Showing posts with label Gift Ideas. Show all posts

Friday, November 30, 2007

How to Frame A Gift for Friends & Family


Gift Ideas - Hybrid Photo Frame
Instructions by Di Hickman, Creative Team Member

One of the quick and easy gifts I like to make for friends and family is photo frames. My friend Nancy took this darling photo of her daughter Bella and I decided to make a photo frame to display it.

To begin I simply scanned in the photo frame (the one I used was about 1/4 thick and scanned easily). I did this so I could get an idea of the size of the frame without measuring, I am so NOT a measuring kind of scrapbooker!
  • Once scanned I created a digital template using the scanned image. This gave me rough dimensions of the frame centre.
  • Next I opened the patterned paper I wanted to use, dragged it onto my document and used a clipping mask [ctrl G] to link the layers together.
  • I also changed the document size to 8.5 x 11" as that would be my final print size later.


Mention this ad and get free May Arts Ribbon with your first order at The Shaker Box!

  • I opened the frame I wanted to use, and
  • again dragged it onto the document, placing it in the frame opening.
  • I repeated this step with the gold paper again using the clipping mask to link the layers together


  • Duplicate the frame and gold paper layers (right click, select duplicate layers).
  • Then open the photo and drag onto the document.
  • Having TWO frame layers is important as in the end product I want the frame to be on the top of the frame and inside the frame on the photo.


The final step is taking the photo and one frame set and moving them to a clear space on the document for printing. I printed my project onto matte photo paper.


  • Once printed trim out the frame and then trimmed the rectangle insert.
  • Repeat with the photo and assemble the frame.
  • I added some traditional elements to give some dimension.


The photo frame I used for this tutorial has a magnet on the back so it can be mounted onto the refrigerator or you could attach ribbon and hang it from the wall.

Supplies: Patterned Paper: April Stalker (signs of fall kit); Frame: April Stalker (frame me - flourishy overlays); ribbon: SEI; Chipboard: Lil Davis; buttons: misc.


It makes our day when you leave us a comment! Visit our sponsors and take a moment to sign up for our weekly newsletter!!!

More Gift Ideas:
Altered Starbucks Bottles

Diva Cards & CD Magnets

Photo Tiles

Customized Shopping List

Altered Clipboard

Tranparency Gift Bag

bk_keywords: 1579906826

Thursday, November 29, 2007

Give a Creative Gift: Custom T-Shirt Instructions

How To Use Digital Brushes to Create

A Custom T-Shirt Gift

By Julie Ann Shahin, Founder

Put your creative skills to good use by designing a unique, one-of-a-kind t-shirt for a loved one this holiday season. Then upload your design to be screen-printed or digitally printed professionally at Uperprints.com

Let me show you the quick and easy steps!

If you want to create your design on a t-shirt graphic for realism, you can download a FREE T-SHIRT GRAPHIC by going to this link at Photoshop Roadmap. You need to click on one more link there "Go to Skull T-Shirt Design". There you will find the free graphic to download as well as another T-shirt Tutorial.

  • Open the graphic in Photoshop Elements.

  • Go to Image -->Resize--> Change width to 30 inches while keeping proportions constant. I chose 30 inches because that is the size of the t-shirt I will be printing on.

  • Next, create a new document that will be the size of your design.
  • In this example, my design will be 10" x 8". Go to File --> New --> Blank Document, then enter the inches.
  • I will have the background as transparent.


  • I want a border to act as my guidelines so I click ctrl-a which "selects all",
  • then I go to Edit-->Stroke (Outline) Selection --> Chose the color and the stroke width 10 px, Location Inside. Click ok.
  • We want to copy this onto the t-shirt so click ctrl-a again to select all, then go to Edit-->Copy Merged.

  • Go to the T-shirt Design.
  • Click ctrl-v to paste,
  • then move the border into position by selecting the move tool,
  • and using the arrows on your keyboard to move it into place.
  • This will be your design guidelines.


  • Now we are ready to upload the brushes we want to use.
  • Select the brush tool. Use the drop down box, and click on the arrow on the right.
  • Click on Load Brushes, then chose a brush from your files.


  • I am using Katie Pertiet's Stamped Block Frames from Designer Digitals.
  • On a New Layer, I position it within my guidelines.
  • At any time you do not want to see your guidelines, you can hide them by clicking on the eye icon.


  • My next step is to add a dingbat font (Oldtime Dings Set number unknown).
  • I then decide I want the area within the frame to be white so I draw a rectangle with the marquee tool.
  • Then go to Edit --> Fill Selection. I fill it with white. Click OK.


  • I also add some splotches with another dingbat font called Loosydings Expert.


  • Here you can see the order of my layers.


  • Now I want to move my design to a new document to print.
  • In a new document that is 10"x 8", I have a transparent background.
  • On my t-shirt document, I hide the t-shirt by clicking on the eye icon.
  • I select one of the layers above the t-shirt graphic. Then I go to Layer -->Merge Visible.


  • I drag the design onto the new 10" x 8" document.
  • Now I am ready to print if I am using inkjet iron-on transfers. Or you can upload the design to a professional site as I mentioned above such as http://www.uberprints.com/


Enjoy your new digital knowledge! If you liked this tutorial, be sure to sign up for our newsletter!


Mention this ad and get free May Arts Ribbon with your first order at The Shaker Box!


Wednesday, November 28, 2007

How To Create Lovely Photo Cards with Word Art


Creating a Gift That Keeps On Giving

for Christmas...


How To
by Maggie Lamarre, Creative Team Member


I drew my inspiration from Sally Keller's gift to her friend seen here.

I was pruning the flowers for Spring when I notice a bunch of Frilitary butterflies in the Garden and I was able to capture these moments..

Let’s begin..
Supplies
  • Set of cards from Michael 4.5" x 5"
  • Cellophane bag
  • Ribbons
  • Trimmer
  • Spray Adhesive
  • Zig pen

Steps
  • I resize the pictures to 3.39x4.5,
  • I created the word art and place each phrase on a layer so I can manipulate them, using the previous posting on the blog on creating word art.
  • Then I formatted the word art to fit on my picture.

Since I wanted to create 25 cards instead of printing at home, I have some tips for you.

  • I open a document 11x17 and
  • drag all the pics the fit 9 to the page and
  • printed at Office Depot for $1.39 a sheet- prices may vary.


Mention this ad and get free May Arts Ribbon with your first order at The Shaker Box!


Finishing Touches
  • I trim the pics leaving 1/8 of an edge
  • I spray then adhere to the card,
  • I use a silver zig pen and trace the edges of the pic to give it a slight frame.

I insert 4 cards to a bag and embellish with ribbon


Voila done
Have fun, create your art!
Maggie


Tuesday, November 27, 2007

How to Create Frameable Art Gifts To Give From the Heart

Do Your Holiday Shopping with Our Sponsors!
How to Create A Festive Art Piece to Frame

for Gift-Giving:

Hybrid Scrapbooking Instructions
by Julie Kelley, Creative Team Member

Looking for a wonderful gift for the holidays? Why not use one of your favorite digital kits to create a framed keepsake holiday decoration?? This is a quick and easy gift for almost anyone on your list.

  • We had a couple packages of frames that we hadn't used.
  • The frames are 8x10, and double matted to fit a 5x7 photo.
  • I loved the dark blue inside mat, and thought it would work well for this project...

Here's how I got started...

  • To create the image, open a new canvas that is 6x8 to give you some overlap to make it easier to place into the frame. File>New>Blank File, then input the size you want.

  • I created a 5x7 area and filled it with black so that I could see where the "inside" of the frame was.
  • There are a couple ways to use this area. You can use the "layer visibility" area in the layers palette, the "eye" next to the layer. Toggle this on to see the black 5x7 area.


and then click on the eye to turn it off.


  • You can also just put that 5x7 layer at the bottom, then when you have the arrow "move tool" selected, if you click on the layer you will see the "outline" of the layer.
  • Either way will work, you just want to be able to see the specific area that will show through the frame.


  • I next placed the papers and elements where I wanted them in the frame.
  • I really liked the "naked" chipboard figures in the kit, and chose the dove for the focal point.
  • I wanted to add a little bit of interest and color the berries. Create a new layer above the chipboard dove CTRL>SHIFT>N. Choose the brush tool and color, add the dots to the new layer, lined up with the dove layer.


Mention this ad and get free May Arts Ribbon with your first order at The Shaker Box!


I wanted the berries to blend a little more with the chipboard, so I changed the opacity of the berry layer until it seemed right to me.


  • To add realism, the next step is to add some drop shadows to the elements.
  • The default shadow size in PSE 4 is 21, far too large.
  • After choosing the drop shadow, click on the format circle and adjust the shadow size in the format box that opens.


Print your final creation.


  • Insert your photo inside the frame,
  • I attach with a little tape on the inside so that it won't slide around.
  • I also used a stamp by Stampin Up that reads "be merry" to add a little more interest to the frame.


Supplies List:
Adobe PhotoShop Elements4
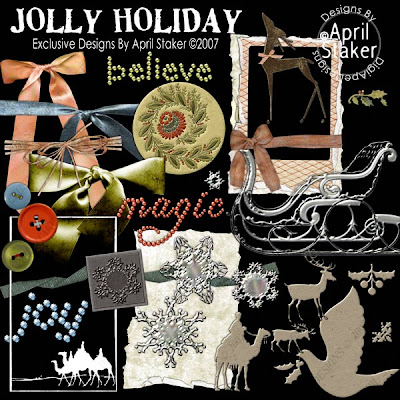
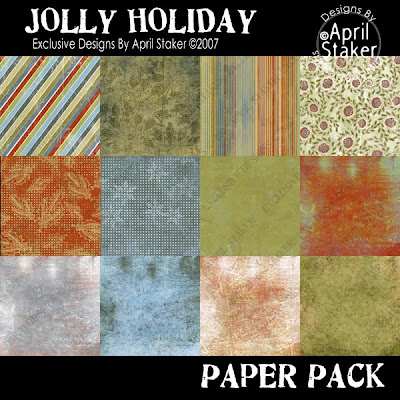
"Jolly Holiday" kit by April Staker
Stampin Up stamp set
Staz-on ink
frame with 5x7 matting


Please look at our sponsors products!


It makes our day to received comments from our readers! Please take a moment to tell us what you think!!!! Enjoy your new knowledge.