Showing posts with label Ideas for Ribbon. Show all posts

Friday, April 20, 2007

Now Create Your Own Striped Ribbon with this Easy Digital Scrapbooking Tutorial

Digital scrapbook element creation tutorial
for Photoshop Elements 5.0
by Julie Ann Shahin, founder and editor
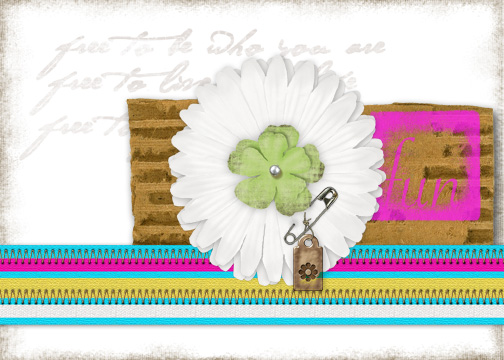
Custom ribbon
Click on image to enlarge

How do you create realistic looking embellishments for scrapbooking?

Digital guru Renee Pearson states in her book "Digital Designs for Scrapbooking" that the good news is that you don't have to decide between paper or digital scrapbooking. "How you use the tools at your disposal is up to you."

So here is a way to create ribbon{digitally} that looks like it has real texture.

Supplies used for the card shown above:
Photoshop Elements 5.0
Fun stamp, safety pin and torn cardboard by Tiff Brady
Inked edge, stitches, and flower by Jan Crowley, Little Black Dress kit
Tiny tag by Misty Cato, Eternal Romance kit
Free to be stamped words and Blossom by Jen Wilson
Ribbon by me, Julie Ann Shahin
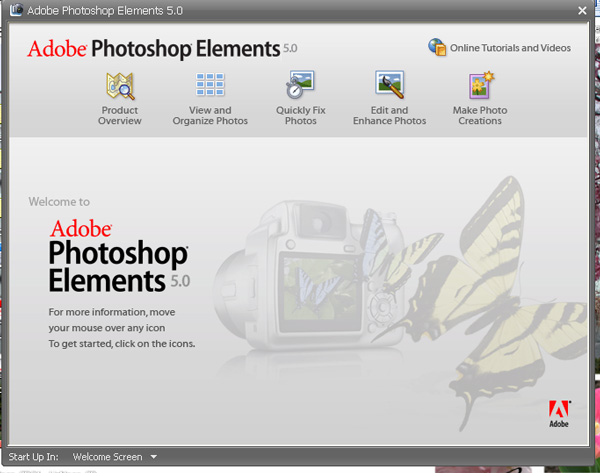


1. Open PSE 5.0 and click on "edit and enhance photos"
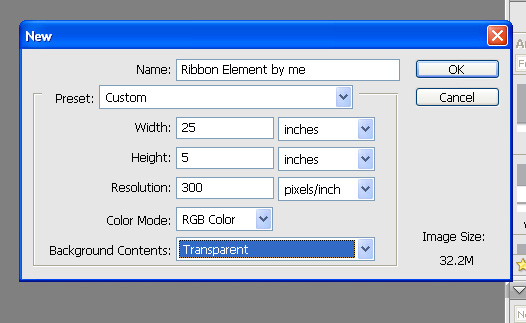

2. Click ctrl-N to create a new document. I wanted to make my document 25 inches by 5 inches because I often like to have my ribbon span over a two-page layout. In the example above, hoewever, I only end up using a seven-inch segment of my ribbon for the 5"x7" card.
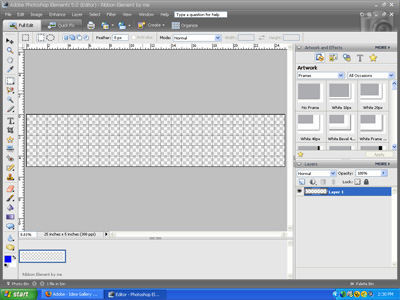
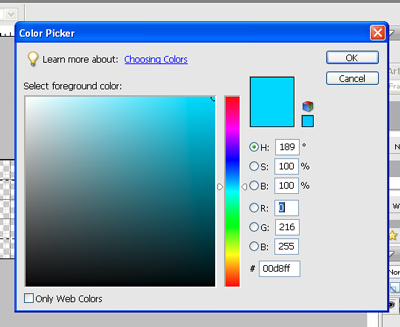


3. Go to View and turn on the Rulers and the Grid. I select the color that I want the background of my ribbon to be by double-clicking on the foreground color in the tool box. I take the rectagular marquee tool and use it to create a rectangle that is 2.5" x 25". This is going to be my ribbon.
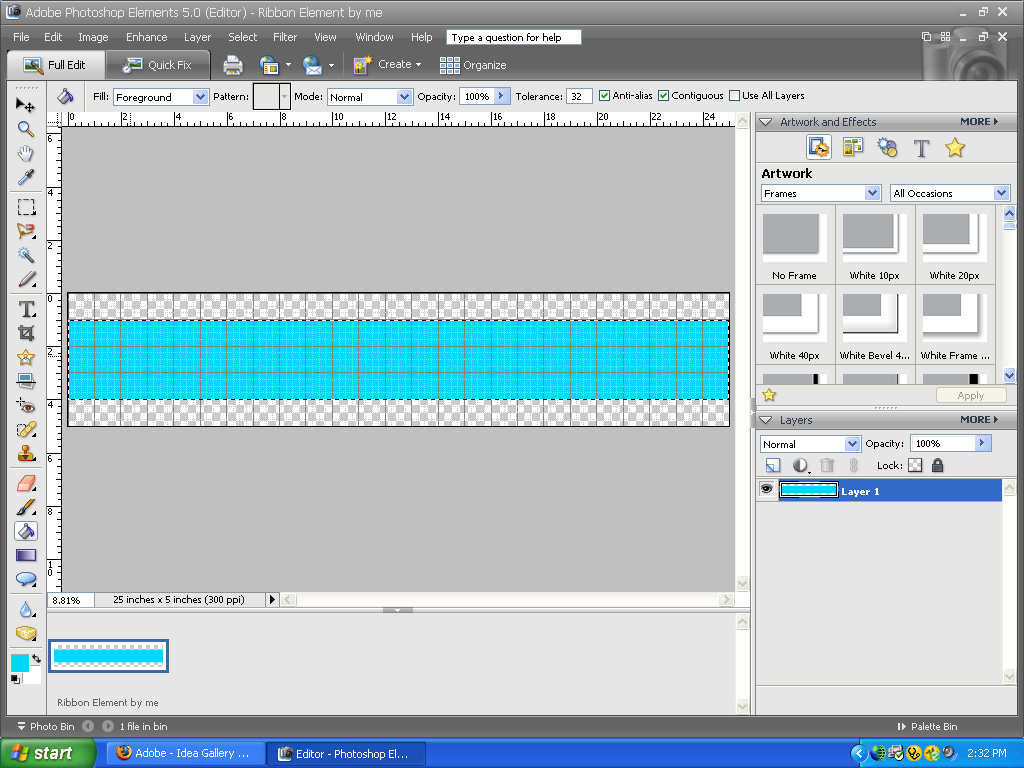

4. I use the paint bucket tool to fill my selection area. Press ctrl-d to deselect the area. Double-click on your foreground color in the toolbox again to choose a second color to be in your ribbon.
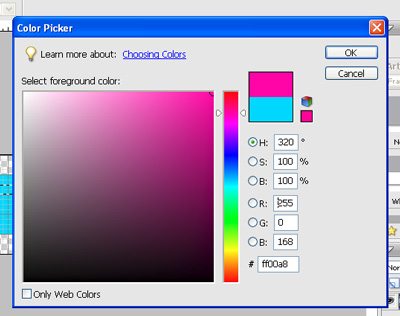


5. I made a 1/4" x 25" rectangle on my blue ribbon to add a stripe. Use the paint bucket tool to fill the selection with pink. Press ctrl-D to de-select.


6. Repeat step five, this time making a slightly taller rectangular box for a second stripe. (I made a .5" stripe below the pink stripe, leaving blue in between).
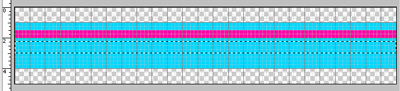


7. Select a color for the second stripe as you did in Steps 3 and 4. I wanted to use yellow for the stripe that will be below the pink stripe. Repeat Step 5 for a white stripe.

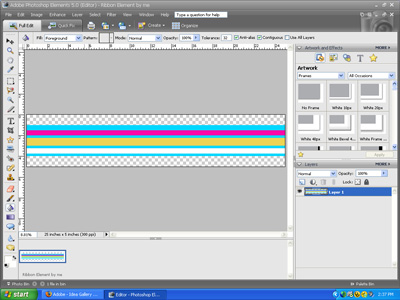


8. I want to turn off the guides now so I go to View and uncheck "Grids". Before I add texture, I make a copy of this layer by clicking ctrl-j

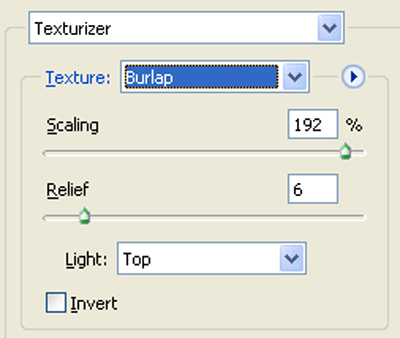
To give your ribbon some realism, make sure the layer copy is selected, go to Filter --> Texture --> Texturizer


9. In the dialog box that comes up, I changed the Scaling slider and Relief slider according to personal preference. Click ok to return to your document.



10. Next, I make a copy of that layer by clicking ctrl-j. I add a different texture to this new layer by going to the Special Effects menu on the right. It is the third symbol under Artwork. Choose Layer Styles, and in the second drop-down menu I chose Patterns. Double click on "Satin Sheets".
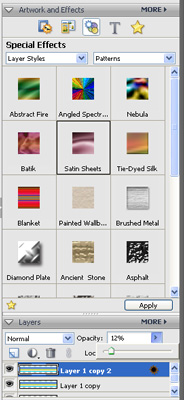


11. Next I change the opacity of this newest layer to about 12% allowing the first texture to show through. You can change the opacity to whatever looks good to you.


12. Your ribbon is ready to be used for your project. Flatten the layers, then drag it right onto your scrapbook page. You can see my finished project above in the first photograph.

Keywords: Adobe Photoshop, Advanced, Creative Team Member, Custom, Photoshop Elements PSE, PS7, Create Your Own Elements


Fill out your e-mail address
to receive our newsletter!


Subscribe Unsubscribe
Hosting by YMLP.com


Subscribe:
Daily Notifications

Enter your Email


Thursday, April 19, 2007

10 Steps to A Creatively Cropped Photo with Ribbon Background

Layout by Angela Spangler for Everyday Digital Scrapbooking

How to creatively crop a photo
by Angela Spangler, Creative Team Member
Angela Spangler

1. Make sure your photo is on top of a transparent layer.
2. Click on your Rounded Rectangle Tool. Set the radius to around .889 in.
Screenshot by Angela Spangler for Everyday Digital Scrapbooking
3. Draw your shape over the photo, making sure the shape is long enough to give you straight edges.
Screenshot by Angela Spangler for Everyday Digital Scrapbooking
4. Go to Layer>Rasterize>Shape
5. Use the Magic Wand Tool to select the shape.
6. Go to Select>Inverse
7. Go to your layers palette. Select the photo layer. Go to Edit>Cut (CTRL + X).
(Tutorial 3)
8. Delete the Shape Layer
9. You now should have your photo in the desired shape.
Screenshot by Angela Spangler for Everyday Digital Scrapbooking

Last step is to add your photo over your background with ribbons! Enjoy! If you enjoyed today's tutorial, please let our designer know~!


Wednesday, April 18, 2007

Scrapping with Digital Ribbons - So Fun!


Ribbon Folding 101
Digital Scrapbooking Tutorial by Beth Price,
Creative Team Member

Beth Price

Many times in a digital kit you’ll receive a strip of ribbon that coordinates with the papers. You can quickly turn them into folded ribbons or cut ribbons using the following quick ideas

To fold a ribbon

1. edit and copy a small section of the ribbon from the strip you’re given in the kit.
2. duplicate it so that you have 2 copies. Rotate the top layer and match the end.


3. Add a staple and you’re almost done. But we need some depth and texture to make it look real.
4. I like to color in the folded area with the pencil tool, in a shade just darker than the color of the ribbon.


5. Then you can smudge and decrease the opacity to get a shaded look.


6. And you have a folded ribbon!


To trim the ends of a ribbon

1. Select the Polygonal Lasso Tool
2. Be sure you are on the ribbon layer, and from a corner of the ribbon, either draw a straight line or triangle to imitate a diagonal cut. Delete. Repeat on the second layer.


3. Add drop shadows and you are done!


If you enjoyed today's tutorial, you'll love our newsletter. Please give us feedback by leaving a comment!


Tuesday, April 17, 2007

12-Minute Hybrid Card Instructions


Add Ribbon to Hybrid Cards
Plus Masking Tips from Maggie Lamarre, Creative Team Member


Ribbons are such an excellent accent piece. They are the perfect little earring. They can add sparkles, a touch of whimsy.

This ribbon adds a little bit of sparkle to this card, I use it as a runner. It is ok to have a little bit running off your lay out.

Supply use
Ribbon Offray, cardstock from the paper company 8.5x11
Brads Joann etc.
Silk Flower
Pop dot glue

I found this tut for the masking off the someone blog a while back, I added a digital spin to it. Let’s begin.

  1. Supplies needed:Heat gun, ink pads of your choice, cardstock of your choice. Stamps, Masking tape.
  2. Select the width oof the first layer and cut the cardstock.
  3. Mask the card with the tape until it‘s completely covered.
  4. Then ink with your first colour then use a heat gun slowly not to melt the tape.
  5. Apply a second coat and heat again.
  6. Now apply your decorative stamps and heat again,
  7. Apply another stamp if desired.
  8. Then heat again
  9. At this point tape the card to a cardstock,
  10. open your graphic software or windows
  11. Type your sentiment in my case it was “Thank you”


12.Add flowers and add brad to secure, then add the ribbon to the left side of the card
leaving ½ an inch hanging on the bottom and adhere.
13. Cut another complimentary cardstock and use a decorative edge scissors 1.5 into the top
part and cut away.
14. Mount both layers to the cardstock.

Voila you are done the whole process took 12 minutes to accomplish.
We would love to see any cards you have made using this process or any comment.
Gave fun, create your Art.
Maggie


Monday, April 16, 2007

Discover the Joy of Printing Digital Ribbons with Pabric


Hybrid Scrapbooking Tutorial by

Julie Kelley, Creative Team Member

Printing Digital Ribbons to Scrap


I love the look and visual feel of digital ribbons on my screen, but have often wondered how they would translate to print. For this card, I printed some digital elements (including ribbon) on Pabric, which is inkjet printable fabric. The Pabric can be fed through the printer just like regular paper (and uses the "plain paper" setting on your printer).

  1. I wanted to create a card for a friend, and didn't want it to be "flat." I created all the elements of the card digitally, placed them all on a single page to be printed.
  2. Then I printed the background on photo paper.
  3. The elements are printed on the Pabric so that they would stand out a little bit and have some texture to them. I love adding the texture to my projects. Although the Pabric is not thick, it adds just the right amount of texture for a card.


credits:
Digital papers and elements by Julie Kelley
Actions by Atomic Cupcake
Pabric printable fabric
Font: Windsong

www.pabric.com