Showing posts with label Two-Page Layout Ideas. Show all posts

Friday, February 16, 2007

Create A Compelling Layout with Journaling and No Photographs

Photobucket - Video and Image Hosting


Digital Scrapbooking Tutorial
by Cammy Plummer, Creative Team Member
Focus on Journaling

Click on image to enlarge please.


The journaling for this layout was taken from my blog. This was a big event in our lives and there were no photos.

INSTRUCTIONS
1.To create the diagonal stripes for a background. Use the shape tool and then skew to the desired angle. Group patterned paper over the stripes.
2.Add stitching.
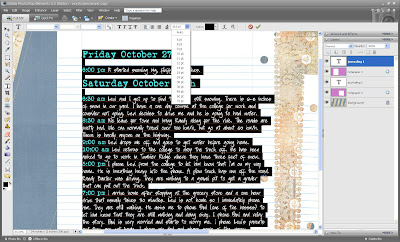
3.Add notepaper. Duplicate layer and reverse one to give the appearance of two pages from a notebook. Write journaling. I like to use a font that mimics handwriting. Adjust the kerning (space between lines) to match the lines on the notepaper. Change fonts and font colours to highlight sub-titles within your journaling.
4.Add snowflakes. Move some below and above the notebook paper layer.
5.Write your title and justify right so it lines up on the right border of your page. Change colour as necessary. Apply the sponged canvas filter from Atomic Cupcake to your title.
6.Place staples at the corners of your page.
7.Apply drop shadows to your page elements.


CREDITS
Paper: Jen Wilson, Nostalgia No. 3 & Fading Days, Jen Wilson Designs; Gina Cabrera, Book Bag Essentials, Digital Design Essentials
Snowflakes: Karen Hunt, Paper Flakes, Scrapbook-Bytes
Staples: Fee Jardine, Chocolate Cupcake, The Digi Chick
Stitches: Jackie Eckles, Big Quirky Stitches, No. 1, Designer Digitals
Paper Tear: Stephanie Krush, 2005-straights, Digital Paper Tears
Actions: Traci Murphy, Drop Shadows, Traci Murphy Designs; BriAnna Shultz, Sponged Canvas, Atomic Cupcake
Fonts: Soli; Love Letter TW; Jailbird Jenna

If you are inspired by today's tutorial, please take a second to let your designer know! Thanks.


Thursday, October 05, 2006

Learn to make custom brushes

Tutorial by Angela Spangler, Creative Team Member

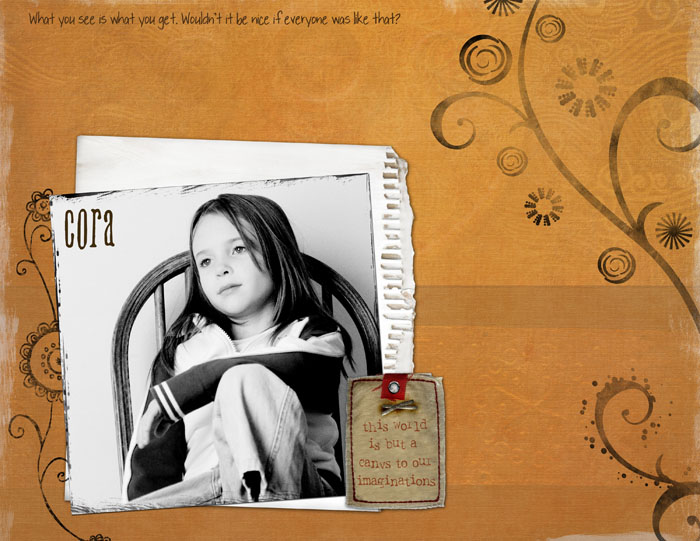
For this layout I made brushes out of elements that weren't brushes before. To do this, open the element you want to turn into a brush.


Select>All. Then go to Edit>Define Brush Preset. Then name the brush and save. You might want to desaturate the element before making a brush if you want a more uniform color to your brush. Play around with it and determine your preferences. (Directions are for Photoshop CS).

Dig around your photo editing program or look online for tutorials on how to make brushes (or similar) for your editing program. I also went outside the box and made a two page layout with landscape pages.


More resources:
Creating, saving and organizing brushes written by Rhonna Farrer for 2peas

Creating brushes from doodles written by Traci Turchin for 2peas

Creating and using custom brushes in Photoshop Elements

Easy Elements Photoshop Tutorial for making brushes

Beginner brushes tutorial in PS CS by digital scrapbook place

Installing brushes (for ready-made brushes) by dsp

Saving png files as brushes in Paint Shop Pro by dsp

Creating Easy Patterns with Brushes in PSE written by Erica Hernandez for 2peas


If you know of any other tutorials for making brushes, please let us know! Thanks Angela for your gorgeous work!

Keywords: Adobe Photoshop, Advanced, Beginner, Brush - Brushes, Creative Team Member, CS2, Custom, Digital Image Pro DIP, Paint Shop Pro PSP, Photoshop Elements PSE, PS7, Resources

Tuesday, October 03, 2006

Two Page layout Tutorial by Andie Smith, Creative Team Member

Thank you all for the tremendous feedback and praise for our debut! Please keep your comments and suggestions coming as we are doing this for YOU!

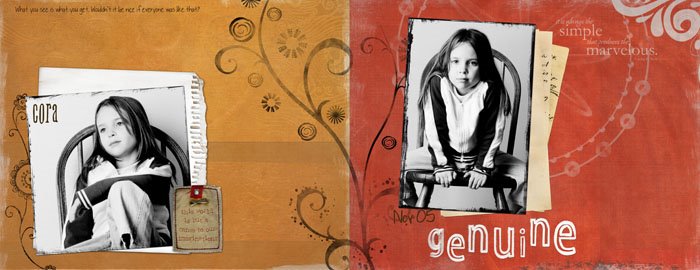
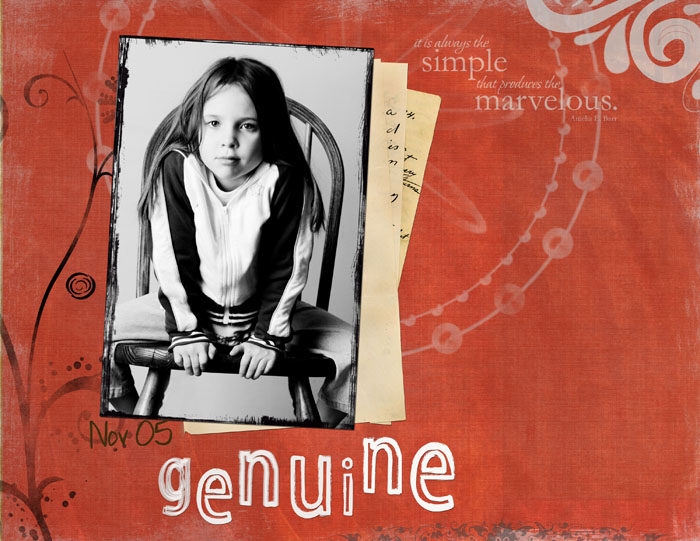
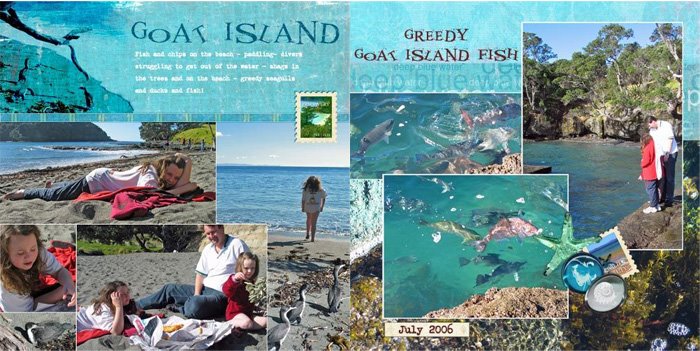
I have two layouts to share with you today - both are two-page creations. First is a gorgeous layout by Andie Smith. I noticed immediately about Andie's layout that the vivid colors captured my attention and drew me in. I love that the focus photo overlaps both pages of the layout. With Lynn Singers layout, I was smitten with how many photos she was able to fit into her layout and the way the photos overlap and are arranged makes me wish that I had been on this trip with her to witness such a beautiful place as Goat Island. Enjoy!


Two page layout by Andie Smith, Creative Team Member

Click on image to enlarge

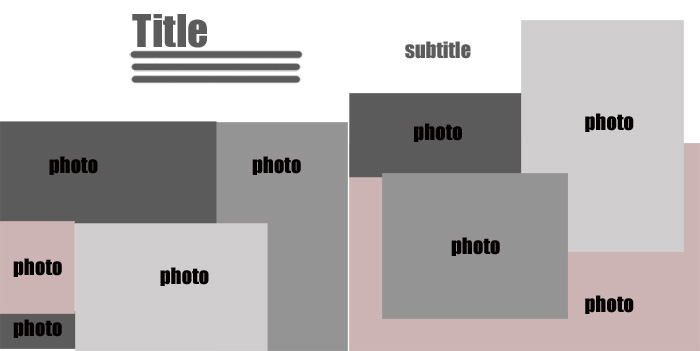
Andie's Tips for creating this digital layout (see sketch below):
1. Create a canvas the size of two pages (i.e 24x12 inches) and crop before printing.

2. Don’t be afraid to type over your photos and other text.

3. Go big! Use large pictures that spans both pages.


Featured Reader: Lynn Singers
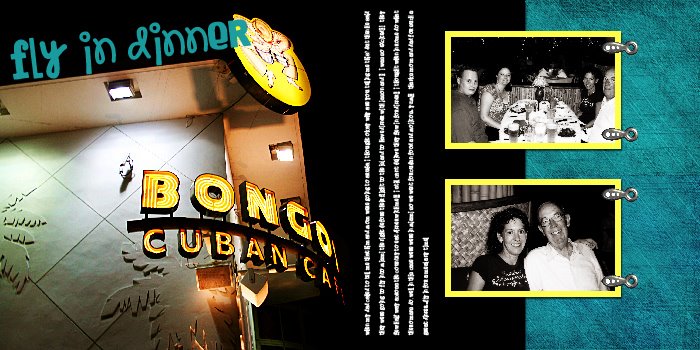
A Marine Reserve just outside the city. (This was the middle of winter in New Zealand believe it or not!) Everything from "Blue Water" kit by Lynn Grieveson from Designer Digitals. Fonts are Akoom and Vintage Typewriter. (Layout posted with permission from the designer.)


Click on images to enlarge.


If you have questions or comments for either Andie or Lynn, please leave a comment below or send an email to thedigitalproject@gmail.com

Keywords: Sketches, Featured Reader

Sunday, October 01, 2006

Welcome to our Debut & Enjoy a Freebie!

(Please bare with us on the blog design for now. We will be changing the blog template very soon in order to have a design that best shows off our tutorials.)


Do you want to have a tool for scrapbooking with infinite possibilities? A tool that is always at your fingertips? A tool that you most likely already use several times a day?


I'm talking about your computer, friends. The hope for this blog is that you will come to be a master of your computer skills that can be applied to your scrapbooking and paper crafts.

We will be bringing you tutorials, sketches for layouts, fresh ideas, cutting edge techniques, interviews within the industry, and features of everyday scrappers just like you. Check out the sidebar for links to more sketches, and all kinds of tutorials for all levels of scrappers.

To celebrate our debut, today's issue of the blog will feature two-page layouts (our focus for this coming week) as well as a freebie digital downloads from our own Angela Spangler, and Betsy Veldman.

I hope you will enjoy this blog as much as we all love scrapbooking and everything digital!

Two-page layouts
Every weekday this week we will bring to you a fresh idea for two-page layouts. We will offer short tutorials and/or sketches along with the examples. The layout title "Free" above, two page 12x12, designed by Julie Ann Shahin, was created for Becky Fleck's Page Maps October Newsletter. Go to www.pagemaps.com to download the sketch and the new pdf newsletter. Thank you to Becky, you all should know she is just the sweetest person. Questions or comments about that layout? Post in the comment section below or email thedigitalproject@gmail.com and Julie Ann will respond.


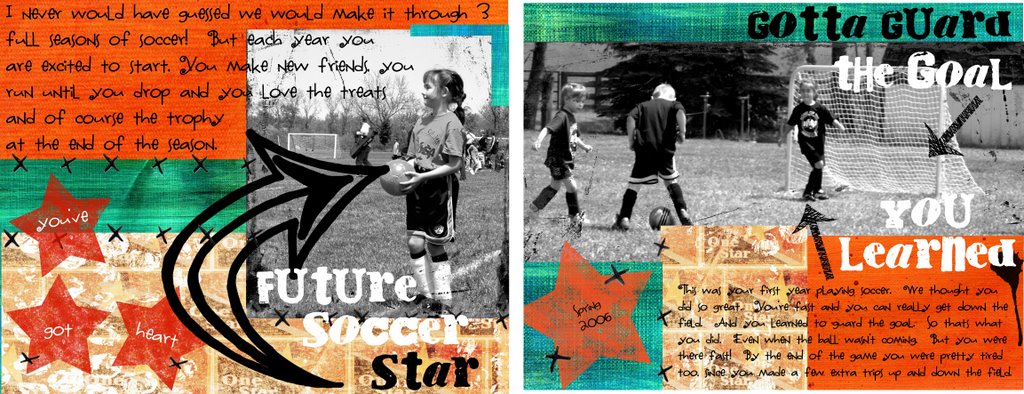
Layout: Future Rock Star by Beth Price, Creative Team Member

Click on image to enlarge.

Beth's Tutorial: Here’s a double page with simply altered photos. I also did a sketch for page one.

Supplies: I used the Rock Star Free Pea kit from 2Peas. Also Arrow Fun by Shawna Clingerman. Title font is Cry Kitty. Journaling font is Fontmoocher.

Instructions: Pages created in MS Digital Image Pro. Photo was converted to B/W by first dramatically increasing the contrast setting on the color photos and cropping to desired size.

Next, I selected the Black and White conversion under Effects.

Then I applied an Overlay available in the Rock Star kit to the photos to give them the grunge look. Just drag and drop the overlay onto the picture and then resize by dragging the edges to fit the picture.

Other tips: To change the color of brushes or embellishments such as the stars with DIP:
select the element and under Effects select “Fill with Color”. You can match a color by going to “More Color Choices” and using the dropper to select a color on the screen.

If the color isn’t a great match, as was the case while I was working with these stars, I closed the “Fill” effect then.

Selected “Hue and Saturation” under the Touchup menu. It allowed me to move the hue on the stars to a darker red I preferred.

Questions or comments about this layout? Please post a comment below or email thedigitalproject@gmail.com and it will be forwarded to Beth.

Freebie: Free Digital Scrapbooking Downloads to celebrate our Debut!
My jaw dropped when I saw this beautiful kit Angela made just for the readers of the Everyday Digital Scrapboking Idea Blog. Thank you Angela! Be sure to check out her blog.
Download Angela's Blue Kit

Enjoy Betsy Veldman's Doodled Overlay. Really fun to layer over striped digital paper for a fun, instant doodled look or print it on striped paper to use on paper LO's.

Download Link

Step-by-step Instructions
with Screen shots on how to download digital kits

Digital Scrapbooking FAQ's

Thank you for being part of our debut. Please pass the word to your friends about us.
Happy Scrapping from Julie Ann, Andie, Angela, Beth, Betsy, Cammy, Martha, and Sherry!