Showing posts with label Christmas. Show all posts

Friday, December 07, 2007

Hybrid Ornament Carnival


Mention this ad and get free May Arts Ribbon with your first order at The Shaker Box!

Ornament Carnival
Check It Out!

Glass Bulb Ornaments by chic mama
They are super fun to make and would be very easy to do with Digital products.
  • You just print out the papers, cut into strips and roll them up. (I also added a little K&Co repositionable liquid adhesive to the strips before I rolled them up.
  • Once all the paper strips were inside the ornament I added glitter, beads and sequins.
  • The adhesive made everything stick to the paper.)
Christmas Card & Ornament by nmartin1
This is my first hybrid project! I used Andrea Burns' Cube Card template and her Winter's Grace Kit

Ribbon Spool Ornaments by Brynn Marie
Supplies:
Christmas Cheer and Paper Flakes by Bren Boone
Traci Murphy Drop Shadows
Paper Mod Podge
Glitter Mod Podge
Ribbon
Empty Ribbon Spools

Holiday Banner Ornament by ScrappinJana
This is an ornament I made for a swap I participated in using primarily Foofala papers. TFL!

Winter Wonderland Ornament by LindsD620
Created using a wooden thingy from a bag of sewing "stuff" from a flea market, lace, buttons, ribbon, and a silver tree cupcake topper. You can read more about it on my blog @ http://www.lindsd620.blogspot.com. TFL! :)

Pocket Kitty Christmas Ornament by josafeen
i'm in the mood to make some ornaments! This one is fun because you can tuck little treats into the envelope folded piece. tfl girls!
prima and IOD products wiht some stickles and perfect pearls


Thursday, December 06, 2007

Holiday Ornament Feature


An easy, printable craft for you to make at home! The Christmas Ornaments come in three shapes - a circle, a tear drop, and a star. Simply open the template, add your own digital paper/photos/embellishments, print out on to white cardstock, and cut according to the directions. In addition to the layered Photoshop Files (PSDs), three PNGs are also included so you can print the pattern onto existing paper (it's a great way to use up those paste eating supplies). File Size: 3.0 MB

Wednesday, December 05, 2007

Free Victorian Dove Ornament Class Tonight Online


Free Holiday Craft Classes!

at Scrapgirls.com

Do you need a quick gift for a teacher or friend? How about a quick holiday decoration for that perfect finishing touch? Want to have fun chatting with your Scrap Girls friends at the same time? Then join us in the chat room for these free craft classes!

Keep checking back for new classes, photos, updates and information on our forum here.

Victorian Dove Ornament - December 5th, 9 PM ET

Class will be held here

Join Denise Doupnik for this free online class which will walk students through the assembly of their Victorian Dove Ornament with additional tips and tricks.

  • Class will take place in the Scrap Girls Live Chat room, in the Free Craft Class room.
  • Materials needed for the class; Victorian Dove Ornament, a favorite Holiday kit, computer paper, scissors, glue, tape, hole punch, ribbon for hanging.
  • Optional materials: bone folder, round corner punch, eyes, feathers, decorative scissors.
  • Please note: the Victorian Dove Ornament needs to be purchased separately.


While all software users are welcome to attend the class, the instructor specializes in PS & PSE.


Ornaments by Valerie Randall


Tuesday, December 04, 2007

How to Create a Darling Hybrid Chipboard Ornament Easily!


Hybrid Ornaments
with Di Hickman, Creative Team Member

I started out with a bunch of old chipboard pieces in various sizes, for this tutorial I chose the oval.
  • I scanned the chipboard piece using my scanner @ 300dpi.
  • Then using the elliptical marquee tool I created an ellipse a little larger than the chipboard piece
  • and used a solid color to fill, this will be used as template later for a clipping mask.


Create a copy of the elipse fill by right clicking the layer, selecting duplicate layer and then clicking ok in the pop up box. Once you have the 2 ellipses merge the layers by pressing Ctrl E


  • Open the paper you wish to use and drag onto the open document (resize if you wish).
  • Then create a clipping mask by pressing Ctrl Alt G (in photoshop CS3). This links the layers together.


  • Repeat the above steps with a smaller ellipse 1/4" inside the edge of the chipboard shape.
  • Again open paper of choice, and create a clipping mask.
  • For interest I added a stroke around the edge by right clicking the layer: blending options>stroke and setting a stroke in creme color at 7pixels


  • Next add the year using the text tool, in the font and color of your choice, I chose a creme to compliment the stroke in the above step.
  • Hide the chipboard scan layer and print onto white cardstock


  • Once printed adhere to chipboard piece,
  • trim and sand edges.
  • Add buttons, stickers and penwork.
  • Punch a hole in the top and thread ribbon through to hang from tree.


Supplies:
digital papers: sponsor Melothria "and then it was winter" kit
photoshop CS3
font: Sexsmith
Chibboard: Provocraft
Alpha stickers: American crafts
ribbon: Offray
misc buttons from craft store
pen: white signo uniball

Mention this ad and get free May Arts Ribbon with your first order at The Shaker Box!


If you have any questions or comments, please send them to thedigitalproject gmail.com

Monday, December 03, 2007

Watch for a Coupon for This Printable Ornament In the Newsletter on December 8th

Printable Ornament Tutorial
by Sarah B. Meyer, Creative Team Member

Digital Supplies

* Sarah Meyer's Printable Ornament Templates (look for the coupon on Sunday)
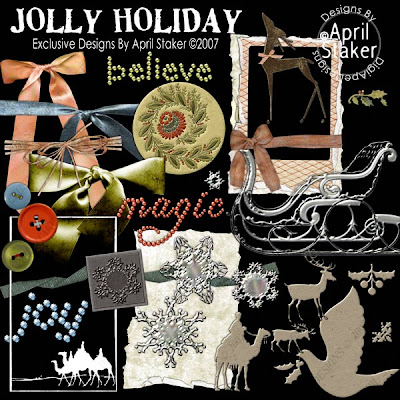
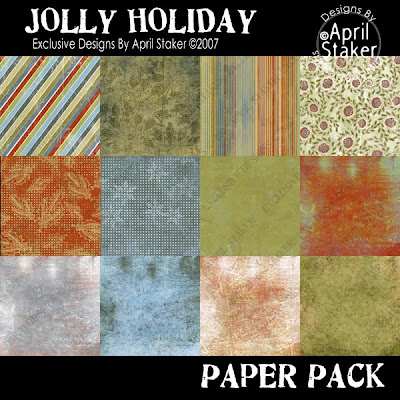
* Digital Paper and Elements of your choice, Sponsor April Staker's Jolly Holiday used here

Hybrid Supplies
* Cardstock
* Color printer
* Scissors
* Adhesive
* Tape
* Twine or ribbon

Instructions and screenshots are for Photoshop CS3. Similar steps are followed for any Photoshop software. For other programs, use the png template and the jpeg preview for reference.

1. Open the psd template file and your designed paper.


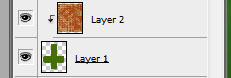
2. Drag the paper on to the template file. Place the paper just above the template layer. Press Alt+Ctrl+G to clip the paper onto the template.


3. If desired, adjust the fill or blending mode for the edges and fold lines layers.

4. Digitally embellish as desired. Ensure that embellishments stay within the filled area of the template.


5. Save and print on heavy paper or cardstock.

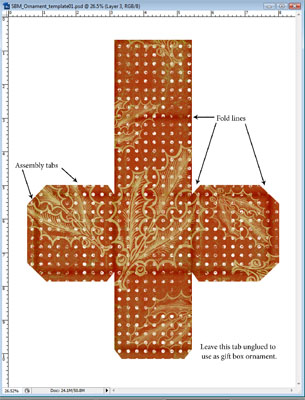
6. First, crease on fold lines. Then cut ornament out exactly on the edges.


7. Prepare your ornament hanger.
  • Cut and tie a loop of twine or ribbon to the desired length.
  • Tape the knot to the INSIDE of the ornament--not on the printed side.
  • The loop can be placed to hang at one corner or with an edge at opposite corners.


8. Place adhesive on skinny tabs and assemble your ornament. If desired, leave one side unglued to use as a gift box.


Mention this ad and get free May Arts Ribbon with your first order at The Shaker Box!


bk_keywords: B000V9NU20

Tuesday, November 27, 2007

How to Create Frameable Art Gifts To Give From the Heart

Do Your Holiday Shopping with Our Sponsors!
How to Create A Festive Art Piece to Frame

for Gift-Giving:

Hybrid Scrapbooking Instructions
by Julie Kelley, Creative Team Member

Looking for a wonderful gift for the holidays? Why not use one of your favorite digital kits to create a framed keepsake holiday decoration?? This is a quick and easy gift for almost anyone on your list.

  • We had a couple packages of frames that we hadn't used.
  • The frames are 8x10, and double matted to fit a 5x7 photo.
  • I loved the dark blue inside mat, and thought it would work well for this project...

Here's how I got started...

  • To create the image, open a new canvas that is 6x8 to give you some overlap to make it easier to place into the frame. File>New>Blank File, then input the size you want.

  • I created a 5x7 area and filled it with black so that I could see where the "inside" of the frame was.
  • There are a couple ways to use this area. You can use the "layer visibility" area in the layers palette, the "eye" next to the layer. Toggle this on to see the black 5x7 area.


and then click on the eye to turn it off.


  • You can also just put that 5x7 layer at the bottom, then when you have the arrow "move tool" selected, if you click on the layer you will see the "outline" of the layer.
  • Either way will work, you just want to be able to see the specific area that will show through the frame.


  • I next placed the papers and elements where I wanted them in the frame.
  • I really liked the "naked" chipboard figures in the kit, and chose the dove for the focal point.
  • I wanted to add a little bit of interest and color the berries. Create a new layer above the chipboard dove CTRL>SHIFT>N. Choose the brush tool and color, add the dots to the new layer, lined up with the dove layer.


Mention this ad and get free May Arts Ribbon with your first order at The Shaker Box!


I wanted the berries to blend a little more with the chipboard, so I changed the opacity of the berry layer until it seemed right to me.


  • To add realism, the next step is to add some drop shadows to the elements.
  • The default shadow size in PSE 4 is 21, far too large.
  • After choosing the drop shadow, click on the format circle and adjust the shadow size in the format box that opens.


Print your final creation.


  • Insert your photo inside the frame,
  • I attach with a little tape on the inside so that it won't slide around.
  • I also used a stamp by Stampin Up that reads "be merry" to add a little more interest to the frame.


Supplies List:
Adobe PhotoShop Elements4
"Jolly Holiday" kit by April Staker
Stampin Up stamp set
Staz-on ink
frame with 5x7 matting


Please look at our sponsors products!


It makes our day to received comments from our readers! Please take a moment to tell us what you think!!!! Enjoy your new knowledge.

Friday, November 16, 2007

How to Create a Dry-Erase Board with Transparencies & Digital Art

Hybrid Scrapbooking Instructions
by Maggie Lamarre, Creative Team Member


Transparencies are the hottest things right now. I love this medium because it is so versatile.

I created this notepad for my mom she is forever saying she can’t find a pad when she needs to jot info down. The transparency will be use like a dry erase board.

Supplies
Fleur de Lis from the shakerbox.com kit club
Ribbons Offray and bowtique
Glitter alpha meandmybigideas
Stickers I created
Stazon stamp pad
Tranparencey
Glue
Magnet
Chipboard

Mention this ad and get free May Arts Ribbon with your first order at The Shaker Box!

Let’s begin

  • Cut the transparency 7"x 9"
  • Cut cardstock and chipboard 9"x 11"
  • Cut paper 9"x 9"
  • Cut another piece of cardstock 9"x 2"
  • Adhere the cardstock to the chipboard, then the transparency to the paper, edge with Stazon Ink and let dry.
  • Add the cardstock 9"x 2" to the bottom, then cut 2 pieces of ribbon 24 inches and wrap around the notepad to cover the seams.
  • Print Notes from a thick font adhere the sticker cut and leave 1/8 of an inch around and ink with stazon.
  • I use a dry erase board from the $ store and take the pen and cut a strip of 2 inches by 15 and roll it around the pen, use liquid glue to seal the edges.
  • Then I added Velcro to the pen and the notepad.
Voila you are done, a great way to use to transparency
Have fun, Create your ART
Maggie


Wednesday, November 14, 2007

Taking Transparencies Out of the Box and Into the {Gift} Bag!


Fun With Transparencies: A Transparency Gift Bag
Tutorial by Cindy Gilchrist, Miss November


Transparencies are a hot scrapbooking item and the best thing about transparencies + digi is that you can MAKE YOUR OWN!
  • You can find blank, printable transparencies for either ink jet or laser printers.
  • I’ve made several projects with transparencies and one of the things I’ve discovered is that they fold really well.
  • You need to use a bone folder, ruler or other straight-edged object to go over the folds to really crease them and they’ll become permanent - for this reason, making a box or bag out of a transparency is great project.

Since I knew I would be making this bag out of a transparency, I wanted to use a digi paper that had a design with a white background. I wanted to the design to show on the transparency but also wanted a good bit of the clear transparency to show - since white doesn’t print on a printer, the white areas will be clear on the transparency.

After selecting the paper I wanted, I printed a full 8.5x11 sheet of digi pattern paper onto my transparency (many printers have a “transparency” setting which will give you the best results when printing).

I used a simple template to make the transparency into a bag:


I printed the template onto a regular sheet of paper and then laid the template over my transparency to make the cuts and folds. With this template, cut out the small, solid triangle shapes on the sides.

The lines are the template are the fold lines. Fold the transparency on these lines and remember to use a bone folder, ruler or other straight edged-item to crease the fold lines.


Mention this ad and get free May Arts Ribbon with your first order at The Shaker Box!

After the cuts and folds are made, your bag will start taking shape;


For the sides of the bag, I overlapped the sides slightly at the top and used a mini-stapler to hold them together as shown (you could also use brads, eyelets, or glue dots).


Now you have a bag like this:


Embellish your bag as desired.
  • I printed out some coordinating papers and made a scalloped border to go around the top.
  • I also added printed a sentiment which I adhered to chipboard and added to the bottom of the bag.
  • You could also add a paper handle to the bag if you‘d like (attaching at the sides where the bag is stapled).


There you have it, a fun transparency project that is perfect for holding holiday treats!

Do you have any projects with transparencies? If so, link us up, we’d LOVE to see them!
Have you been inspired by our blog? Share with us what you create at our NEW Flickr group:
http://www.flickr.com/groups/everydaydigitalscrapbooking/

Please check out what is new at our sponsor!