Showing posts with label Teacher Gift Ideas. Show all posts

Thursday, November 29, 2007

Give a Creative Gift: Custom T-Shirt Instructions

How To Use Digital Brushes to Create

A Custom T-Shirt Gift

By Julie Ann Shahin, Founder

Put your creative skills to good use by designing a unique, one-of-a-kind t-shirt for a loved one this holiday season. Then upload your design to be screen-printed or digitally printed professionally at Uperprints.com
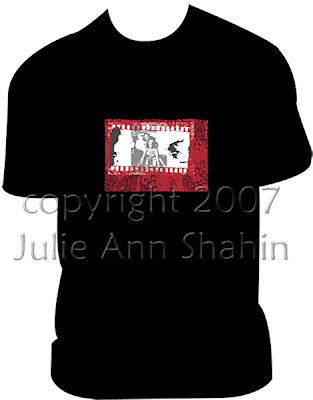
Let me show you the quick and easy steps!

If you want to create your design on a t-shirt graphic for realism, you can download a FREE T-SHIRT GRAPHIC by going to this link at Photoshop Roadmap. You need to click on one more link there "Go to Skull T-Shirt Design". There you will find the free graphic to download as well as another T-shirt Tutorial.

  • Open the graphic in Photoshop Elements.

  • Go to Image -->Resize--> Change width to 30 inches while keeping proportions constant. I chose 30 inches because that is the size of the t-shirt I will be printing on.

  • Next, create a new document that will be the size of your design.
  • In this example, my design will be 10" x 8". Go to File --> New --> Blank Document, then enter the inches.
  • I will have the background as transparent.


  • I want a border to act as my guidelines so I click ctrl-a which "selects all",
  • then I go to Edit-->Stroke (Outline) Selection --> Chose the color and the stroke width 10 px, Location Inside. Click ok.
  • We want to copy this onto the t-shirt so click ctrl-a again to select all, then go to Edit-->Copy Merged.

  • Go to the T-shirt Design.
  • Click ctrl-v to paste,
  • then move the border into position by selecting the move tool,
  • and using the arrows on your keyboard to move it into place.
  • This will be your design guidelines.


  • Now we are ready to upload the brushes we want to use.
  • Select the brush tool. Use the drop down box, and click on the arrow on the right.
  • Click on Load Brushes, then chose a brush from your files.


  • I am using Katie Pertiet's Stamped Block Frames from Designer Digitals.
  • On a New Layer, I position it within my guidelines.
  • At any time you do not want to see your guidelines, you can hide them by clicking on the eye icon.


  • My next step is to add a dingbat font (Oldtime Dings Set number unknown).
  • I then decide I want the area within the frame to be white so I draw a rectangle with the marquee tool.
  • Then go to Edit --> Fill Selection. I fill it with white. Click OK.


  • I also add some splotches with another dingbat font called Loosydings Expert.


  • Here you can see the order of my layers.


  • Now I want to move my design to a new document to print.
  • In a new document that is 10"x 8", I have a transparent background.
  • On my t-shirt document, I hide the t-shirt by clicking on the eye icon.
  • I select one of the layers above the t-shirt graphic. Then I go to Layer -->Merge Visible.


  • I drag the design onto the new 10" x 8" document.
  • Now I am ready to print if I am using inkjet iron-on transfers. Or you can upload the design to a professional site as I mentioned above such as http://www.uberprints.com/


Enjoy your new digital knowledge! If you liked this tutorial, be sure to sign up for our newsletter!


Mention this ad and get free May Arts Ribbon with your first order at The Shaker Box!


Friday, November 16, 2007

How to Create a Dry-Erase Board with Transparencies & Digital Art

Hybrid Scrapbooking Instructions
by Maggie Lamarre, Creative Team Member


Transparencies are the hottest things right now. I love this medium because it is so versatile.

I created this notepad for my mom she is forever saying she can’t find a pad when she needs to jot info down. The transparency will be use like a dry erase board.

Supplies
Fleur de Lis from the shakerbox.com kit club
Ribbons Offray and bowtique
Glitter alpha meandmybigideas
Stickers I created
Stazon stamp pad
Tranparencey
Glue
Magnet
Chipboard

Mention this ad and get free May Arts Ribbon with your first order at The Shaker Box!

Let’s begin

  • Cut the transparency 7"x 9"
  • Cut cardstock and chipboard 9"x 11"
  • Cut paper 9"x 9"
  • Cut another piece of cardstock 9"x 2"
  • Adhere the cardstock to the chipboard, then the transparency to the paper, edge with Stazon Ink and let dry.
  • Add the cardstock 9"x 2" to the bottom, then cut 2 pieces of ribbon 24 inches and wrap around the notepad to cover the seams.
  • Print Notes from a thick font adhere the sticker cut and leave 1/8 of an inch around and ink with stazon.
  • I use a dry erase board from the $ store and take the pen and cut a strip of 2 inches by 15 and roll it around the pen, use liquid glue to seal the edges.
  • Then I added Velcro to the pen and the notepad.
Voila you are done, a great way to use to transparency
Have fun, Create your ART
Maggie


Friday, May 11, 2007

Easy Teacher Gift Tutorial plus a Freebie Alpha for You!

Create an Easy, Personalized End-of-the-year Gift for your

Child's Teacher: Unique Gift Card

by Julie Kelley, Creative Team Member

For my children's teachers, I usually get them a small gift card for either a local store that I know that they like, or for the local coffee shop. I wanted to find a way to personalize the gift, and here is the little booklet that I created.

For this project I used papers and the ribbon from Carrie Stephens' kit that was a free gift for subscribing to Scrapdook Dimensions Magazine, and atomic cupcake chipboard actions for the letters.

I decided to use cascading flip up pages to spell the word "Teach," and when you lifted it up there would be a little message underneath, and on the bottom I would attach the gift card. Each letter is 2 inches shorter than the one that came before, making the entire project 10 inches wide. I created a new file for each one in decreasing lengths. Because I wanted the front to be uniform, I had each be the same color, then the message could be on a different patterned paper. I wanted a little bit of depth on the front, so I printed the letters, ribbon and heart separately so that I could attach them once the project was complete. Here's the process (I tried to fit a few things on a page where I could because I was using a heavyweight matte paper):

In this first example I printed the binding paper, and the background "T" page. The T is the back page that I will be attaching the gift card to.

Page for Letter T


I wanted each of the inside pages to look the same, but be different sizes, with differnt text based on the letter.


Page for Letter E

Page for Letter A


Page for Letter C

Page for Letter H


The final page that I printed included the C and the H page, along with the letters and heart (trying to conserve the beautiful thick matte paper that I was printing on). The H page is blank because it is the last page, and will have the H and heart attached.


Support This Site

Here is the final product all put together.


Credits:
Digital papers by Carrie Stephens (Scrapbook Dimensions free digital kit with subscription).
Program: PhotoShop Elements 4
Font: Jane Austen
Chipboard Action: Atomic Cupcake
Epson Heavyweight Matte Paper

Download Julie Kelley's Alphabet freebie here
Please be kind and leave a comment if you download.

Alphabet Preview


Thursday, May 10, 2007

Featuring Miss May: Susan White

Teacher Gifts: Customized Postcards

By Susan White, Miss May

Creative Team Guest Member

This tutorial is written for FxFoto software, and you can create your postcards using your own software with adjustments.


Making postcards is a quick and easy digital project! And post cards are a fabulous deal –postage is only 24 cents so they are perfect for quick notes, announcements and invitations. And the front side is free for you to digitally decorate.

Make them to give to your child's teacher as a unique gift!

And yes it is perfectly legal to make and mail your own. They do need to meet the US Postal Service rules which are:
Rectangular One sheet of paper or card stock Minimum size: 3 ½ inches high by 5 inches long and 0.007 inches thick Maximum size: 4 ¼ inches high by 6 inches long and 0.016 inches thick 0.007 inches thick is the thickness of an index card so cardstock works well


Creating a Post Card


1. Start by turning on your FxFoto and clicking on the New button. In the next box, click on the Card button and choose 6x4 inch card, then click Continue.
Now choose your background. Here’s the dialog box you will see:


Click on File and then use the drop menu to choose the kit you want to use. Here I chose
Kim Hill’s Wacky Spring kit. Now click on Continue. Here’s the folder for the Wacky Spring kit by Kim Hill – simply click on the paper you would like to be the background. Don’t worry, it’s easy to change it later (see step #6 below).


2. Now add elements and papers by clicking on them in the left hand folders. They will appear in your work space as you can see below.


Grab the elements to move, rotate and resize. To layer them, right click on the element you want on top and choose Show Image on Top. To delete an element, right click and choose Delete Image from Collage.

3. Add a shadow by clicking on Info and the click on the Image Placement and Shadow tab. Click on the Add Shadow box and then using the sliders, chose the height, darkness and feathered edge for the shadow. Then click Apply. You can apply the same sized shadow to several elements by right clicking on the element and choosing Add Shadow. In FxFoto the shadow rotates and moves with the object so you can apply the shadow anytime.

4. Crop two papers using the Bumps Box crop shape. Here I cropped striped and polka dot papers. Click on the Crop tab and then choose Pull or Adjust Pattern. From the crop menu choose Bumps Box. Then click and drag to create a box. Click on the Crop button and move into place. Do this for both papers. Right click on the cropped purple polka paper and chose Show Image on Top, then move it on top of the striped paper.


5. Let’s add some text. Click on Text and then choose New Text Object.


I used Batik font with a size of 20 and bolded it to make it stand out better. Now type your text and don’t forget to spell check it! When you are done, click OK. Now grab the text box and move it over the purple paper. Make a separate box for the tag.

6. We are just about done but I think I’d like to change the background so the pink tag shows up better. So let’s change it to green. In the upper left pane, click on Settings and then click on Collage Settings. Now click on the tab marked Background and Theme. Here’s the box for changing the background. Click on the box marked Background Image


and then click on the Choose Image File button. Now you can browse to the Wacky Spring file and choose a different paper. Once you have selected it, click open and then OK and you will have a new background.

7. Print it on cardstock and cut out. Turn it over and write the address on the right side and your message on the left. Stick a stamp on it and put it in the mail!


Here are some other examples using our sponsor Kim Hill at CG Essentials :


Support This Site