Featuring Miss May: Susan White
Teacher Gifts: Customized Postcards
By Susan White, Miss May
Creative Team Guest Member

By Susan White, Miss May
Creative Team Guest Member

This tutorial is written for FxFoto software, and you can create your postcards using your own software with adjustments.
Making postcards is a quick and easy digital project! And post cards are a fabulous deal –postage is only 24 cents so they are perfect for quick notes, announcements and invitations. And the front side is free for you to digitally decorate.
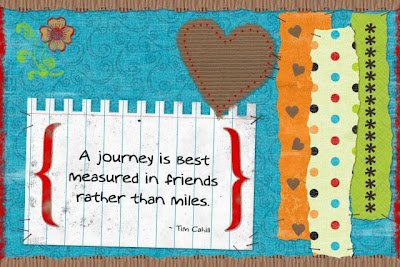
Make them to give to your child's teacher as a unique gift!
And yes it is perfectly legal to make and mail your own. They do need to meet the US Postal Service rules which are:
Rectangular One sheet of paper or card stock Minimum size: 3 ½ inches high by 5 inches long and 0.007 inches thick Maximum size: 4 ¼ inches high by 6 inches long and 0.016 inches thick 0.007 inches thick is the thickness of an index card so cardstock works well
Creating a Post Card
1. Start by turning on your FxFoto and clicking on the New button. In the next box, click on the Card button and choose 6x4 inch card, then click Continue.
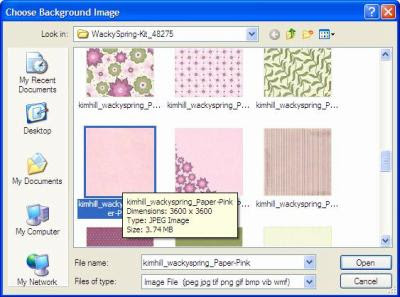
Now choose your background. Here’s the dialog box you will see:

Click on File and then use the drop menu to choose the kit you want to use. Here I chose
Kim Hill’s Wacky Spring kit. Now click on Continue. Here’s the folder for the Wacky Spring kit by Kim Hill – simply click on the paper you would like to be the background. Don’t worry, it’s easy to change it later (see step #6 below).
2. Now add elements and papers by clicking on them in the left hand folders. They will appear in your work space as you can see below.

Grab the elements to move, rotate and resize. To layer them, right click on the element you want on top and choose Show Image on Top. To delete an element, right click and choose Delete Image from Collage.
3. Add a shadow by clicking on Info and the click on the Image Placement and Shadow tab. Click on the Add Shadow box and then using the sliders, chose the height, darkness and feathered edge for the shadow. Then click Apply. You can apply the same sized shadow to several elements by right clicking on the element and choosing Add Shadow. In FxFoto the shadow rotates and moves with the object so you can apply the shadow anytime.
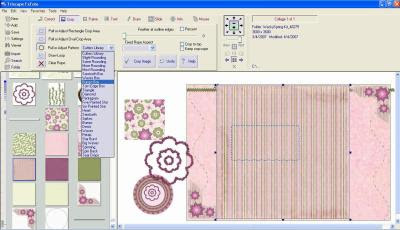
4. Crop two papers using the Bumps Box crop shape. Here I cropped striped and polka dot papers. Click on the Crop tab and then choose Pull or Adjust Pattern. From the crop menu choose Bumps Box. Then click and drag to create a box. Click on the Crop button and move into place. Do this for both papers. Right click on the cropped purple polka paper and chose Show Image on Top, then move it on top of the striped paper.
5. Let’s add some text. Click on Text and then choose New Text Object.
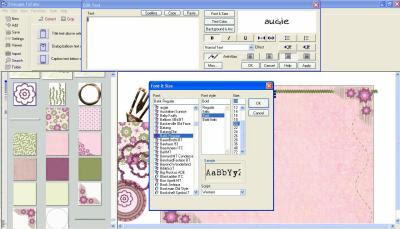
I used Batik font with a size of 20 and bolded it to make it stand out better. Now type your text and don’t forget to spell check it! When you are done, click OK. Now grab the text box and move it over the purple paper. Make a separate box for the tag.
6. We are just about done but I think I’d like to change the background so the pink tag shows up better. So let’s change it to green. In the upper left pane, click on Settings and then click on Collage Settings. Now click on the tab marked Background and Theme. Here’s the box for changing the background. Click on the box marked Background Image
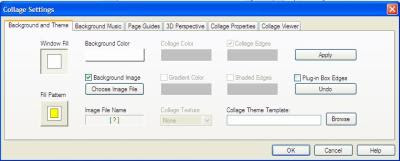
and then click on the Choose Image File button. Now you can browse to the Wacky Spring file and choose a different paper. Once you have selected it, click open and then OK and you will have a new background.
7. Print it on cardstock and cut out. Turn it over and write the address on the right side and your message on the left. Stick a stamp on it and put it in the mail!
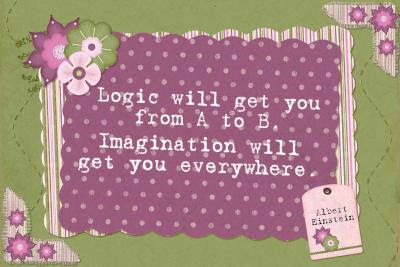
Here are some other examples using our sponsor Kim Hill at CG Essentials :




2 comments:
Thanks Julie! Come to think of it these would make a nice and quick Mother's Day gift too!
It's so nice to see the bright turquoise/red/tan colors together....instead of the dreary red apple/primary colors that many people have decided "teachers" like...lol. Signed, a teacher who doesn't like primary colors or apples (unless they're to be eaten)
Post a Comment