Showing posts with label Artistic Photo. Show all posts

Monday, November 10, 2008

How to Use Photo Masks

How to Use Photo Masks in Photoshop Elements
by Julie Ann Shahin, Founder
Close-up of photo in layout
******************************
Final Layout. Credits: Nessa Kit by Erica Hite. Photo Masks Canvas by Amanda Sok. All available at Scrapgirls.com
*********************
Here is a simple technique to add texture and interest to your photos. The final result is posted above. For this example I am using {canvas} photo masks by Amanda Sok available at Scrapgirls.

The instructions for using these masks are very simple.
Step 1. Open your photo in PSE.
Step 2. Select the photo mask you wish to use, and open it in PSE.
Step 3. Drag the photo onto the photo mask so that it is the layer above the photo mask.
Step 4. Select ctrl+g to clip it together.
Step 5. To use it in a layout, select Layer--> Merge Visible.
Step 6. Drag the photo onto your layout.

Here are some looks that can be made with Amanda's photo masks.


Please leave feedback if you would like more new content on the EDS Blog!

Julie Ann Shahin, Founder

Monday, November 12, 2007

Clearly Fresh Ideas for Hybrid Scrapbooking with Transparencies


Freestyle Hybrid Scrapbooking Class

{using 15 transparent items in one layout}

with Julie Ann Shahin, Founder


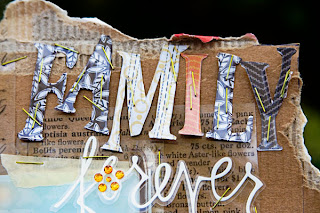
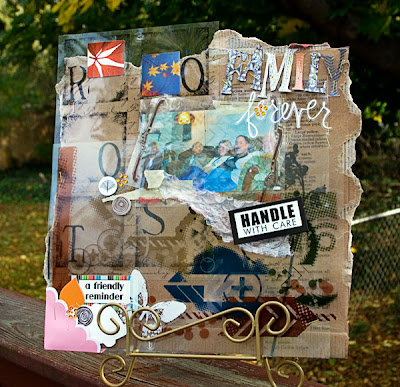
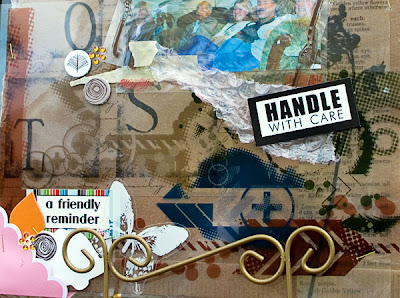
My layout is titled: Roots: Handle With Care
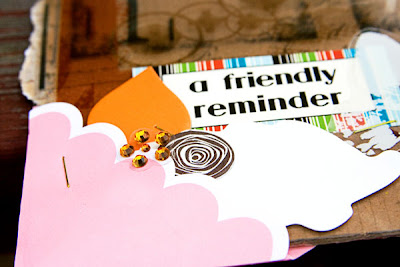
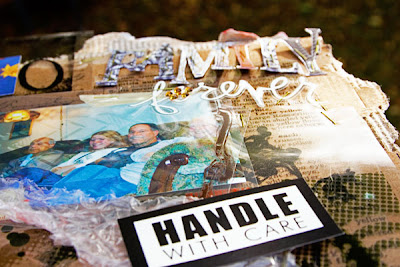
See below for larger images
Transparencies have been the rage for several years now, however new "out-of-the-box" ideas are still emerging. Recently scrappers were challenged by The Dares to scrap with eight transparent items. This week we will be bringing you NEW hybrid ideas for scrapping with transparencies - try them if you dare!!!


CLASS INSTRUCTIONS:
1. Open a new document in Photoshop Elements workspace editor that is the size of your transparency.
  • I buy 12x12 transperencies and cut them to 8.5x12 in order to fit them in my standard printer.
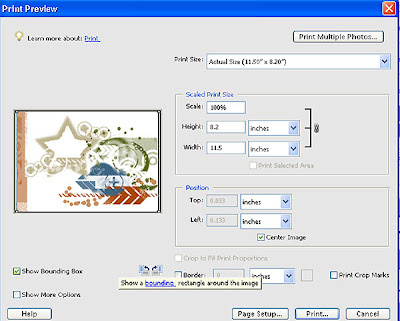
  • My new document size will be 8.5 inches wide by 12 inches high. (Actually, my epson printer will tell me at the exact measurement of 8.5x12 that some of the edges will be cut off so I get around that by making my new document 8.2 x 11.5)

2. Click on the brush tool. Load the brush of your choice. I am using Amanda Sok's Techno Grunge Mini Sets 1 and 2.
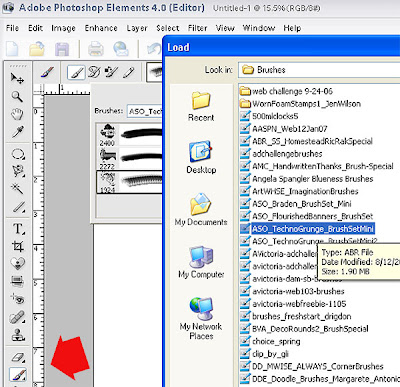
3. Add a new layer before applying the brush. I add a new layer for each different brush so that I can change that layer later if I want and not change the rest of the layout.
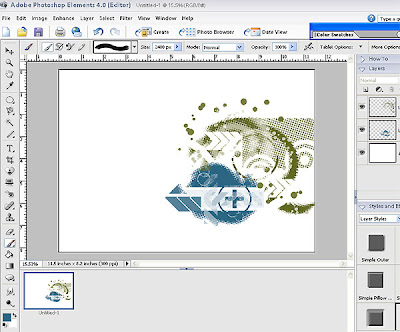
4. To use the second set of brushes, I have to go through the load process again.
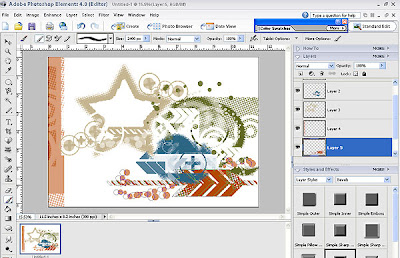
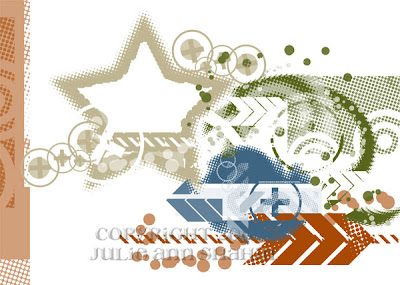
Here you can see that each brush was put on it's own layer. Save this without flattening as a .psd file.

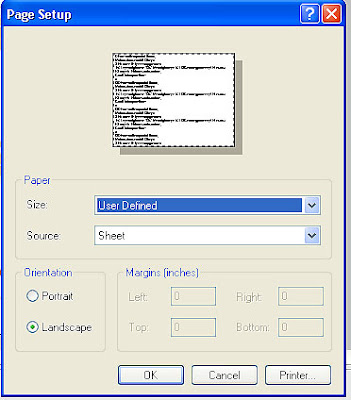
5. To print, I change the paper size by going to File-->Page Setup. For paper size, I chose "User Defined", then click on "Printer" in the lower right corner.

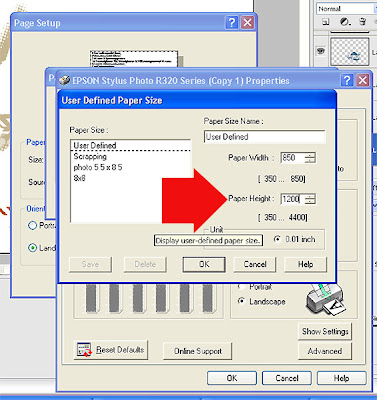
6. Click on "Properties". Under Paper Options, even if the size says "User Defined" go to the drop-down box and click on "User Defined" again - which brings you a pop-up box. For Paper Height, change the value to 1200. Click OK. Repeat clicking ok until all the page setup boxes have closed.

7. Go to File--> Print. The Print Preview pops up for my Epson printer and I can see that my design fits on the page.
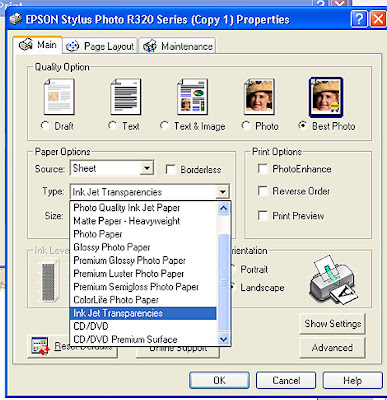
8. Make sure to set your printer properties. I chose Best Photo, and Inkjet Transparencies at my Paper Type. For inkjet printers, if you use Scotch Brand Transparencies - put the transparency into the printer so that the printing will go on the rough side. For other brands, read the manufacturer instructions.

Mention this ad and get free May Arts Ribbon with your first order at The Shaker Box!


9. To give my photo the look that it has a transparency over it I add a new layer by holding down the "alt" key while clicking on the "Create a New Layer" button on the layer palette.
  • When you get a pop-up box, change the mode to soft light.
  • Click the box next to where it says "Fill with Soft-Light-neutral color (50% gray)".
  • When you do this a grey layer appears above your photo but does not cover the photo.
  • Using the brush tool, I apply my Techno Grunge brush to this gray layer.
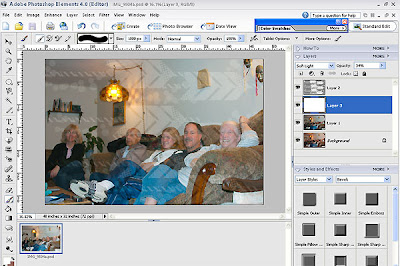

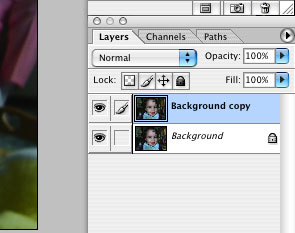
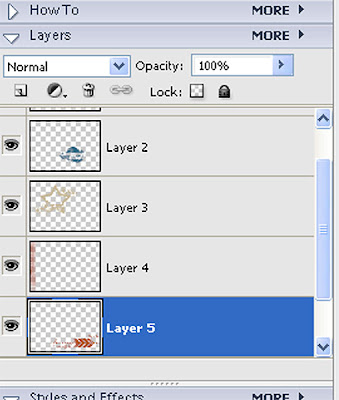
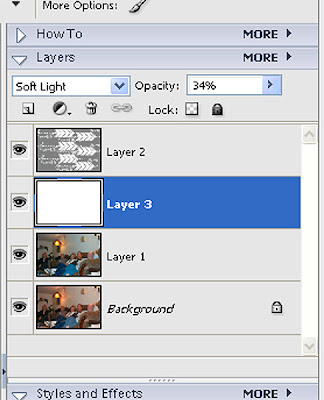
10. Here is what the layer palette looks like. Layer 2 shows with my Technogrunge brush applied. Layer 3 is the same technique using a hard round brush painting white over the whole gray layer. This lightens the photo which I wanted because the photo was dark.

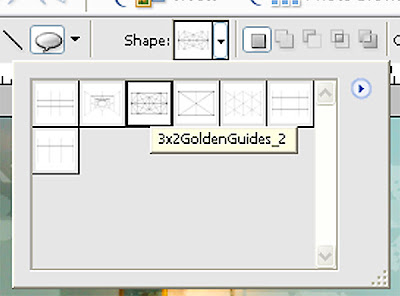
11. To crop my photo, I use the shape tool and select Geometrical Guides.
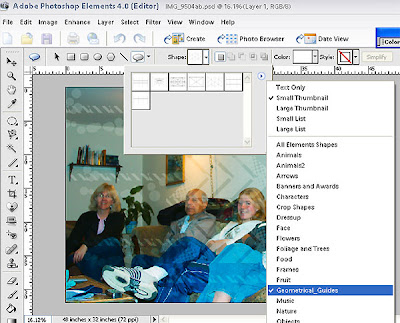

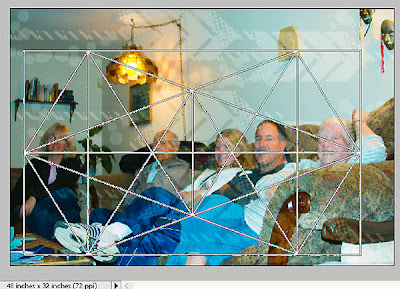
12. To keep the correct proportions, hold the shift key as you create the shape of the geomtrical guide. I chose this particular guide because of the larger width than the other guides.

  • To crop, use the crop tool and place it over the outer edges of your geometrical guide.
  • Click the check mark to confirm the crop.
  • I printed my photo on 4x6 glossy photo paper.


13. I tore a piece of cardboard to 12x12 then sprayed it with Krylon "Make It Acid-Free" I stapled most of my transparent items or used masking tape to attach.
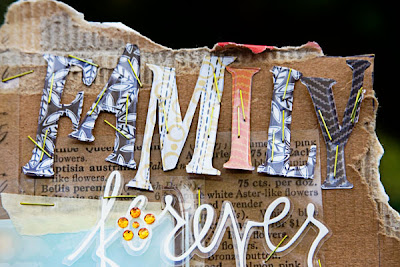

This layout contains:
1 custom transparency designed by me
1 digital transparent overlay on photo
2 Narratives Transparencies
6 Heidi Swap Ghost Letters (Family) backed with paper from the Zingboom Kit Whimsy Woods
1 Heidi Swap acrylic word (Forever)
2 MME Bohemia Transparent Frames
1 MME Bohemia Transparent Butterfly
1 piece of bubble wrap
___________________
15 Transparent Items


Have you been inspired by our blog? Share with us what you create at our NEW Flickr group:
http://www.flickr.com/groups/everydaydigitalscrapbooking/


Wednesday, December 20, 2006

How To Combine Blend Mode Techniques with Word Art and Brushwork

I am happy to present an awesome digital scrapbooking tutorial by Audrey Neal today that focuses on blend modes, however the layout also encompasses other features that this blog has been teaching this month: Word Art and Brush Work! Audrey does a brilliant job of using all three techniques.

Featured Reader: Audrey Neal

Supply list:
Paper, brushes, jewel: Avacado Toaster kit, Jan Crowley and Meredith Fenwick
Word art: You Name It_Individuality, Jen Wilson Designs

Instructions: (using PSE 2.0)
  1. Open a new document, 12x12 inches, 300 dpi, white background, RGB color.
  2. Open wavy lined paper and cut and paste onto new document (or drag and drop).
  3. Open picture and resize as needed until it covers your entire document.
  4. Make a duplicate of the photo layer.
  5. Make sure the bottom photograph is the active layer and change the blend mode to Hard Light. Keep it at 100%.
  6. Make the top photo the active layer and erase everything but the focal point (in this photo, that is the person in the photo). Use a very large brush to erase the majority of the background and then switch to a smaller brush and zoom in to erase around the outline of the figure.
  7. Open the jeweled accent and place it over your figure’s face. Apply a drop shadow of 4 to it. Resize until the middle jewel is the size of your figure’s head. Move the accent layer in between the two photo layers.
  8. Open the word art and place over the top photo layer. Adjust size to fit your liking.
  9. Open a second photo, apply a stroke (Edit>Stroke>Outer, size 15), and arrange onto layout. Apply drop shadow of 4.
  10. Open various brushes and place them around the focal point figure and the word art. Save now as a PSD document so that you can make changes later.
  11. Flatten layers and save as a jpeg.

Categories:
Advanced

Artistic Photo

Blend Mode

Featured Reader

Photoshop Elements PSE


Tuesday, December 19, 2006

How To Make a Dull Photo Pop with Blend Modes in Photoshop

Scrapbooking Tutorial by Amy Duquette,
Creative Team Member


Making a dull photo POP using blend modes in Adobe Photoshop CS

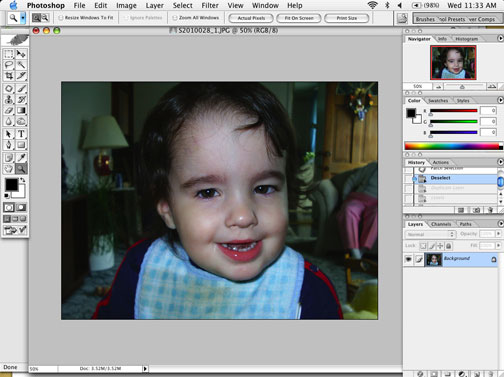
1. Open up your photo and duplicate the background layer to save your original photo.


2. Hide your background layer by clicking the "eye" to the left of the layer.


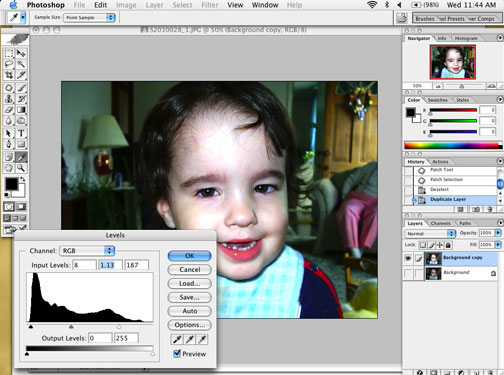
3. With your background COPY layer selected adjust the levels of your photo until you are happy with it.


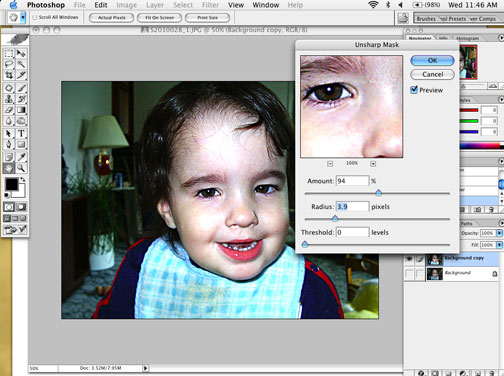
4. Then use the Unsharpen Mask filter to bring out some more detail of the photo... results will vary depending on your photo.


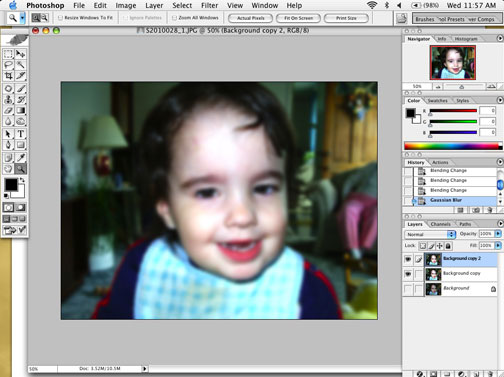
5. Duplicate your background copy and keep it selected and then FILTER - GUASSIAN BLUR. If you are using a large photo that is 300 dpi a blur between 5 - 9 will work. If your photo is a smaller size and 72 dpi or a little larger then a blur between 3 - 5 will work. Be sure you do not apply too much of a blur because it will ruin the effect you are trying to achieve.


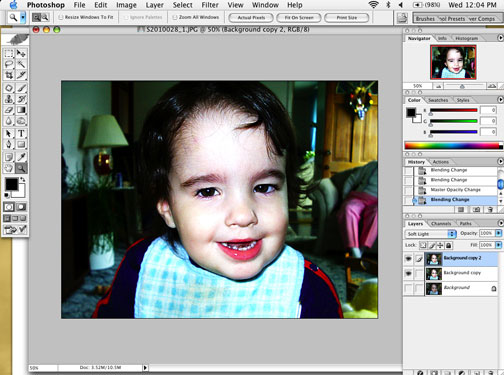
6. Now you can experiment with which blend mode will give you the effect you want. I used SCREEN, OVERLAY, SOFT LIGHT and HARD LIGHT so you could see the differences between them.

SCREEN


OVERLAY


SOFT LIGHT


HARD LIGHT


7. You can play with the opacity and the fill amounts until you are happy with the results.
8. When you are finished make your background layer visible again and then flatten your image and save it.

If you want to be able to make changes to the layers later, also be sure to save a .PSD file before flattening the image.

If you like this tutorial, you'll enjoy our newsletter as well!

Categories:
Adobe Photoshop
Artistic Photo
Blend Mode
Creative Team Member
CS2
Photo Editing

Monday, December 18, 2006

This Week Learn How to Expertly Use Blend Modes for Digital and Paper Layouts

Blend Mode Tutorial by Maggie Lamarre,
Creative Team Member

Learn to Make a Grungy Flower

What are Blend Modes? Determines how colors applied blend with colors already in the image. We will show you some online resources for learning about blend modes and also give you an amazing tutorial every day as well!

Jay Arraich has great information on his website all about blend modes.
Most of the painting and editing tools, as well as each layer offers a menu of blend modes from which you can choose the way new colors will mix with those already there.

Basic terminology used for describing blending effects is:
Base color - this is the color that is already there. The one that you are going to paint over, onto, or add a layer on top of.`
Blend color - the color you’re going to add with your paint tool, or which is already on the layer for which you are selecting a blend mode (the layer will be blending with the layers below it).
Result color - what you get after you do some “blending.”

Please note that the blend modes that are found on a tool’s options bar affect how the colors or actions caused by that tool blend with the colors that are already on the current layer that you have selected in the Layers palette. Those tool blend modes do not affect how those colors blend with the layers below that layer once the color or effect has been applied. This also applies to the blend mode chosen when using Edit > Fade; it affects how the colors are blended with the existing colors on the current layer. The blend mode setting in the Layers palette determines how each layer’s colors blend with the colors of all other layers below it in the Layers palette.


Maggie's Tutorial

Supply List used
Antique Kit , photo corners@ Dragonflaire.com
Lace, photoprongs from Isabella kit @Oscraps.com


PSP has 21 blend modes. PSCS2 has 23 Blend mode. Blend modes are essentially your mixer it allows you to blend the layers with the underlying layer to produce stunning effect.

The blend modes range as follow:
  • Darken, mulitply, color burn will darkens the current layer using the underlying layer.
  • Lighten, screen, dodge will lightens the current layer using the underlying layer.
  • Overlay, soft light, hard light,color legacy, exclusion will contrast the current layer using the underlying layer.
  • Hue, saturation, color, luminosity, color legacy will create color with the current layer using the underlying layer.

The best thing is to play around with your layers and change the opacity of the layers,then duplicate change the blend modes, then apply a filter and see the stunning effects you can achieved.

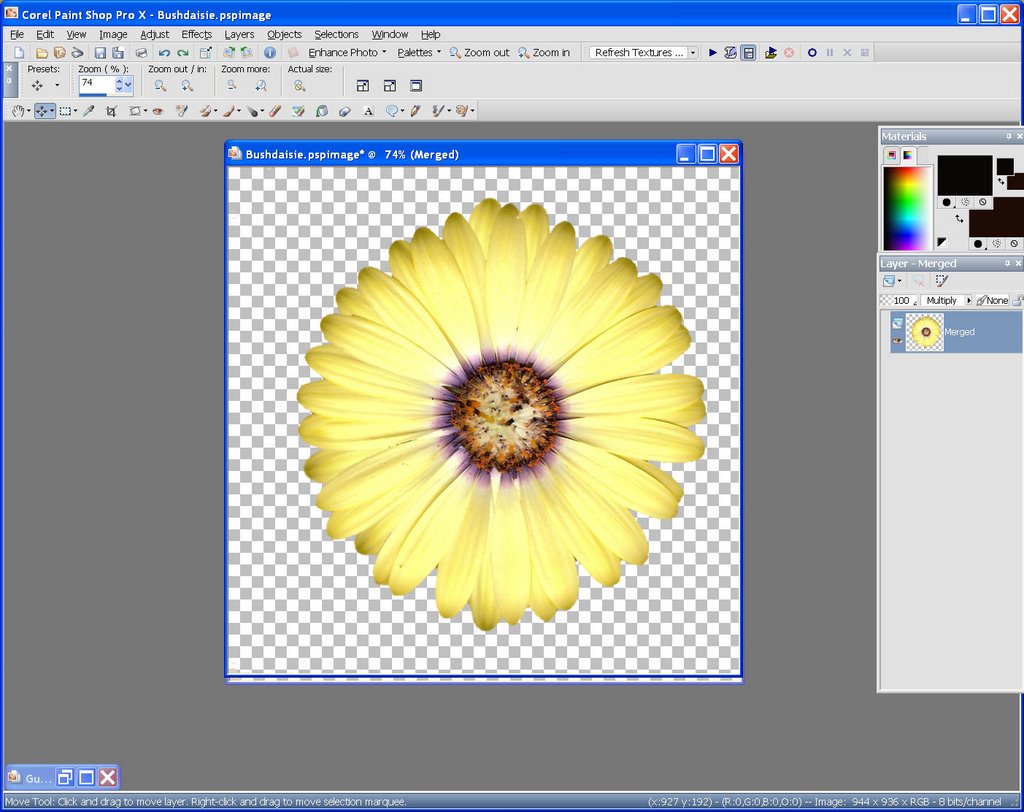
Today we are going to change the blend modes on a picture of a flower I took from my garden. I wanted to give it the look of silk flower and a bit of grunge to it.


Navigation
  1. Open the picture or paper and duplicate and save the original we will be working on the duplicate.
  2. Duplicate the layer and change the new layer blend mode to burn.
  3. Duplicate the bottom layer one more time and move it on top of the burn layer.
  4. I added a filter, filter unlimited (noise) I used the default, then reduce the opacity. I added another layer of paper from the Antique kit then changed the blend mode to Overlay and reduce the opacity as well.
  5. Once satisfied I merged the layers and added a slight shadow.

Here's the finish flower..

Have fun and create your Art!


Categories:
Adobe Photoshop
Artistic Photo
Blend Mode
Creative Team Member
CS2
Photo Editing

Thursday, December 14, 2006

Custom Photoshop Brush Tutorial So Easy You Will Be in Awe

Special Announcement:
Everyday Digital Scrapbooking is currently featured on Disc Talk Radio.
Dishin' the Digi Coast to Coast
It's free, just register to listen.
Each week, Shanah Gordon and deann McDaniel will take you on a guided tour through the amazing world of digi, spotlighting fun and fabulous finds for all your digital needs...yep, needs! Come along! Don't miss a thing - new shows air each Tuesday.
Read our tutorial and then check out Disc Talk Radio.


Photoshop Brush Tutorial by
Susan Rodriguez, Creative Team Member

How to turn a photo into a PhotoShop brush

This is going to be so easy you will be in awe.
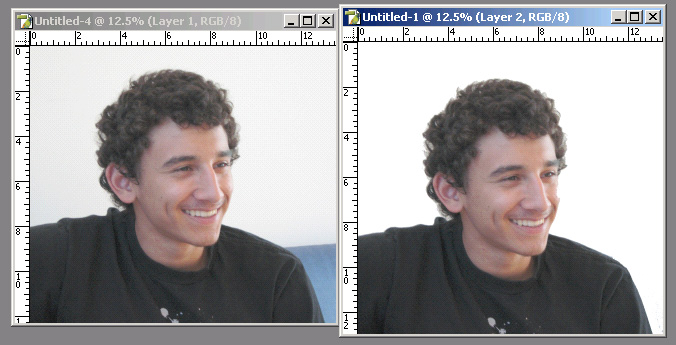
First select a few photos you would like to turn into a brush. My suggestion would be to select photos with mostly a white background. If you do not have any of those available I would suggest deleting as much of the background as possible and filling it in with a white background. See Example below.


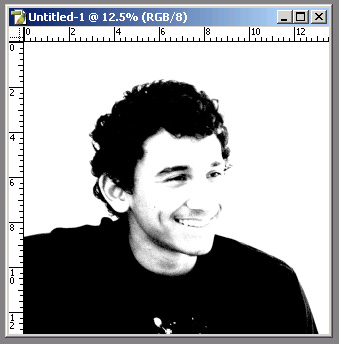
Once you have cleaned up your image make sure you have flattened your image. Click on Layer > Flatten Image. Next you will need to desaturate your image. Click on Image > Adjustments > Desaturate. The image will turn into a black and white image. Now you will need to adjust the brightness/contrast to remove as much grey as possible from the image.


I adjusted my image to +57 brightness and +81 contrast. It really depends on your image on how much you will need to adjust the brightness/contrast.

Now you’re ready to create your brush. Click on Edit > Define Brush Preset. A default name will appear, give your brush a name.


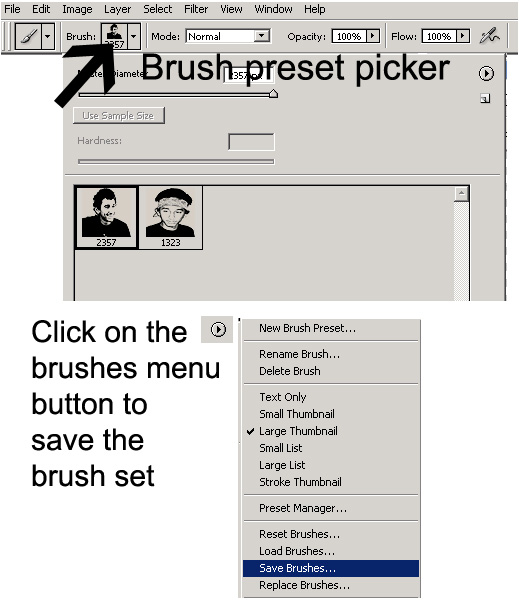
If you want to create a whole set of your own brushes you may want to delete the other brushes already in the set. To do that, open up your brush preset picker, right click on the brushes you wish to delete and click on delete. You will be able to retrieve your brushes again once you load that set of brushes. Once you have deleted all the other brushes continue on with the same process to create more brushes.

Once you have created all the brushes you want in the set click on the brush preset picker (see example below). Click on the brushes menu button, scroll down to save brushes and give your brushes a name.


Imagine all the fun you will have with your own photo Brushes. Enjoy and happy creating.


If you liked this tutorial please let us know by leaving a comment. You would also enjoy signing up for our newsletter!


Categories:
Adobe Photoshop
Advanced
Artistic Photo
Brush - Brushes
Create Your Own Elements
Creative Team Member
CS2
Custom
Photo Editing
Photoshop Elements
PS7