How To Make a Dull Photo Pop with Blend Modes in Photoshop
Scrapbooking Tutorial by Amy Duquette,
Creative Team Member
Creative Team Member
Making a dull photo POP using blend modes in Adobe Photoshop CS
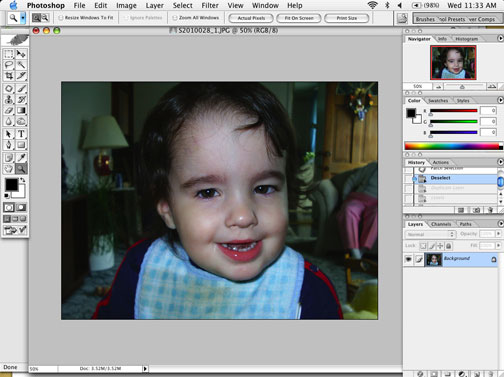
1. Open up your photo and duplicate the background layer to save your original photo.
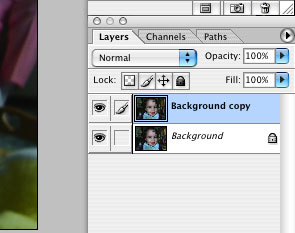
2. Hide your background layer by clicking the "eye" to the left of the layer.

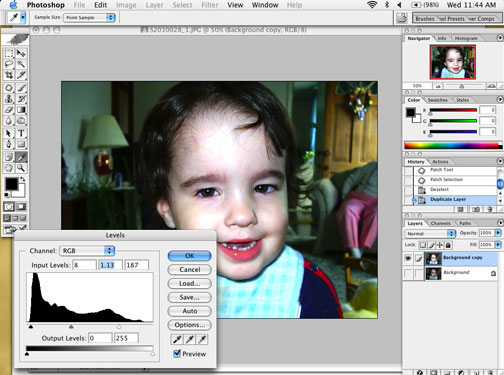
3. With your background COPY layer selected adjust the levels of your photo until you are happy with it.
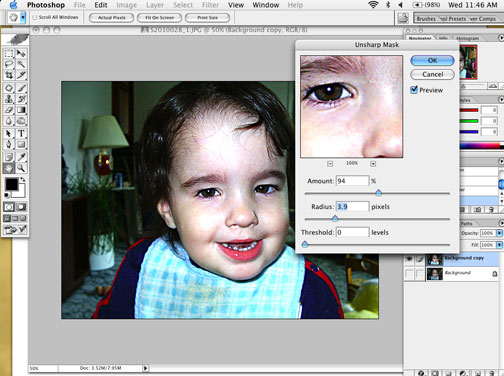
4. Then use the Unsharpen Mask filter to bring out some more detail of the photo... results will vary depending on your photo.
5. Duplicate your background copy and keep it selected and then FILTER - GUASSIAN BLUR. If you are using a large photo that is 300 dpi a blur between 5 - 9 will work. If your photo is a smaller size and 72 dpi or a little larger then a blur between 3 - 5 will work. Be sure you do not apply too much of a blur because it will ruin the effect you are trying to achieve.

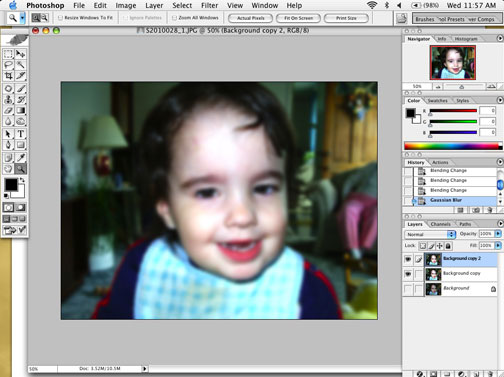
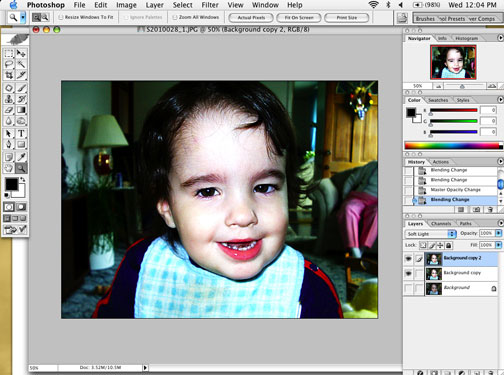
6. Now you can experiment with which blend mode will give you the effect you want. I used SCREEN, OVERLAY, SOFT LIGHT and HARD LIGHT so you could see the differences between them.
SCREEN

OVERLAY

SOFT LIGHT
HARD LIGHT

7. You can play with the opacity and the fill amounts until you are happy with the results.
8. When you are finished make your background layer visible again and then flatten your image and save it.
If you want to be able to make changes to the layers later, also be sure to save a .PSD file before flattening the image.
If you like this tutorial, you'll enjoy our newsletter as well!
Categories:
Adobe Photoshop
Artistic Photo
Blend Mode
Creative Team Member
CS2
Photo Editing


3 comments:
Thanks for this tutorial. I have PSP and cannot buy the actions for pse & pscs2 and I have lots of dull photos LOL I will be trying this asap.
Outstanding tip!
What a cool tip! Thanks
Post a Comment