Showing posts with label Digital Image Pro. Show all posts

Monday, October 09, 2006

How To Combine Paper with Digital Scrapbooking: Tutorials

What is hybrid scrapbooking?
It's a digital layout that is printed and embellished by hand. Or you can print out the papers and embellishments, and adhere them the traditional way. Hybrid scrapbooking "undercuts the objection of "It's too time consuming." The crafter can spend as little or as much time as desired on the hand embellishments." Creative Leisure News

Beth Price, EDS Creative Team Member, adds that according to Wikipedia, HYBRID means a cross between populations or cultivars of the same species. In the world of scrapbooking, we used to have 2 distinct groups of scrappers ñ the digi people or the paper people. Lately, weíre starting to use the word Hybrid as these formats begin to cross over. Hybrid is being used to define computer-generated graphics or photos that are used with paper layouts. You can embellish a photo right on the computer before printing and save finding the perfect rub-on or quote. Sometimes you can alter a photo and save it from the trash, hiding a blurry focus, a poor resolution, or a distracting background, for instance.

In hybrid scrapbooking you can,

-use brushes, frames, text, or even embellishments on photos and print (at home or in lab)

-make a paper layout, import it to photoshop (via digi pic or scan) and add brushes, text, re-coloring, elements on TOP of your paper page

-print out digi papers, embellies, alphas, word art, etc onto matte photo paper or cardstock and use on paper

-print brushes or wordart onto transparencies and use on paper pages


Source: Tia Bennett, Garden Girl - twopeasinabucket.com

Update 2/12/2007: Want to learn more about Hybrid Scrapbooking? Go to Scrapbook Dimensions and download your FREE premiere issue for February/March 2007.


This e-mail address is being protected from spam bots, you need JavaScript enabled to view it

New Magazine Uniquely Blends Two Popular Methods
Into the Ultimate Scrapbooking Experience

HIGHLAND, UT November 21, 2006 – Scrapbook Dimensions Magazine announces the January release of its Premiere Issue which is aimed at combining the long-standing traditions of paper scrapbooking with the ease and appeal of its ever-growing digital counterpart. Many people are very interested in reaping the benefits of both sides of the scrapbooking market and have learned how to get the best of both worlds! A "hybrid" or "tradigi" scrapbooker finds unique and practical ways to make the best use of all tools and products, and the results can be absolutely amazing! Scrapbook Dimensions is the first magazine to provide focused inspiration and education covering this "hybrid" approach to scrapbooking.
Co-editors Cindy Wyckoff and Deanna Shain (digital and traditional scrapbookers, respectively) have combined their vast experience with their love of this hobby to launch a truly unique and innovative magazine. This magazine will provide project ideas, informative articles, layout gallery inspiration, how-to tips and techniques, and product reviews for bridging the gap between these two seemingly different but very complementary approaches to scrapbooking. "We touch on all areas of interest to both traditional and digital scrappers showing how fun and easy it is to save time on layouts by using the computer but still keeping a hands-on approach to add to the creative process, “Wyckoff said.
For more information about Scrapbook Dimensions Magazine visit their website at www.scrapbookdimensions.com. While at the site you can you can request a free copy of the upcoming Premiere Issue.

Featured Reader: Tara Pollard PokostaClick on image to enlarge. Layout posted with permission from designer.

Tara's Instructions:I just couldnt' resist buying (and dowloading some free kits).....so the pp's are digital and i printed them out, the doodle journaling thing and name thing are digital too. all printed and cut out. then i used heidi letters and some jewels. and a prima cork flower. eventually i will learn to do an all digital page and actually have it look good!!! tfl!!! tara

Supplies used:


  • the black/white pp is kim christensen digital; so is the doodle journaling thing, and the doodle on the photo! all printed out on the b/w pp
  • the dot pink is digi by kim christensen also.
  • the letters are heidi swapp! and the jewel is heidi swapp that is on the prima flower.
  • colorbox chalk ink
  • sharpie marker!


Featured Reader: Kathy Montgomery

Happy Birthday Card posted with permission from designer


Digi kits used:
"Tattoo Art" by Rhonna Farrer, (doodles and elements on right side of card)
www.twopeasinabucket.com
"Cottage Bluff" by Veronica Ponce, (stitched border along left side of card)
www.twopeasinabucket.com

How-to:
Printed digi elements onto white cardstock, and matted onto front of pink

5X7 cardstock card. Hand-printed "Happy Birthday" with pens. Added Nunn

Designs copper charms, and Offray ribbons to front of card.


Next:

Hybrid mini-album by Tiffany Tillman

More inspirations for combining traditional scrapbooking with your computer skills all week! Bookmark us now! Thanks.

Keywords: Adobe Photoshop, Advanced, CS2, Digital Image Pro DIP, Gift Ideas, Hybrid, Photo Editing, Photoshop Elements PSE, Printing, PS7, Resources

Friday, October 06, 2006

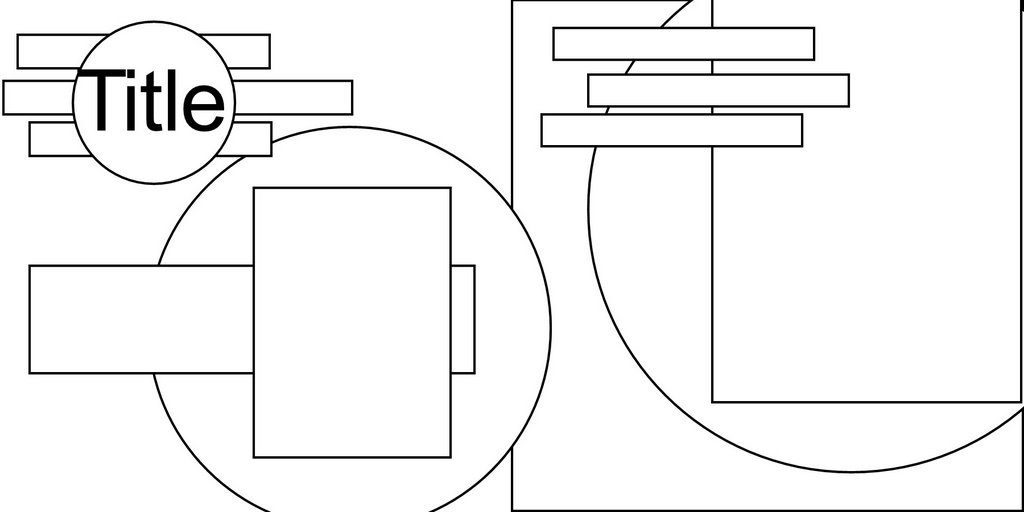
Digital Image Pro Layout Tutorial and Page Sketch

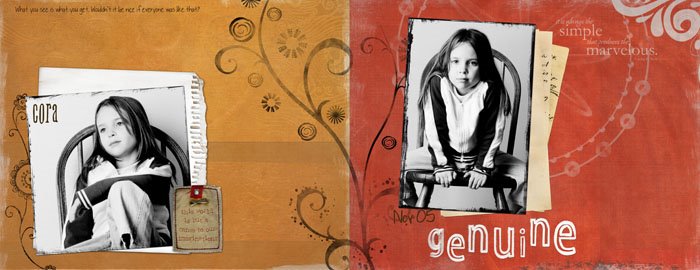
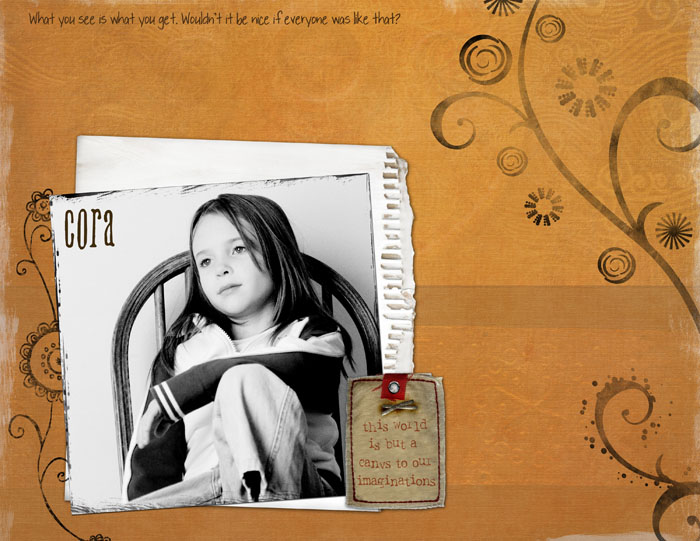
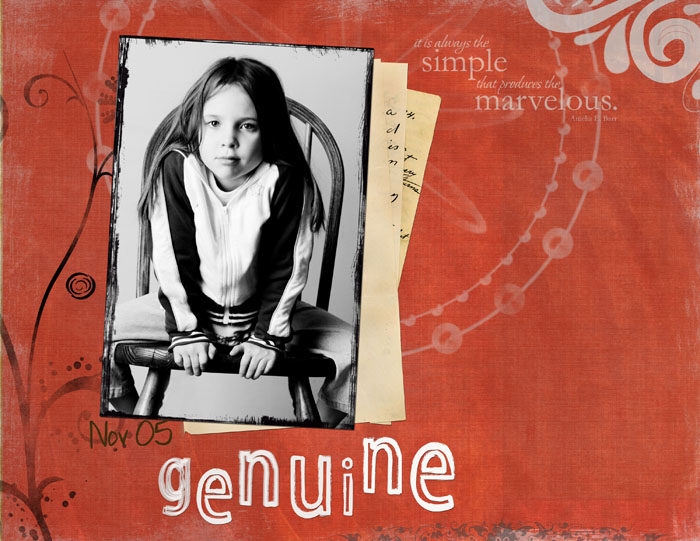
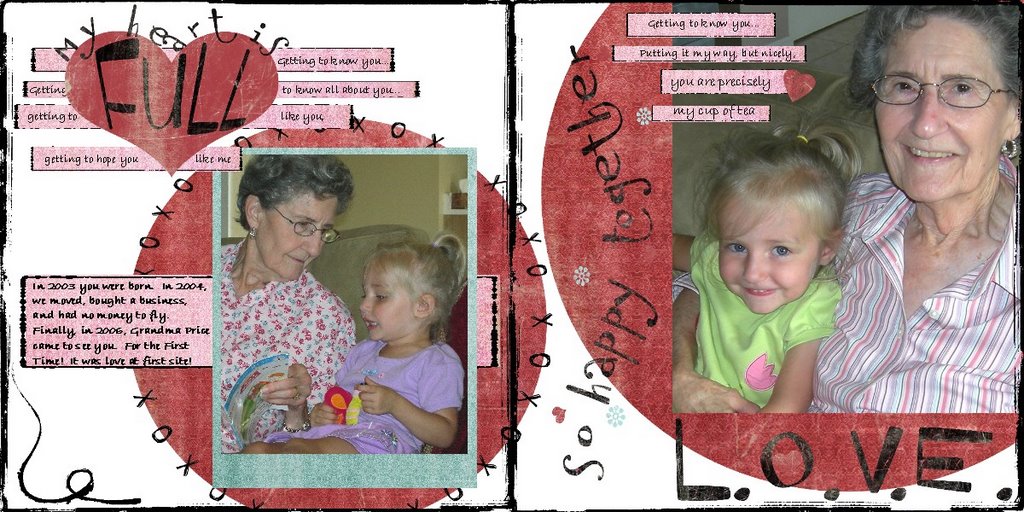
Digital Scrapbooking Tutorial and 2-page Sketch by Beth Price,
Creative Team Member


Beth's How-to: This layout was created using Digital Image Pro

1.Start with a canvas formatted to 6x3 (easier on your computer's processor) or 12x6.

2.If you like the divided look you can add the overlays to outline each page, or stretch it to fit the longer length.

3.Open paper from kit, insert a shape and copy and paste it to the canvas. To create the text boxes, choose Insert, Shape, and Square. Size the square into the text box shape you want, then add an overlay for the inked edge. You'll have to shrink the overlay down quite a bit.


4.To create the shaped text "XOXO" in Digital Image Pro:

- Go to the Text menu and choose shaped text.

- Select the rainbow (semi-circle) shaped image, and it will ask you to enter your text. Enter a lot (about 30?) of XO's.

- After you have the image you'll need to size it to fit around the circle. This will take some trial and error.

- First change the font of your text, since a different font will change the size of the semi-circle. You change the font by right clicking on the text and selecting font.

- Stretch the rainbow image so that it is large enough to somewhat cover the circle.

- Right mouse click on the image and edit text, adding or subtracting more xoxo's until the size is lined up with the circle.

- Take a look at how your rainbow fits the circle, it should come nicely half-way around. Edit to add or subtract xoxo's until you like it.

- When it fits nicely around the top half, select the rainbow, copy it, choose Format, and then Flip

- You may have to fine tune again, but at this point you should have a circle shaped text wrapping around your colored circle.


You can do other shapes as well, experiment around!

Coming next week!
Next week this blog will focus on combining digital scrapbooking with paper scrapbooking - whether you call it hybrid, digital-infused, or tradi-digi - it's a lot of fun! Look for projects by Tara Pollard Pokosta, Tiffany Tillman, Kathy Montgomery, and more!

We want to feature YOU!

Email your ideas to thedigitalproject@gmail.com by October 22nd to be considered as a featured scrapper.

We are looking for:
Gift Ideas
From cards to mini-albums - innovative and creative projects never seen before

Home Decor Ideas
Fresh ideas to personalize your scrapbook space and all the rooms in your house

Creating Custom Papers and Elements with Your Computer
Basic information on how to make your own paper and elements

Computer Shortcuts
Keyboard and Image-Editing Program shortcut tips

Using Sketches
Provide a sketch or use a sketch from the many online resources

Email your ideas to thedigitalproject@gmail.com by October 22nd to be considered as a featured scrapper.
Keywords: Beginner, Creative Team Member, Digital Image Pro DIP, Sketches, Digital Scrapbooking Tutorial

Thursday, October 05, 2006

Learn to make custom brushes

Tutorial by Angela Spangler, Creative Team Member

For this layout I made brushes out of elements that weren't brushes before. To do this, open the element you want to turn into a brush.


Select>All. Then go to Edit>Define Brush Preset. Then name the brush and save. You might want to desaturate the element before making a brush if you want a more uniform color to your brush. Play around with it and determine your preferences. (Directions are for Photoshop CS).

Dig around your photo editing program or look online for tutorials on how to make brushes (or similar) for your editing program. I also went outside the box and made a two page layout with landscape pages.


More resources:
Creating, saving and organizing brushes written by Rhonna Farrer for 2peas

Creating brushes from doodles written by Traci Turchin for 2peas

Creating and using custom brushes in Photoshop Elements

Easy Elements Photoshop Tutorial for making brushes

Beginner brushes tutorial in PS CS by digital scrapbook place

Installing brushes (for ready-made brushes) by dsp

Saving png files as brushes in Paint Shop Pro by dsp

Creating Easy Patterns with Brushes in PSE written by Erica Hernandez for 2peas


If you know of any other tutorials for making brushes, please let us know! Thanks Angela for your gorgeous work!

Keywords: Adobe Photoshop, Advanced, Beginner, Brush - Brushes, Creative Team Member, CS2, Custom, Digital Image Pro DIP, Paint Shop Pro PSP, Photoshop Elements PSE, PS7, Resources

Sunday, October 01, 2006

Welcome to our Debut & Enjoy a Freebie!

(Please bare with us on the blog design for now. We will be changing the blog template very soon in order to have a design that best shows off our tutorials.)


Do you want to have a tool for scrapbooking with infinite possibilities? A tool that is always at your fingertips? A tool that you most likely already use several times a day?


I'm talking about your computer, friends. The hope for this blog is that you will come to be a master of your computer skills that can be applied to your scrapbooking and paper crafts.

We will be bringing you tutorials, sketches for layouts, fresh ideas, cutting edge techniques, interviews within the industry, and features of everyday scrappers just like you. Check out the sidebar for links to more sketches, and all kinds of tutorials for all levels of scrappers.

To celebrate our debut, today's issue of the blog will feature two-page layouts (our focus for this coming week) as well as a freebie digital downloads from our own Angela Spangler, and Betsy Veldman.

I hope you will enjoy this blog as much as we all love scrapbooking and everything digital!

Two-page layouts
Every weekday this week we will bring to you a fresh idea for two-page layouts. We will offer short tutorials and/or sketches along with the examples. The layout title "Free" above, two page 12x12, designed by Julie Ann Shahin, was created for Becky Fleck's Page Maps October Newsletter. Go to www.pagemaps.com to download the sketch and the new pdf newsletter. Thank you to Becky, you all should know she is just the sweetest person. Questions or comments about that layout? Post in the comment section below or email thedigitalproject@gmail.com and Julie Ann will respond.


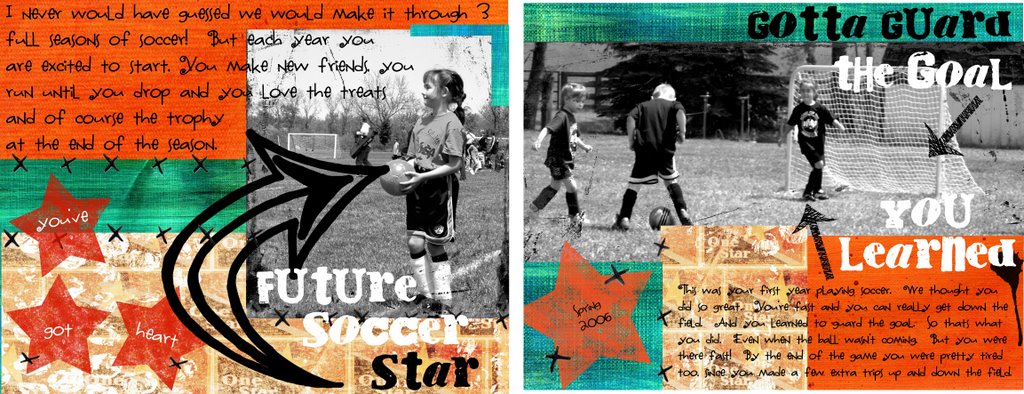
Layout: Future Rock Star by Beth Price, Creative Team Member

Click on image to enlarge.

Beth's Tutorial: Here’s a double page with simply altered photos. I also did a sketch for page one.

Supplies: I used the Rock Star Free Pea kit from 2Peas. Also Arrow Fun by Shawna Clingerman. Title font is Cry Kitty. Journaling font is Fontmoocher.

Instructions: Pages created in MS Digital Image Pro. Photo was converted to B/W by first dramatically increasing the contrast setting on the color photos and cropping to desired size.

Next, I selected the Black and White conversion under Effects.

Then I applied an Overlay available in the Rock Star kit to the photos to give them the grunge look. Just drag and drop the overlay onto the picture and then resize by dragging the edges to fit the picture.

Other tips: To change the color of brushes or embellishments such as the stars with DIP:
select the element and under Effects select “Fill with Color”. You can match a color by going to “More Color Choices” and using the dropper to select a color on the screen.

If the color isn’t a great match, as was the case while I was working with these stars, I closed the “Fill” effect then.

Selected “Hue and Saturation” under the Touchup menu. It allowed me to move the hue on the stars to a darker red I preferred.

Questions or comments about this layout? Please post a comment below or email thedigitalproject@gmail.com and it will be forwarded to Beth.

Freebie: Free Digital Scrapbooking Downloads to celebrate our Debut!
My jaw dropped when I saw this beautiful kit Angela made just for the readers of the Everyday Digital Scrapboking Idea Blog. Thank you Angela! Be sure to check out her blog.
Download Angela's Blue Kit

Enjoy Betsy Veldman's Doodled Overlay. Really fun to layer over striped digital paper for a fun, instant doodled look or print it on striped paper to use on paper LO's.

Download Link

Step-by-step Instructions
with Screen shots on how to download digital kits

Digital Scrapbooking FAQ's

Thank you for being part of our debut. Please pass the word to your friends about us.
Happy Scrapping from Julie Ann, Andie, Angela, Beth, Betsy, Cammy, Martha, and Sherry!

Sunday, September 10, 2006

Learning - Tutorials

Our blog debuts October 1, 2006. In the meantime here are some great resources.


What is Digital Scrapbooking? Podcast
A session from the Digital Talk Radio site featuring Cathy Zielske (mp3)


How to start digital scrapbooking
Article written by unknown designer for 2peas with information on what equipment you need to start.


Beginning Tutorial by Rhonna Farrer
Rhonna Farrer, a legend in the scrapbook community, shares easy-to-follow tips for creating your first layout using a free kit from the 2peas website.


Beginner Tutorial for layout with custom chipboard letters (PDF file)
Julie Ann Shahin walks you through a digital layout with screen shots and useful directions.


Photoshop Elements Tutorials
Article compares pros and cons of PSE as well as offering tutorials written for 2peas on how to do drop shadows, re-sizing, using rubons and digital alphas, digi toolbox FAQs, drag and drop method, lightening photos, layers, paper tearing, easy b&w conversion


Adobe Photoshop
Article from 2peas includes overview as well as the version differences (CS and CS2), and the pros and cons. Tutorials listed include: Getting Started in Photoshop; Text on a Path; Bezier Curves; Loading & Unloading Brushes; Using the clone tool; Lightening Photos Using Threshold & Levels; Brushes; Paper Tearing; Eraser Tool; Color spotting B&W photos; Shadows & Highlights; File Size FAQ; Actions FAQ; Styles FAQ; Resizing photos or elements FAQ; Lasso tool FAQ; Tool Box FAQ; Calibrating your Monitor FAQ; Understanding resolution FAQ.


Adobe Illustrator
This 2peas article includes an overview, information on vector vs. bitmap, tools, pros & cons, and a few links to off-site tutorials for text and illustration.


Memory Mixer
Information about this starter program includes overview, cost and features, tools and functions, as well as the pros and cons written for 2peas.


Microsoft Digital Image Suite/ Digital Image Pro
This article talks about the user-friendly program with an overview, screen shots, and pros/cons on the 2peas site.


Paint Shop Pro
2peas article talks about the overview, tools and features, and the cons.


Tags: tutorial
Keywords: Adobe Photoshop, Beginner, CS2, Digital Image Pro DIP, Paintshop Pro, Photo Editing, Photoshop Elements PSE, PS7, resources