See how easily you can make these fantastic gifts and cards
Featured Reader: Lauren Teather
 Project posted with designer's permission
Click on image to enlarge
Ceramic floor tiles - Mine are 8"x8" and I got them at Home Depot for about $0.63
Modge Podge
a sponge paint brush
Your layout - Mine was 7.55"x 7.55" to show a small border of the tile around the edge of the layout.
How to:
1. Design your layout - I designed my layouts in Photoshop Elements using a digital kit from Rhonna Farrer and some elements from Heather Ann Melzer.
2. Print your layout off - I printed mine on Epson Heavyweight Matte Photo Paper and then trimmed it.
3. Pour some Modge Podge on top of the tile, about the diameter of a golf ball or so. Use the sponge brush and spread it around, all the way out to the edges, covering the whole tile.
4. Center your layout on top of the tile, and lay it down right on top of the modge podge adhesive. Smooth it out from the center, making sure that you don't get any modge podge on top of the print out (it just leaves a shiny streak). Smooth down the edges and corners and make sure there aren't any bubbles.
5. Spray the whole thing with a clear top coat, spray sealer and let that dry.
6. Voila!
Friend Card Digital/Hybrid Tutorial by Betsy Veldman, Creative Team Member Friend Card Tutorial
 Friend Card Tutorial
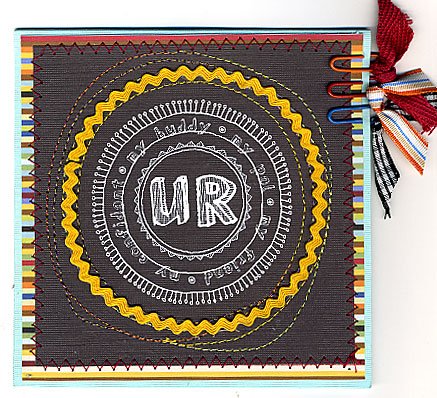
Create a new document in Photoshop. Click the shape tool and create a square of the desired size, filling it with black.
Open the digital image you wish to use for the card.
Go to Enhance>Hue/Saturation and drag the lightness slider all the way to the right to turn your image white. Place it in the center of your black square, moving it to the front if need be by clicking layers>arrange>bring to front.
Print onto cardstock.
Finish card by layering with patterned paper and cardstock. I stitched around the circle with variegated thread and also applied some rick-rack.
Credits:
Digital Image: Sandy Kreiger “Talking in Circles” brushes (Downloaded from Two Peas in a Bucket)
Cardstock: Die Cuts With a View
Patterned Paper: KI Memories
Keywords: Hybrid, Brushes, Card, Gift, Photoshop, Photoshop Elements
Featured Reader: Janet Lawrence Project posted with designer's permission
Click on image to enlarge
Supply List: Project posted with designer's permission
Click on image to enlarge
Background Paper - Shabby Princess, Flea Market Chic
Frame - Katie Pertiet
It's Your Day - Nancie Rowe Janitz, Schmootzy Alpha 2
Make A Wish, Flower and Little Girl - Paper Relics, Hope Wallace
Keywords: Card, Card Gift, Vintage, Vintage Card, Birthday Card, Hybrid, Digital, Photo Gift
Subscribe To Our Newsletter
Subscribe for Daily Updates Delivered to Your Inbox (or enter your email into the sidebar box to the right)
Keywords: Card, Card Gift, Vintage, Vintage Card, Birthday Card, Hybrid, Digital
Gift, Gift tags, Christmas, Holiday, Photoshop, CS2, Adobe Photoshop, Advanced, Digital Image Pro DIP, Featured Reader, Paintshop Pro, Photoshop Elements PSE, PS7, Resources, Gift Ideas, beginner, hybrid, Paint Shop Pro, PS7


2 comments:
For the tiles (which are gorgeous) what kind of top coat do you spray it with exactly? Are the top coat and spray sealer the same? Or is that two diffent steps? Sorry for the dumb question.
Hi! This is Lauren, who made the tiles.... yes, the top coat and spray sealer are the same. If you go to Michaels or even Walmart or Home Depot or something, and look in the spray paint department, and just look for a clear spray... one that is suitable for paper. The one I used was created by Krylon... it's an Acrylic "crystal clear" top coat. I hope that helps you. The best part about these tiles, if that if you screw one up... oh well, it's only $0.63 cents down the drain :) hee hee!
Post a Comment