How To Create Your Own Paper with Tree Design

Create a Background for Your Woodsy Creatures!
Digital Scrapbooking Instructions by Sarah B. Meyer, Creative Team Member
Digital Scrapbooking Instructions
 by Sarah B. Meyer, Creative Team Member
Screenshots are from Photoshop CS3, but tutorial can be adapted to any software.
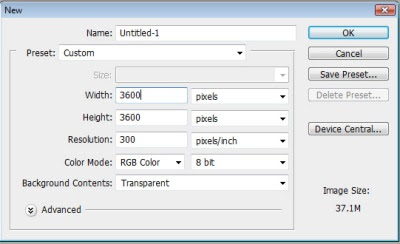
1. Create a new blank document, 3600px by 3600px, 300ppi.
2. I wanted a muted green so I chose #909d79. In Photoshop, press Alt+Delete to fill the the document with your foreground color.
3. There's a nice evergreen tree custom shape built in to Photoshop that I am going to use to dress up this paper a bit.
Access the Shape tools by pressing U and choose the Custom Shaper tool. Find the desired shape.
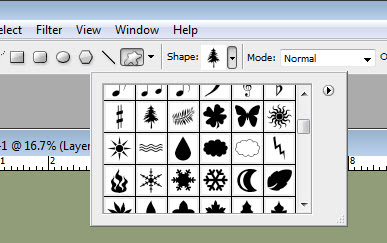
If you don't have this tree custom shape, a tree, leaf or pine cone image would work well too!
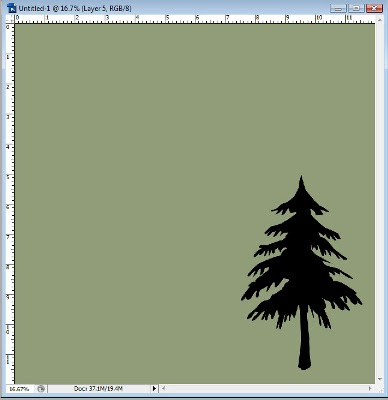
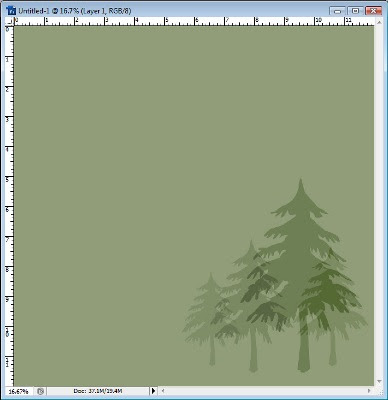
4. Create a new blank layer above your green background. Switch your foreground color back to black by pressing D. Using the custom shape tool, draw a large tree in the corner of your page. (Make sure the Defined Proportions box is clicked or that you hold down the Shift key while drawing so that your image isn't skewed.)

Mention this ad and get free May Arts Ribbon with your first order at The Shaker Box!
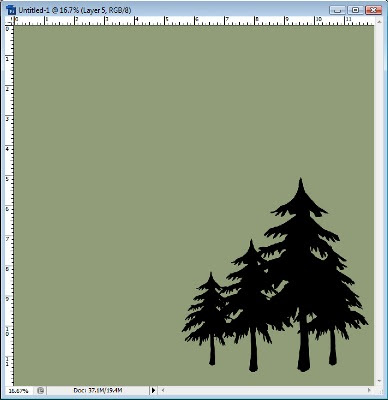
5. Draw several more trees of different sizes, each on their own layer. We'll play with the blending options and opacity in the next step, and having them overlap a bit will add more interest.
6. In the layer palette, change the blend mode from Normal to Overlay. Reduce the opacity to about 40%. Do this for each shape layer, differing the opacity for each layer. You may also like the effect of the Multiply or Color Burn modes. If you want the shape to appear in a lighter color than the background, use the Hue/Saturation menu (Ctrl+U) to alter the color to a light gray or white and test the Screen or Soft Light blend modes.
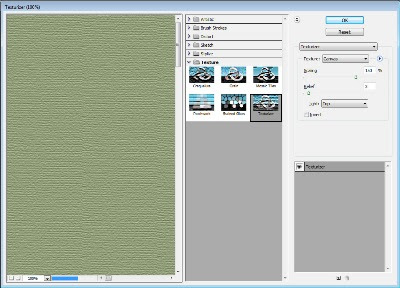
7. Now add some texture to your paper. With the background layer selected go to the Filter>>Texture>>Texturizer menu. For this paper I chose a Canvas texture, Scaled at 150%, a Relief of 3 and the Light Source at the Top. Click OK.
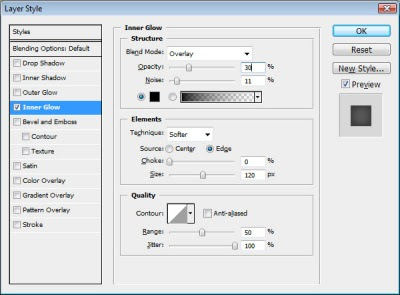
8. For a bit of wear to the edges of the paper, add an Inner Glow in the Blending Options for the background layer. I changed the Blend Mode to Overlay, the Opacity to 30%, the Noise to 11%, the Color to black, the Size to 120px and the Jitter to 100%.
Here's my completed paper. Have fun creating your own woodsy-themed paper!



2 comments:
Thanks so much for the clear and easy to understand tutorial!
Wow...You are my Hero, i just loooove what you do, i am a novice, but my greatest pleasure is playing around in my photoshop.
I have made my very first Paper and can't wait to make more and of course more!
I would love to see s Tut. on Animation in psp, and how to create kits to go with my papers,oh and how do you put it all together, Boy, i'm so excited and can't thank you enough for sharing your knowledge, you make it all so easy to understand...
Cheers for now...
Carilyn.
Post a Comment