Projects You Can Create with Children!
Polly Put the Kettle On…
Have a Tea Party with Cute Paper Tea Cups!
Hybrid Tutorial by Beth Price,
Creative Team Member
Have a Tea Party with Cute Paper Tea Cups!
Hybrid Tutorial by Beth Price,
Creative Team Member

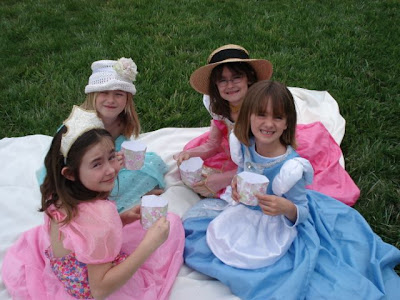
For a fun girl party, make your own paper cups for a girly tea party outside!
Here I tell you how I made this template, and how you can create these cups in a palette of your own choosing.
I found this template online for a cute cup you can print on 8.5” x 11” paper.
Creating the Tea Cup Template
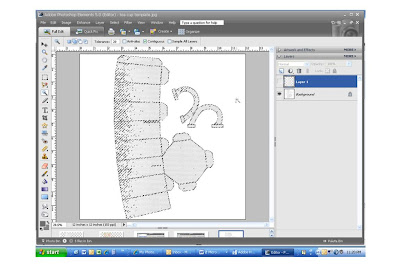
I scanned the template with my scanner, loaded the .jpg file into PSE5, then used the magic wand to select the pattern. I used a Tolerance of 20, and checked contiguous. No anti-alias, No sample all layers. The area should have blinking dotted lines (marching ants) surrounding the template, but not the background.
(Click on image to enlarge if you wish)
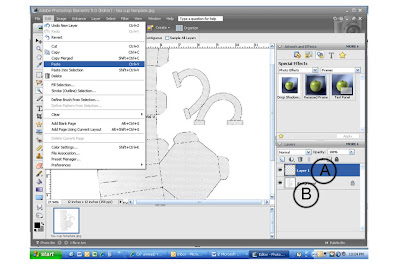
I copy and pasted the pattern into a new layer (A) and deleted the background layer (B) so that I now have a portable template ready to impose on any digital paper.
(Click on image to enlarge if you wish)
Putting the Template onto Paper
You can print this template directly onto the back of patterned paper. Then cut out the cup pattern and assemble.
But if you have digital paper you want to use, save ink and only fill the portion you need inside the pattern.
You do that this way –
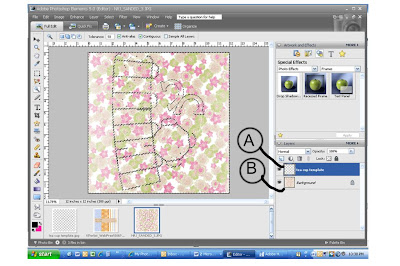
Open both your cup template file (A) and the paper you want to use (B)
Drag the template over the top of the paper and select it with the magic wand.
(Click on image to enlarge if you wish)

Switch to the pattern paper layer (B)
(Click on image to enlarge if you wish)
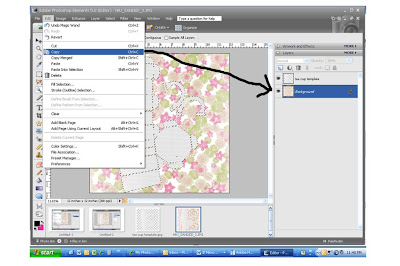
Select “copy”, open a new layer and paste into the new layer. (C)
Delete the paper layer and the template layer.
(Click on image to enlarge if you wish)
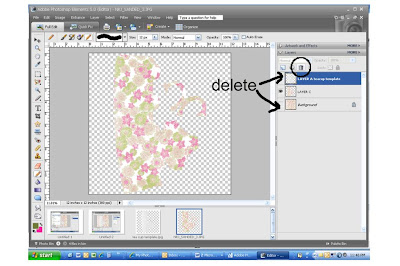
You should have a new pattern filled with your digital paper.
To see the fold lines better, I enhanced them this way:
I selected the new pattern
Go to Edit>Stroke (outline) Selection
(Click on image to enlarge if you wish)
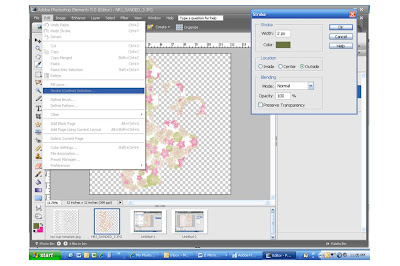
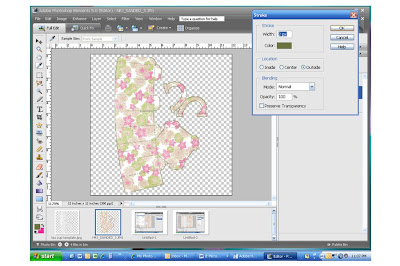
I chose a color that blends with the pattern, and line size of 2 pixels
When you hit OK, the lines will appear.
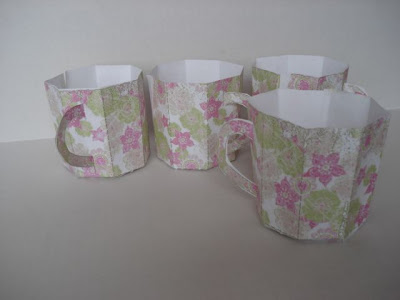
Now you’ve got your cups ready to assemble, and girls love a party! These make great party favors or just a fun play date.
Free Teacup Template Download
 Please leave Beth feedback as we work hard to bring you free tutorials!


4 comments:
beth, i love this hybrid project! making paper teacups will be so much fun and they will be fabulous party favors! thanks for the great tut!
:) M
This is such a cute project! I think I may just have to do it for my 3-year-old's birthday party!
So cute Beth! :)
Thinking of using this for my daughters birthday party. Thanks for sharing your inspiration
Post a Comment