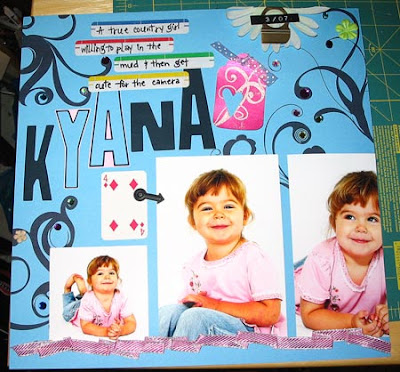
Hybrid Tip: Add Hip Digital Brushes To Multi-Photo Layouts!
Hip Hybrid Brushes Tutorial by
Cammy Plummer, Creative Team Member

Layout: Kyana
Instruction:
1. Open a new document in Photoshop. Arrange brush layers and photos as desired. At this stage, it is also useful to try out a few different background colours to see what appeals to you.
2. In a separate document, print the photos.
3. On a 12x12 sheet of coloured cardstock (or whatever size your printer will accomodate), print only the brush layers on a white background.

4. Add photos and embellish brush images with gems and flowers.
Related Tutorial: How to Print 12x12 Even if You Don't Have a Wide-Format Printer
Credits:
Brushes: Anna Aspnes, Hipster Plumes 2, Designer Digitals
Letter stickers: Imagination Project
Stamp: Autumn Leaves
Paint: Twinkling H2Os
Tag: Avery
Paper punch: EK Success
Pen: American Crafts
Paper flowers: Prima
Arrow and label plate: 7gypsies
Brad: Scrapbook Sally
Label: Dymo
Other: gems; ribbon; labels; playing card, silk flower; thread
If you enjoyed today's tips, please sign up for our newsletter as well!


No comments:
Post a Comment