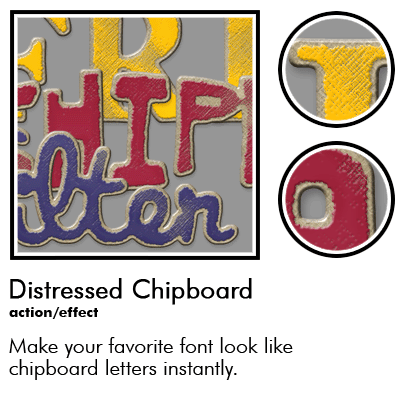
Make Your Own Chipboard Words with this Free PS/ PSE Action
update at bottom of post
Digital Scrapbooking Tutorial for Creating Your Own Elements
by Julie Ann Shahin,
In order to complete this tutorial, you'll need this free download courtesy of Atomic Cupcake. This link takes you to their site so you'll need to click on the return arrow on your browser to come back to the blog. Atomic Cupcake Chipboard ActionDigital Scrapbooking Tutorial for Creating Your Own Elements
by Julie Ann Shahin,
founder/editor
This works for both Photoshop and Photoshop Elements.
 1. Download the chipboard action. Scan it with your Norton Antivirus software as you should with all downloads. Right-click on it the zipped folder and select "Extract All..." Install the action according to the directions accompanying it.
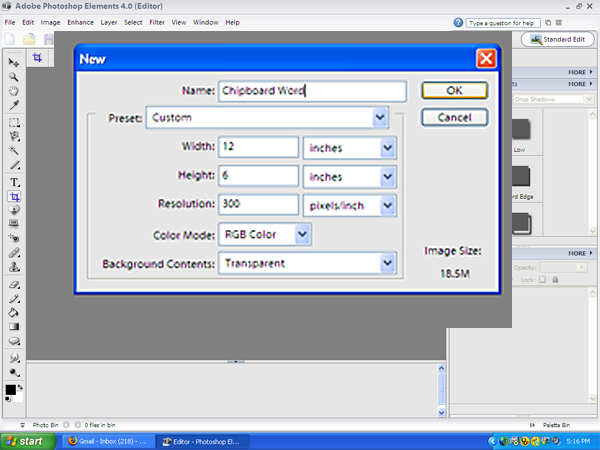
2. In Photoshop Elements, create a New Document. I want my letters to be fairly large, and this action works better with larger letters. My document for my chipboard word will be 12" x 6" 300 dpi, transparent background.
3. I type my word (happy) with the font "elise" at size 72.
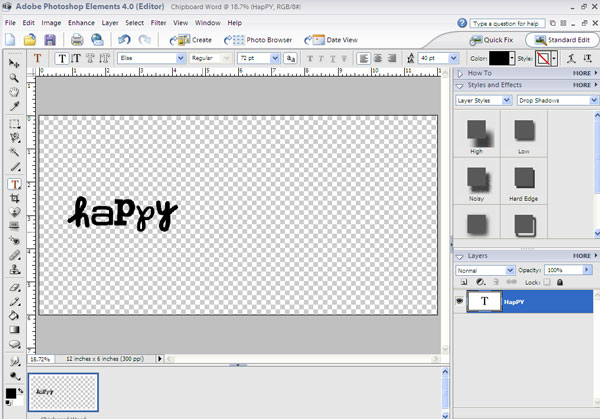
4. Next I use the move tool. Holding down the shift key, drag the corner of the text box to size that is your personal preference.

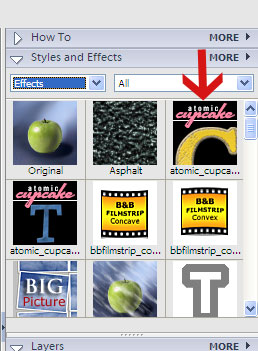
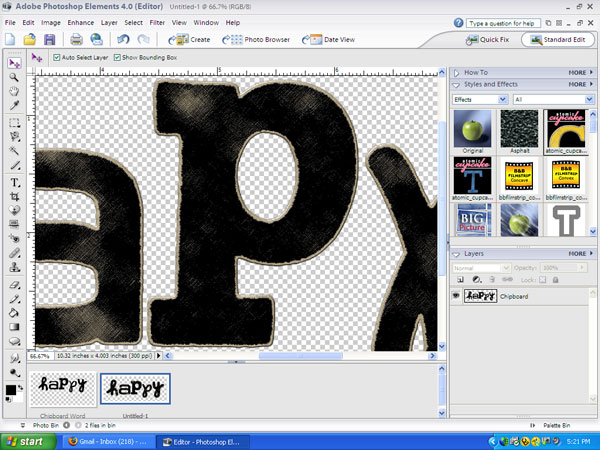
5. In your Styles and Effects palette, Select Effects, All to see the Atomic Cupcake action icon. With your text layer selected, double-click on the icon. Allow the program to run the action automatically, it might take several minutes depending on the length of your word.
6. The action will create a new document which has your new chipboard word in it. There will be a "dancing ants" type line around your letters. Click ctrl-d to deselect the word.
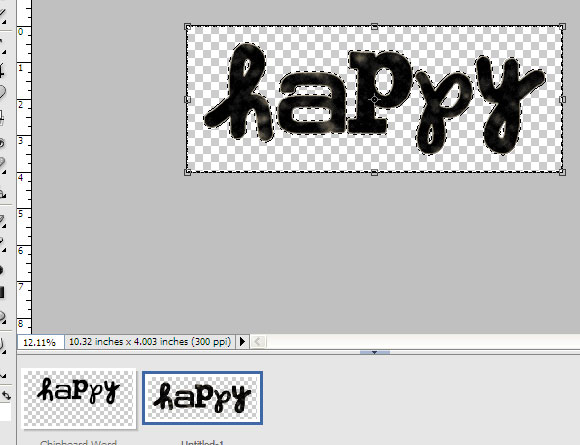
7. You may zoom in up close to see the distressed chipboard up close.
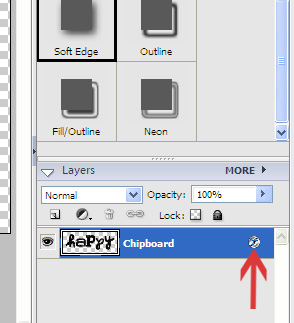
8. You may add a drop shadow if you wish. I use a soft edge shadow this time.

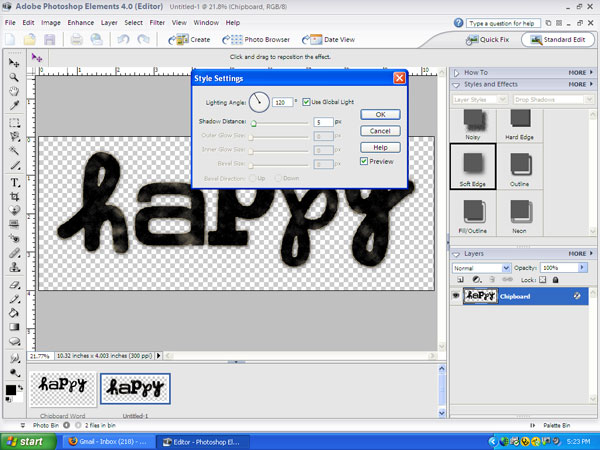
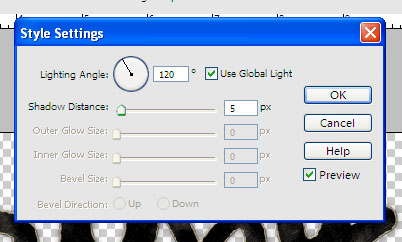
7. To adjust the shadow, double-click on the f icon in the layer.
8. I adjust my shadow distance between 1 - 5 for it to be realistic.
9. Congrats! You've created your chipboard word.

Additional Resources:
Create Digital Die Cuts for Scrapbooking at Simple Scrapbooks
Create a Tag - 2peas Tutorial
Scalloped Edges - 2peas Tutorial
Curved Corners and Other Shapes - MS DIP/DIS - 2peas Tutorial
Create Your Own Transparency Elements - 2peas Tutorial
Element Creation Tutorials at Digital Scrapbook Place
Make a Flower in Photoshop Elements - Digital Scrapbook Place
If you liked this post, sign up for our newsletter.
Keywords: Adobe Photoshop, Beginner, Create Your Own Elements, Creative Team Member, Custom, Photoshop Elements PSE, PS7, Resources
Update: Check out Katie Pertiet's Digital Video Tutorial on how to add sewing to your layouts without using a sewing machine!


3 comments:
Love love LOVE this distressed chipboard look! Thanks so much for sharing the info. I'm in awe at anyone who can do amazing digital stuff.
Thank you so much for sharing this information!! I just spent hours searching for just the right chipboard alpha to complete my holiday cards. With your tutorial, I did it myself! Thanks for your clear instructions and great ideas!
ohmygosh! I have been looking for this tutorial. Thank you so much!
Post a Comment