How to Create an Epoxy Bubble Sticker or Plastic Charm as Digital Art
Realistic Elements for Digital Scrapbooking
Using Photoshop Elements

by Beth Price, Creative Team Member
Using Photoshop Elements

by Beth Price, Creative Team Member
Creating an epoxy dragonfly from a child’s hair clip
(Note from Editor: If this is something you crafted, you may use it to create and sell digital elements. However if it is store-bought, copyright prevents you from using it for sale or re-sale - you may use it only for personal use once you make it into a digital element. The exception would be vintage items older than 25 years as the copyright expires.)
I saw this hair clip and thought it would be so cute in a layout along with my daughter actually wearing it. So I am going to make it into an embellishment – I’ll give you two looks. I’ll show you how you can create an epoxy bubble sticker, or just create a dimensional-looking charm.
First get an image to work with. This was small, so I scanned it. You could also take a high resolution photo on a white background.
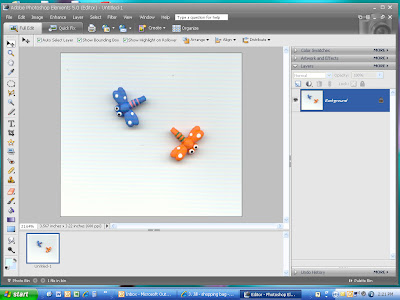
1.Scan the hair clip at 600 dpi
2.import into PSE5
3.use magnetic lasso to select the image and copy to a new document with transparent background (feather set at 10)
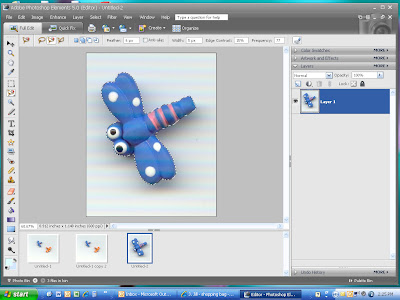
4.copy and paste into a new document with transparent background
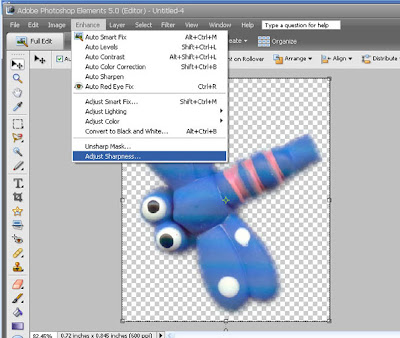
5.You may want to sharpen the image if the copy and paste left it a little fuzzy around the edges. To do this, at the top tool bar, select Enhance / Adjust Sharpness
To create an epoxy bubble sticker:
1.Select the shape tool, and draw a circle layer underneath the dragonfly
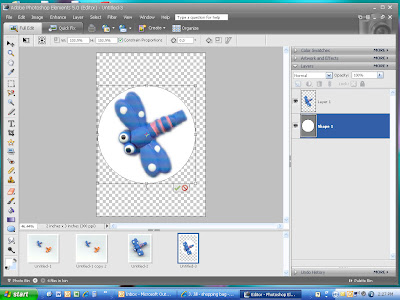

2.Apply these layer style effects:
1.Bevel – Simple Sharp Outer
2.Translucent Glass
3.Wow Plastic – clear
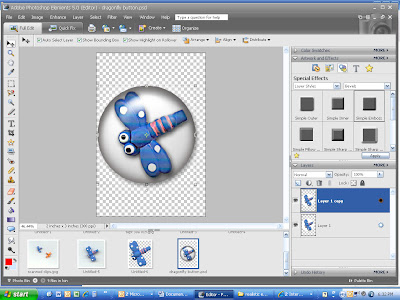
You should have a bubble looking sticker now. Save as a .png or .jpg file to use with any digital project.
To create a plastic charm:
Apply these Layer Style Effects
1.Select Layer Style / Emboss / Simple Emboss. Adjust the size and distance until you’re satisfied with the effect.
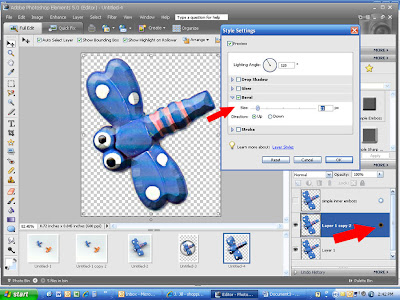
2.Add a drop shadow to increase the 3-D effect. Adjust the size and distance until you’re satisfied.
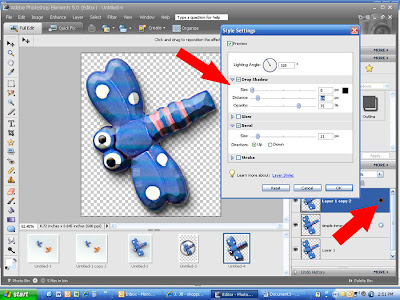
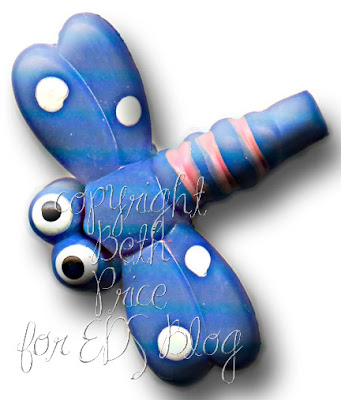
3. Save as a .png or .jpg and use on your next digital project

Mention this ad and get free May Arts Ribbon with your first order at The Shaker Box!


8 comments:
WOW this is great, you make it seem so easy! I need to get ready for work, but when I get home LOOK OUT! lol I am so going to try this! Thank you
I tried making the Epoxy Bubble Sticker. When I added the Wow Plastic - Clear my graphic totally disappeared. I don't know what I've done wrong. Any suggestions?
OH wow. This is neat. I have PS CS 3 and I'm searching for the plastic and glass to use. Looking at my styles I'm not finding exactly the same thing...I will continue to search.
Is the a simple way to save your tuts? You don't have a printer friendly view that a person could copy or seea way to save as a pdf.
GREAT TUT!
I have the same problem with the plastic making everything disappear as the person above.
I'm using PS though. Theses are neat tuts.
thanks for all your comments! if your image is going blank, my first thought is to create a duplicate of the original layer and apply the WOW style to it. see if this makes a difference. then you could try the other styles after.
Thank you for suggestion. I actually tried doing just that - making a duplicate and then applying the Wow Plastic. It worked!
i'm using Photoshop Elements 6 and i don't seem to have any layer styles. is there a different way of doing this when it comes to PSE6?
I like this post .
But you can get more on Epoxy Label
This will really help you to be perfect . Click Here
Post a Comment