Day 2 Of Birthday Bash
EDS Birthday Blog Party Day 2
Thank you to the following EDS Friends who left a link to their blog.
Please take a moment to check out their blogs, mingle like good party guests, and leave a friendly hello!
colleen
kelli
yezenia
cindy
juls
brooke
aimeslee
bucket
cpbunch
maggie
di
beth
julie k
Thank you to the following EDS Friends who left a link to their blog.
Please take a moment to check out their blogs, mingle like good party guests, and leave a friendly hello!
colleen
kelli
yezenia
cindy
juls
brooke
aimeslee
bucket
cpbunch
maggie
di
beth
julie k
Join us all week as we celebrate our first ever birthday. Add to our party by linking your blog in our comments section.
The 50th person this week to add a link to their hybrid or digital tutorial will receive an extra special RAK. Please add your link in our comments section. At the end of the week one of these persons will be awarded the title of Guest CT member for the EDS Blog for November, December and January!
Be sure to party and mingle with all those linking our blogs.
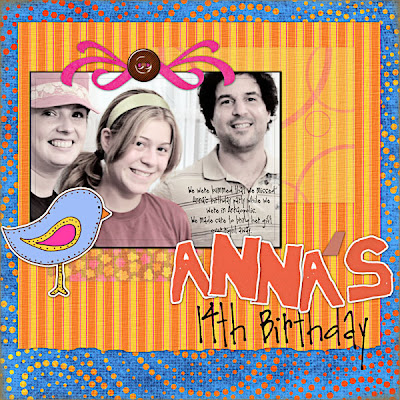
 My niece just turned 14 in September.
Layout created with the EDS Blog Birthday Kit - free to all newsletter subscribers.
Newsletter will be sent on October 7th.
Credits: Template: Michele Ciola for EDS Blog
Blue paper, bird sticker: Julie Kelley for EDS Blog
Other papers: Di Hickman for EDS Blog
Button: Maggie Lamarre for EDS Blog
Alphabet: Julie Ann Shahin for EDS Blog
Font not included in kit: AMC Chatty available at Scrapgirls

Now we will share a new birthday-themed tutorial for all our party guests!
************
Digital Scrapbooking Tutorial by Maggie Lamarre, Creative Team Member
Using the EDS Blog Birthday Kit
Hi Everyone:
I have been trying to figure out what every single options in PS does and have discovered some great tricks.
Today I will go over vector mask and match color mode and what they do, and how you can use them to improve your pictures.
- Vector mask are great for defining images and it is sharper than using layer mask.
- Match Color is used to match colors between several layers. I mainly use it to tweak the colours in my image precisely to a colour I have in mind. It is also great for correcting colour cast or to add luminance to a picture.
Let’s begin
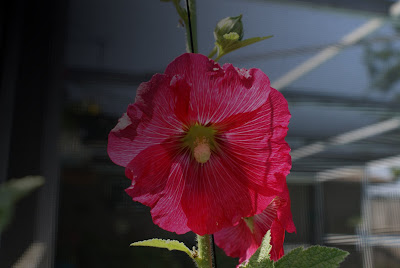
- Open an image in my case I wanted to mask my pool screen enclosure and have the flower really pop only in certain areas and have a greater depth of field.

1.make a copy of the image, then select image, mode turn the picture into grayscale.
2.convert the image back into RGB.
3. paste the other copy onto the layer so now you should have a grayscale layer
and colour layer.
3.Now on the colour layer selected we are going to choose Vector Mask under
Layer select reveal all.
4.Now you should see the mask on the layer.
5.Select the gradient tool from the tool menu and select transparent or black depending on how much you want to mask, and apply.
Here’s where the fun really begins

6.on the layer with the mask, select image adjustment and select match color.
7.Now if the image has an unnatural colour cast you can click on the neutralize and adjust to your liking.
8.We are going to play with the colours a bit here, make sure preview is selected.
9.On the slider for color intensity slide to the right to pop to tone it down slide to the left.
10.if too much colour you can adjust the fade which works similar to the fill option in the layer palette.
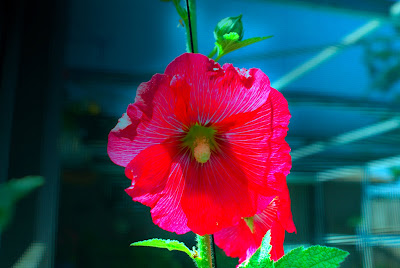
11.As this point you can adjust the luminance as well and it ok, if you want more pop like I did on this pic I use the burn tool, once satisfied I turned the layers into a smart object and save.

Have fun create your ART,
Maggie Lamarre
Please join our party!!!


No comments:
Post a Comment