Discover the Joy of Creating Your Own Digital Charms
One of my favorite things to do is play around with Photoshop Elements 5 filters and styles and see what I can do on my own. So for this holiday layout, I had seen some metal snowflakes in my local scrapbook store, and I wondered if I could add them digitally.
Here is my page with the metal snowflake charm.

Steps to create the charm:
- I first opened a new file, with transparent background.
- Then selected a brush I had already purchased earlier, Snowflake Brush kit by Michele Coleman.
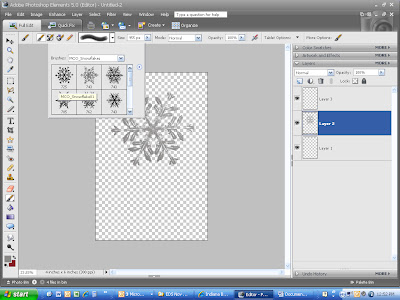

- Open a new layer and create a snowflake, filling with gray.
- I duplicated the snowflake layer
- I went to Effects – Styles – Wow Plastic and chose gray plastic style.
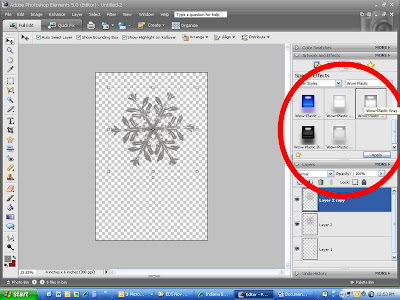
- Then I went to Effects – Styles – Wow Chrome and chose Shiny Edge style.
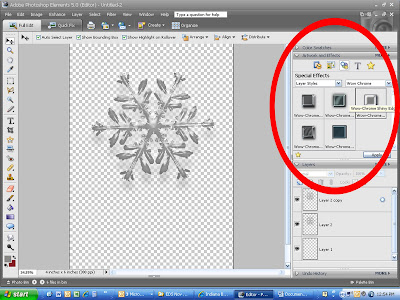
- I played around with the settings a little, but clicking on the sunshine icon in the right side of the layer palette next to the snowflake layer.
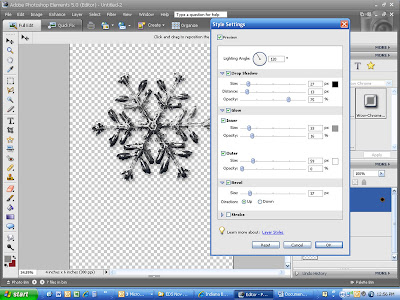
When I was happy with the effect, I deleted the unused layers and flattened the image, then saved as a .png file for use at any time.

Mention this ad and get free May Arts Ribbon with your first order at The Shaker Box!


No comments:
Post a Comment