How to Alter a Plain Envelope into a Cleverly Designed Envelope
Creating Your Own Personalized Envelopes
Digital Scrapbooking Tutorial

by Amy Duquette, Creative Team Member
Instead of using personalized address labels why don't you go one step further and create your very own personalized envelopes. If you have a printer that will print on standard sized #10 envelopes then you are ready to go.Digital Scrapbooking Tutorial

by Amy Duquette, Creative Team Member

Instructions for Custom Envelopes:
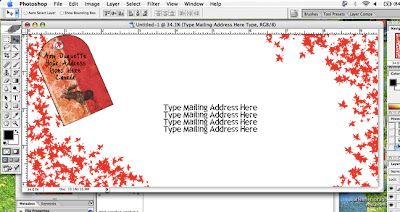
1. Create a new 9.5 x 4.12/ 300 dpi document in Photoshop (or whatever program you prefer).
2. Decorate your envelope with your digital elements.
3. Type in your return address in the upper left corner. (be sure you leave some space above and beside your type to allow for any problems if your envelope moves in the printer etc) and type in the Mailing address in the center of the envelope.
4. Load your printer with your envelopes, making sure you have them loaded with the right side up
5. Change your page setup if need to print on envelopes and make sure your "Media Type" is set to "Envelope" before printing.
6. Sit back and relax while your printer does all the work :)

Some tips:
-Use a fairly good quality envelope for the best results.
-You can adjust this tutorial for any size envelope as long as your printer can print on envelopes.
Please let Amy know you enjoy her ideas and leave a comment! thanks!!! Then check out our sponsors.


1 comment:
This is totally one of those "why haven't I ever thought of this before" ideas! I always print sheets of return address labels so today I'm going to load up my printer with envelopes and print up some cute designs! Thanks for the great idea!
Post a Comment