Digital Alphabet Freebie for You plus Instructions on How to Make it Yourself!
 Announcement: Want to win a copy of the current issue of Scrapbook Dimensions magazine? The one with me on the cover? Go to Cindy's blog and enter her blog giveaway!
Rule of thumb if you are not creating the font from scratch - use a commercial-use font- there are several sites that provide them: Larabiefont.com, myfont.comAnd for others do a google search.
I am going to be using a commercial font that I purchased and some vintage fabric that I purchased in Paris 5 years ago. (Note: If using a patterned fabric, be sure to follow copyright rules if creating for commercial purposes).
Supplies: For this purpose I am going to show you how to create just 3 using paint shop pro and the filter Eyecandy 4000 by alien skin.
Let’s begin: I have scan the fabrics (BTW the copyright and moral to the fabrics have expired) and installed in the pattern folder and texture folder of Corel.
In Paint Shop Pro: (instructions are good for most software programs with minor adjustments)
- Open a new document. I am using 2400x2400 300 dpi so I can have room.
- Select the font and the size of 1200 antialias checked and type the foreground and background colour is a light pink. Create as vector.
- Now on the keyboard hit ctrl +A then ctrl+F to float the selection.
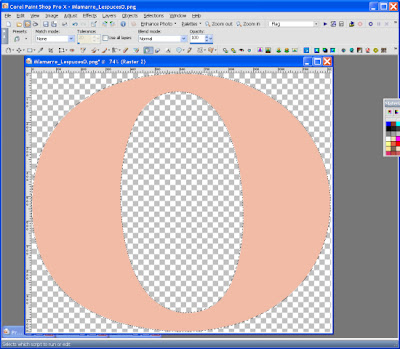
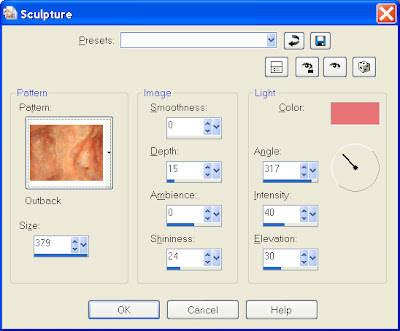
- Next select effects, texture effects, sculpture and apply the pattern. Play with the selection until you are satisfy, in this case here’s my selections
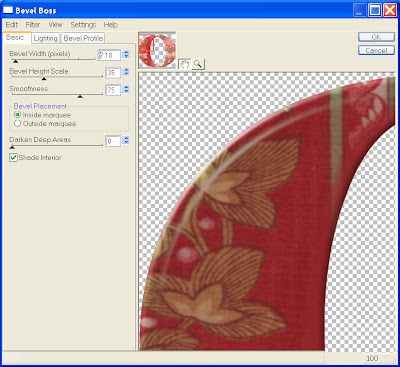
- Next we are going to apply a bevel boss to give it the round feel of a soft chiseled alpha. Select effects , Select plugin then select Eyecandy 4000, then bevel apply the default below.
- Now at this point you can add a grunge to the alpha, flowers, swirls etc..
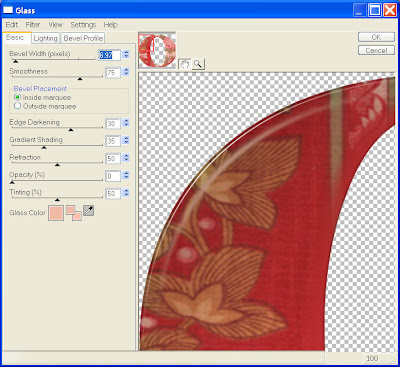
- I choose to add a glass layer to the alpha. effects , Select plugin then select Eyecandy 4000 select glass select the default below and select the correct colours for the shadow.
Here’s the final alpha, now I did every single alpha the same way.
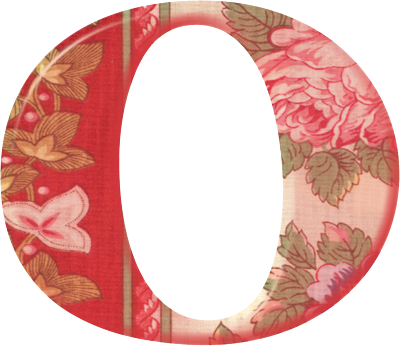
Here’s another one I use 26 different fabrics to create this alpha.
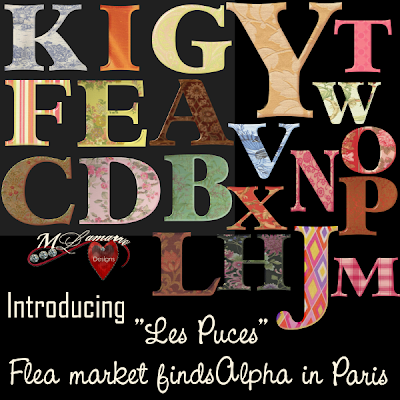
You can download the alpha for free here.
Don’t forget to leave a comment and let us know what you think.
Have fun, create your art!
Maggie
Please visit our advertisers!


6 comments:
Thanks for the tutorial...any chance of showing us how to do it in illustrator.....newbie illustrator here!
Thank you for the wonderful tut, also for the advice on copyright issues!
Thanks for the beautiful alphas and the tut. Will try it sometime.
Thank you for the beautiful alphas - you must have had a wonderful time shopping for the material!
Thanks for the tutorial. I have been looking for a good alpha tut. If it is ok I would like to list your link in my tutorial section on my blog. Leave me a comment to let me know if this is ok.
http://magicallmoments.blogspot.com/
Sure would appreciate it if you would tell how to SAVE alphas...sure are big as they are...what size exactly>>>>what kind of file??? jpeg,gif,png? Paint shop directions. Please!
Post a Comment