Introducing Miss June: Di Hickman - Creative Team Guest Member
Making Your Own Templates:
Scallop Edged Template
By Miss June: Di Hickman,
Creative Team Guest Member

Scallop Edged Template
By Miss June: Di Hickman,
Creative Team Guest Member

{Please note: Everyday Digital is looking to expand it's team. We have a new compensation package in place since the last team search we held. Please see this post for all the information!}
Scallop edges are so HOT right now! Everywhere you look you'll see scallop edges on patterned paper and cardstock, from big scallops to small everything comes with a decorative scallop edge! You can make your own scallop template and turn any digital paper into a scallop,

I'll show you how...
* First open a new document 12" x 12" @ 300 dpi, with a transparant background
* select your brush palette, ensure that the round brushes are selected (this should be your default set)
* select [brush tip shape] and you can change the brush diameter and spacing. For this template I chose a brush diameter of 300pixels (1") and the spacing to 90%. You can use anything from 1 - 100% depended on the depth of the scallop you wish to create.

* Press shift and then click and drag a line of the brush along the page

* Copy the layer, select the new layer and rotate the image 90 degrees, then move to overlap the original layer

Then Merge the two layers together (control E)
* Again copy the layer, rotate 180 degrees this time, and merge the layers. You should now have a frame of dot brushes

* open a new layer, and using the selection tool click and drag a square overlapping the scallops, fill with the same color and merge the layers (this avoids any stray pixels not being filled)


* once merged as a single layer, save as a .png file to retain the transparant background

* Use the template the same way you would any other template.
* Open your template and the paper you wish to scallop. Drag the paper onto the same document as the scallop template, and use control G to create a clipping mask

and VOILA! (credits: pink paper by Sarah Meyer, SarahB Designs, www.gottapixel.net )
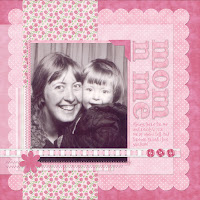
Final layout
Credits: Gummy Grins Girly kit by Sarah Meyer, SarahB Designs, www.gottapixel.net ; font: SP wonderful wendy, Scrapsupply.com

Please leave feedback for Diane! we work hard to bring you free tutorials!!! Thanks.


20 comments:
Wow that was so much easier than I thought it would be, Thanks Di
Lovely tutorial, easy to follow directions for any shape even!
Great Job Di!
What an easy way to make scalloped template. I tried the tut and it works beautiful. Thank you again
Thank you for the wonderful tutorial - love your work!
Thanks that was so easy
Great tut Di.
Maggie
how impressive! i'm amazed at how easier it looks. i really need to get photoshop--i have digital image pro, i'll have to see if i can duplicate this there. thanks for the easy instructions1
Wow that is so easy to use great tut, used mine in psp thanks for sharing
Great tutorial. Worked a treat and found out a lot of new things about using brushes.
Thanks Di! That was so easy to follow and I have wanted to know how to do this.
i had no idea it was this easy! thanks for the great tutorial Di!
Can't tell you how excited I was to follow your excellent directions and make my own scalloped paper! It's amazing you didn't hear me squealing all the way at your house. Thanks so much!
Excellent job Diane!
Wow -- thanks for making that so easy. I have tried several things myself, but this is by far the easiest!
I like this way of doing scalloped borders, very easy technique. I used the "dot" from text and played with the policy and font size, but your is so much easier and can be applied to every king of shapes. Thank you for the tip. On my way to try it ;)
this is the coolest!!! i am so excited! thank you sooooo much!!!
Thanks for the awesome tip! I tried it immediately and was thrilled with how easy it was!
Thank you so much it was very useful.
thanks for the great tutorial!
Thanks so much!
That was WAY easier than I thought. Now I need to figure out how to do scallop Circles!
Post a Comment