How to Create Digi Paper from a Flower Photograph
Creating a Digital Kit In Paint Shop Pro
by Maggie Lamarre, Creative Team Member
(can be modified for any software)

by Maggie Lamarre, Creative Team Member
(can be modified for any software)

In this tutorial we will be exploring how to create a digital paper using images you have captured from your garden or anywhere. I have several vinca's in my garden that makes wonderful elements. We will create an element using the flower. When creating custom papers, there are very simple techniques you can use to create texture using filters. The possibilities are unlimited.
There are several websites that offers colour palettes that you can use to create papers, we have several links on this blog, check out our colour tutorials.
For this tutorial you will need to visit the blend modes tutorials as well on the blog.
Supply list
Images
Colour palette
Let's begin
Open your graphic software and create a layer 3600x3600 pixels or 12x12 inches 300 dpi,
fill with the colour of your choice.
Next step we will clean up the picture. Here I have a pic of a flower I will be using the lasso tool to select as close as possible the shape of the flower.
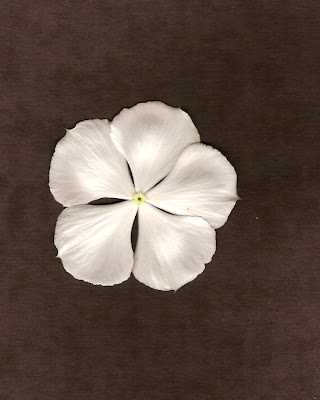
After extracting the flower from the background I will clean up the edges, by chosing
Select, modify then expand by the number of pixels you want I selected 3, then select smooth, then select feather of at least 1 pixel then invert and delete the excess. You can also apply a sharp filter by selecting, unsharp mask.
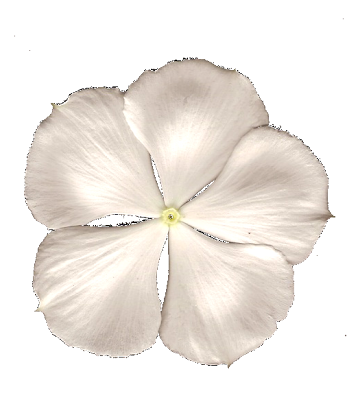
At this point you can turn the flower into a brush or turn it into a seamless tile.
To create a seamless tile for the paper reduce the size of the flower to 500 pixels in psp select
effects, image effects then seamless tile, select mirror.
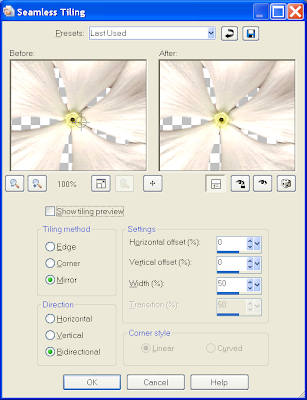
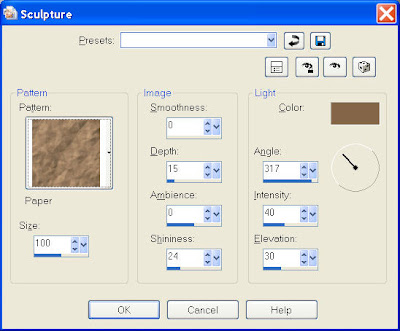
Next we are going to apply a slight crumple effect to the paper to give it depth.
Select effect in psp, select sculpture and look for the crumple paper that came with psp.
Next we are going to add the flowers on a layer each, then adjust the blend modes and opacity, follow the previous blend modes tutorials. I used a combination of burn and multiply on the flower.
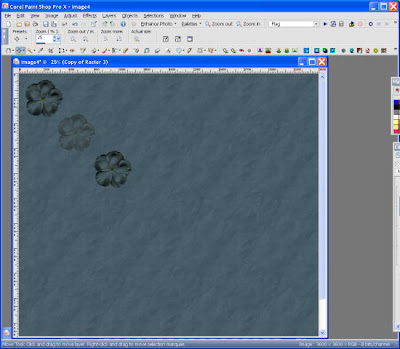
Next step place the flower at angle on the page to create interest.
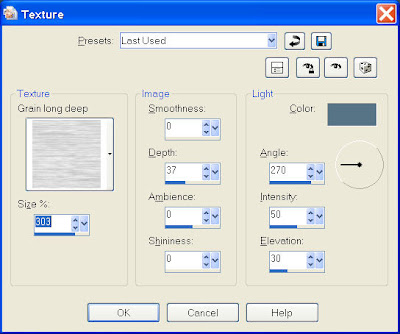
Next step I create another layer and fill with the base colour, then select effects, textures select the default below, change teh blend mode to soft light then reduce the opacity to 60.
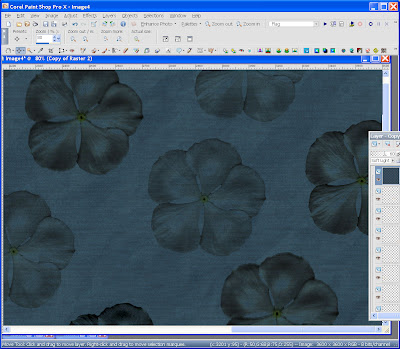
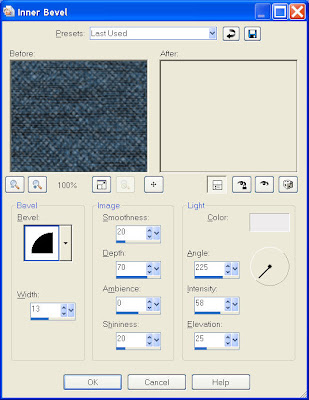
You can add more texture to the paper such as an overlay border, and more grunge.
Tomorrow: Part 2 of Maggie's Tutorial includes her paper as a freebie download and how to create a frame embellishment!


3 comments:
This is great! Thanks so much now I'll have to crack open my PSP & learn to use it again.
thanks so much, this will help a bunch :o)
WOW, what a great tutorial. It is much appreciated!! TFS
Post a Comment