Friday's Tutorial

Creating Custom Spring Embellishments using the Custom Shape Tool
In Photoshop CS (PSE compatible too)
by Amy Duquette, Creative Team Member

In Photoshop CS (PSE compatible too)
by Amy Duquette, Creative Team Member

1. Start by creating a new image that is 5 inches x 5 inches, 300 dpi and has a transparent background.

2. Make sure you work on a new layer so go to your layers window and add a new layer. Now chose your custom shape tool from your tool pallette. Its about half way down and looks like a paint splotch (In PSE it looks like a speech bubble). Now go to the top of your screen and click the Custom Shape Picker. You will see a variety of default shapes in the window. CLick the arrow to the right and a menu should pop up on your screen to load some new custom shapes. You want to find the "Nature" shapes and load those.

3. Find and click the shape that is called "flower 5" by hovering your mouse over each shape. Next pick a nice spring colour for your foreground. Now hold your SHIFT key and create your shape by click your mouse and dragging it across the window. Using the Move Tool you can move the shape around to where you want it.

4. Next pick a nice shade of green as your foreground colour and create a new layer to work on. Click on your custom shape tool again and go back to the top of your screen to the Custom Shape Picker and find the shape "Grass 2"

5. Create your shape by holding down the SHIFT key and clicking your mouse then dragging it across your image until you are happy with the shape. If you do not hold down the SHIFT key the shape will be distorted but you may like that look so feel free to play around with it a bit. Drag your green shape layer and move it UNDER your flower layer.

6. Next go to LAYER>MERGE VISIBLE so you are now left with your flower on a transparent background. Create a new layer and with your Eliptical Marquee tool and your SHIFT key held down create a circle to be the center of the flower and fill it with a nice yellow colour. Use your MOVE tool and place the circle in the position you want it in and then LAYER>MERGE DOWN.


7. Now that you have your shape you can make it into a variety of different embellishments.
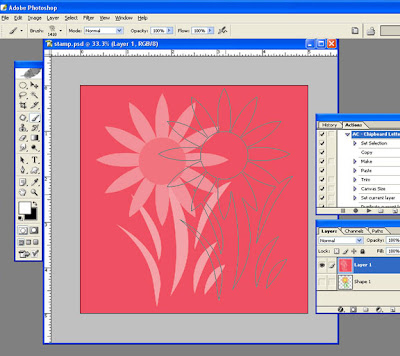
You can change the opacity and add some Text and make it a stamp.

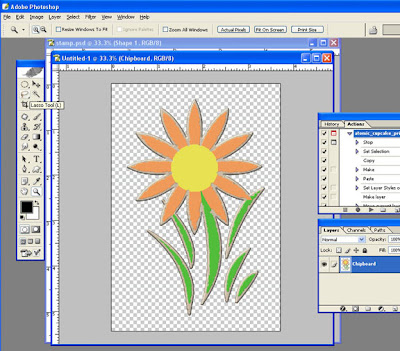
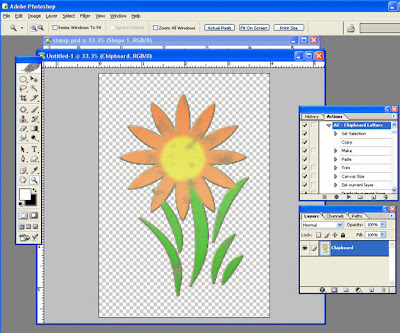
You can turn your shape into a chipboard embellishment. I used 2 different actions by Atomic Cupcake.


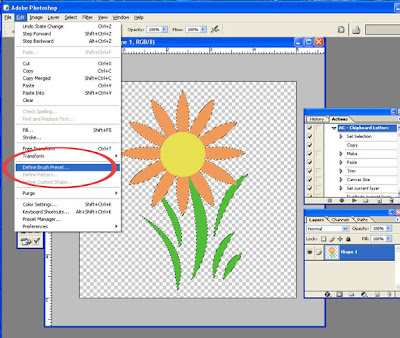
You can turn your shape into a custom brush by selecting your shape and going to EDIT>DEFINE BRUSH SET.


You can go to EDIT>STROKE and had a white 10 px stroke OUTSIDE and make your shape into a sticker. You can add a small drop shadow for extra dimension.

There are endless possibilities to creating your own custom embellishments so experiment and have fun!


3 comments:
WOW! This is such a cool site!!! I so need to get me that program! I KNOW I'd have a lot of fun with it!
loved this tut! thanks for the step-by-step with screen shots and the translation for pse!
:) M
Thanks a lot for the tuts. I learned so much infos and stuff about making my own page. Your site is cool!
Post a Comment