How to Quickly Achieve Realistic Inking in Digital Scrapbooking
Editor's Note: Welcome! I hope everyone had a beautiful weekend. I apologize for the newsletter this weekend - the hosting site crashed when I was 75% complete with the newsletter and I did not have time to start over. Never fear - the newsletter at the end of this week will be a double-feature for both weeks!
Enjoy this week's focus on using Actions for Photoshop & Elements.
I appreciate your patience and understanding,
Julie Ann Shahin, Founder/Editor
Enjoy this week's focus on using Actions for Photoshop & Elements.
I appreciate your patience and understanding,
Julie Ann Shahin, Founder/Editor
Time-Saving Inking Actions Tutorial
 by Julie Kelley, Creative Team Member
Using actions in your photo-editing software can really help make a layout go quickly! When I was paper scrapping, I used a lot of ink on the edges of my papers and photos, I thought that it gave really nice definition to the edges of my papers and elements. It was the one thing that I missed when I started scrapping digitally because you certainly CAN use a brush in your choice of color, and manually "ink" your photo, but it was far too much effort for me. Now I use actions for most of those labor intensive tasks that I love the effect of, but just don't have time to do myself!
There are many actions available... from photo enhancing, to inking and tearing, to designer resources. Most will work in the various PhotoShop programs, just be sure to you purchase the correct action for your specific program.
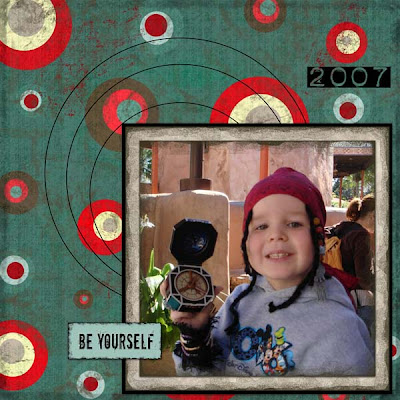
I have several Atomic Cupcake actions that I use regularly, mostly the inking and tearing actions. There are 4 or 5 different inking actions which have various depths to the "ink" from a light inking just along the edge to a dark grungy inking. For this layout I used a medium sized inking to mimick the inking on the paper that I was using. Take a look at the original layout, I had all my elements placed where I wanted them, but something just didn't look "finished" to me.

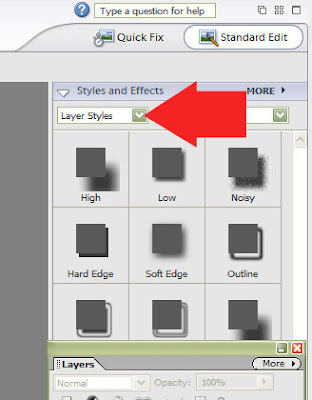
To add inking to the edge, first in the Stlyes and Effects Pallet find the Layer Styles drop down box.

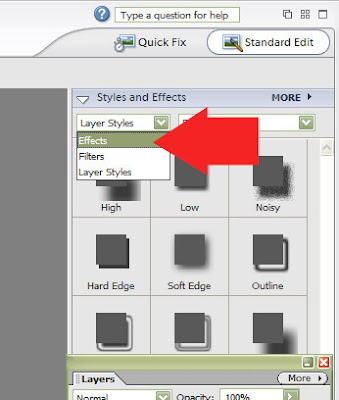
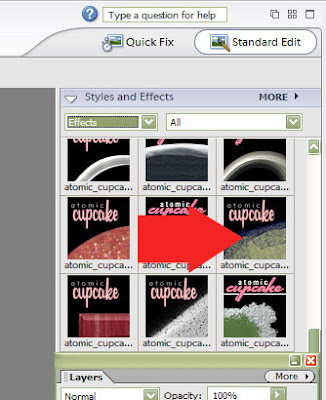
Choose >Effects This will bring up a thumbnail of all the actions you have available to use.

Be sure to select the color that you want the inking to be (most will use the foreground color) and also select the area that you want to ink, I usually click the layer and ctrl A to select all of that layer. Then double click on the action and sit back and relax while it works to add the inking where you want it!

The inked section will open in a new document, simply copy and past it where you want it to be on your page.
Here's the inked version:

Layout credits:
Adobe Photoshop ELements 4
Papers and Elements "Bootleg Flowers" by Rikki Donovan (rikkiscraps)
Actions by Atomic Cupcake


1 comment:
I would prefer to learn step by step how to create the action :(
Post a Comment