How to Add Shadows with Paint Shop Pro
Realistic Shadow Tutorial for Digital Scrapbooking
by Maggie Lamarre, Creative Team Member
by Maggie Lamarre, Creative Team Member

Supplies used
Papers, tags,ribbons, brads, alphas, word art the Adoption kit by Ronee Pearson @Oscraps.com
Buttons and flower the Organic kit @Dragonflaire.com
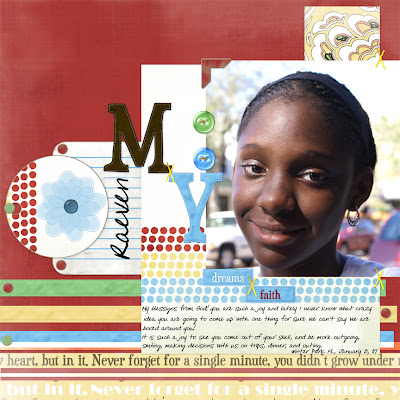
Creating realistic elements on lo:
- To have your layout look as realistic as possible use shadows on your elements sparingly and pay attention to the light source: it should be between 120-124.
- There are several ways of using shadows, you can paint the shadow using a brush,layer style or use a filter such as Eye Candy 4or 5 shadowlab to apply the shadow.
- The trick I have learned to using shadows is not to use black, but a dark brown and for each colour choose a darker colour of the same pallette to give it a more realistic shadows.
- On this lo I selected the colours on the button and went a shade darker.
Step by Step:
- Open your graphic software
- open a new layer and place your paper
- add your picture
- select effects if using psp and select shadows
- select the horizontal and vertical at 2 each for a slight shadow, blur at 5.0 and opacity at 40,
- select the shade a bit darker than original and hit ok
- repeat the same pattern for each elements, but choose the colour of that element.
For pictures I usually select a darker brown instead of black.
Have fun, create your ART
Maggie Lamarre


No comments:
Post a Comment