Ever wondered how to make your own brushes for digital scrapbooking?
Note from the founder:
If you have any questions about this week's brush tutorials, please leave your question in the comment section or email thedigitalproject@gmail.com
We will respond in the comment section and/or in our weekly newsletter!
Thank you.
Julie Ann Shahin
Custom Brush Tutorial
for Photoshop Elements by
Julie Kelley, Creative Team Member
Creating Brushes from a Photo
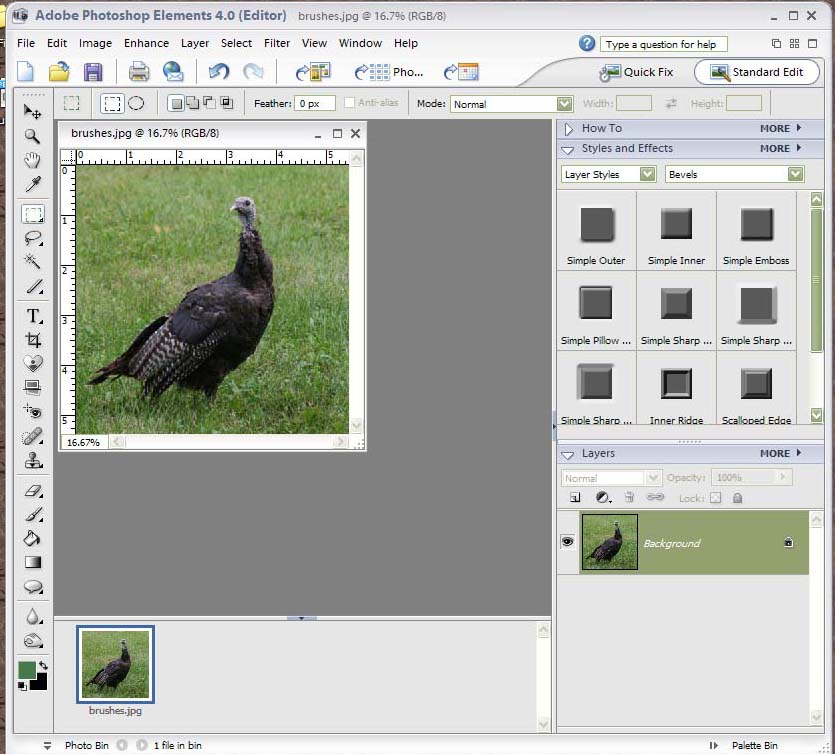
Brushes are such a versatile tool, and creating one is easy enough with these few steps. I wanted a stamp of a turkey for an invitation to Thanksgiving Dinner. I had several photos of turkeys from our back yard this fall. Here's how to make the photo into a brush.
Choose a picture to use, crop the area that you want to use (VERY IMPORTANT... Use the "save as" feature so that you are not changing your original photo).
To create the brush, you need the photo to be in black and white, there are many ways to accomplish this, I used the Image>Mode>Grayscale method.
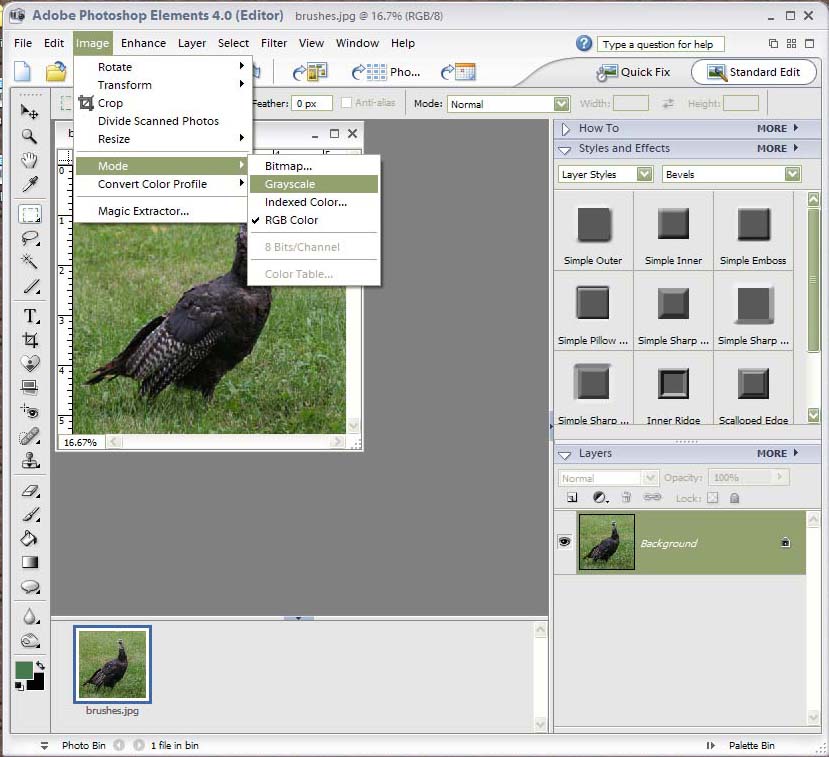 Click on image to enlarge please
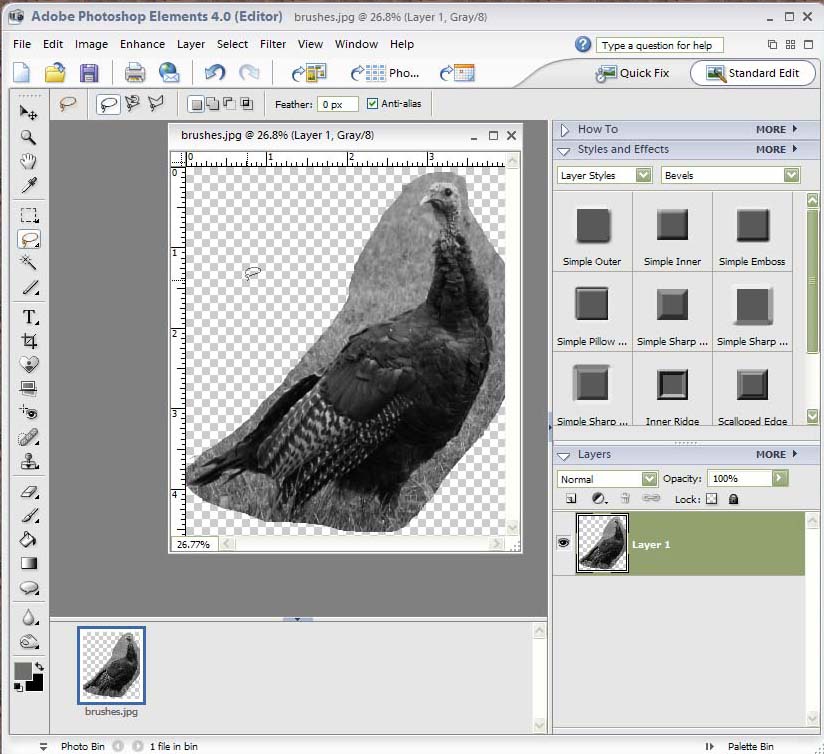
The next step is to erase the parts of the photo that you do not want to use (depending on your photo, you may need to create a new transparent layer, and move it under the original photo so that when you erase, there is a transparent layer underneath). Again, there are many ways to accomplish this, I used the Lasso tool to go around the turkey, then select>inverse and delete.
I then used the eraser tool, first with a very large brush to erase larger areas, and then with a smaller brush for the detailed erasing around the body.
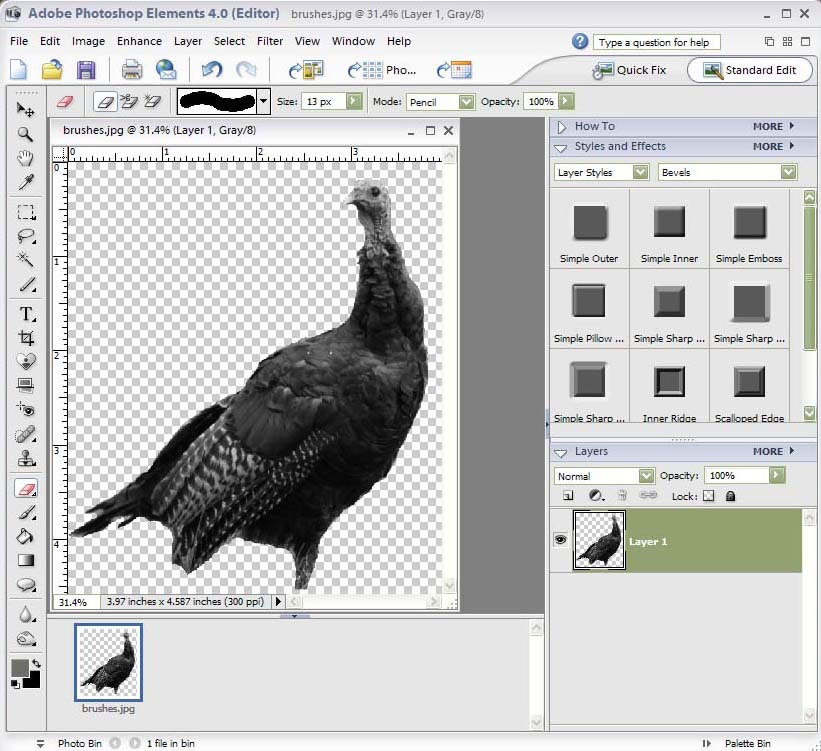
Once the image is how you want it, choose edit>define brush, you will need to name the brush, and click OK. Your new brush is now included in the brushes pallet to use as you would like. In this example, I used it over a pretty paper. It is somewhat transparent (in the lighter colors) which is what I wanted it to be. Have fun, and create as many photo "stamps" as you need for your creations!!
 Click on image to enlarge please
 Invitation can be printed and even embellished as a hybrid creation.
Credits for invitation: "Bountiful Harvest" digital papers and elements by Andrea Designs at www.thedailyscrap.com, font is eightfifteen
I also used this brush as part of my title on this layout.
 Click on image to enlarge please
Credits for Gobble Gobble: "Fall Velvet" Digital papers and elements by Holly McCaig at www.hollymccaigdesigns.com, font is Artistamp Medium
Categories:
Brush - Brushes
Create Your Own Elements
Creative Team Member
Custom
Hybrid
Photoshop Elements


2 comments:
Fascinating... thanks for the tutorial. The hardest bit will be to find the photo to turn into brushes...:)
Ohh, the Thanksgiving card using my kit looks gorgeous! Thanks for sharing this :)
Post a Comment