How to Alter Photos for Digital & Paper Scrapbooking
When I posted a survey on what you the readers wanted to learn, the majority of you wanted to know more about altering photos. This week, we will focus on layouts with altered photos just like you want!
There are certain things I do to every photo before sharing them or printing them. I myself use Photoshop Elements. I do use automatic enhance features quite often. Or you can make artistic enhancements to your photos. Below the following tutorials, I have posted links to more resources that you will find helpful. Come back throughout the week to see more ideas and more tips!
Let me give you some tips if you are looking for beginner or advanced photo editing software.
(ETA: these lists do not include my favorites
ACDSee Photo Editor and Scrapblog)
Here are the top 5 editors for beginners (windows) according to about.com:
- Photoshop Elements
- Ulead Photo Impact
- Microsoft Digital Image Suite
- Corel Paint Shop Pro Studio
- Corel Paint Shop Pro Source
- Photoshop Elements
- Photoline 32
- Arcsoft Photo Studio X
- Microfrontier Colorit Source
- Adobe Photoshop
- Corel Paint Shop Pro
- Corel Painter
- Serif Photoplus
- Corel Photo-paint Source
- Adobe Photoshop
- ACD Systems Canvas
- Corel Painter
- Synthetic Studio Artist Source
- Media-chance Photo Brush
- Photo Pos Pro
- Paint Shop Pro Studio
- Roxio PhotoSuite 7 Platinum Edition
- Photoline 32
- Pixopedia 24
- LView Pro
- Ultimate Paint
- NeoPaint
- Focus Photo Editor Source
- GIMP for Windows
- Serif PhotoPlus
- Paint.NET
- Pixia
- PhotoFiltre
- Ultimate Paint
- VCW Vicman's Photo Editor
- ImageForge Source
- GIMP for MacOSX (free)
- FuturePaint (free)
- Photoline 32
- Painting
- Rainbow Painter
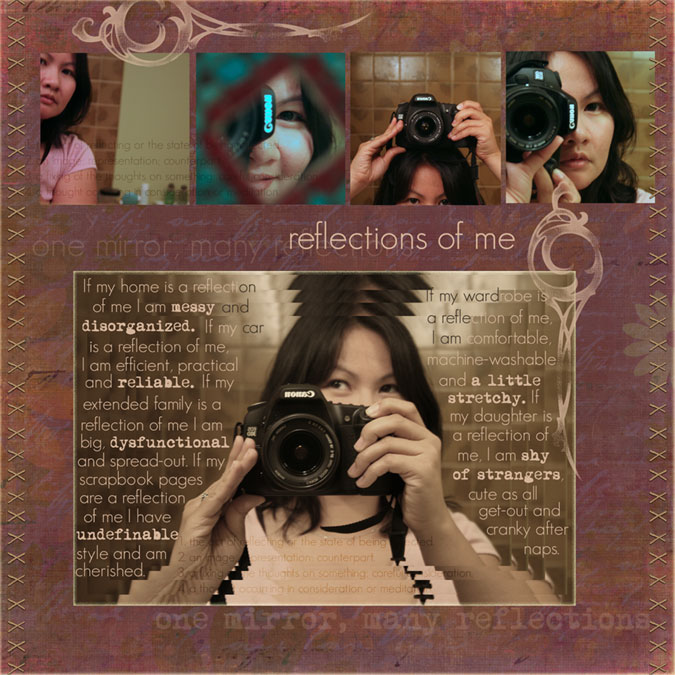
I created duplicate layers of my photo and layered them on top of each other, making each photo progressively smaller. This gives the photo more interest and ties into my theme of "reflections." I also applied an "inner glow" layer style to the copy of the photo on the bottom to make it stand out from the patterned photo.
For the 4 small photos:
I used the fixed size rectangular marquee tool to "cut" each photo into uniform sizes.
For ALL photos:
Because I took my photos in the bathroom at night without a flash, there was a slight green cast to my photos. To correct it I selected: Enhance->Adjust Color-> Color Cast and followed the instructions.
Because there wasn't much room left for journaling, I journaled in the "white" space of the photo. I chose to highlight a few words here and there by using a bolder font. I also added text throughout the layout, including a definition of the word reflection (overlapping on the smaller photos and on the large photo). I adjusted the opacity to give it a subtle effect.
And here are the credits:
Patterned papers: Jen Wilson Designs, Nostalgia 5 Collection downloaded at jenwilsondesigns.com
Flourish, stitches, Jen Wilson Designs Meaning 3 Accessories
Fonts: geosanslight and mom's typewriter downloaded at dafont.com
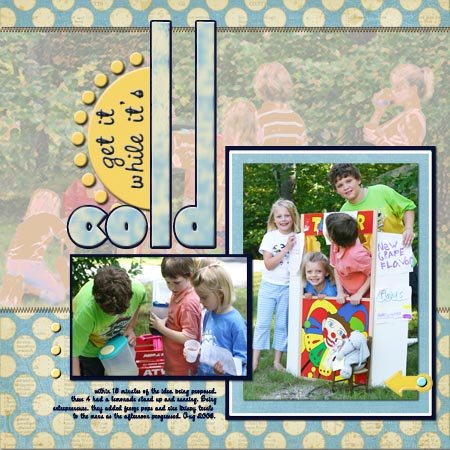
SUPPLIES: sun embellishment Jeri Ingalls Summertime/Autumn Leaves; patterned paper: Katie Pertiet Botanist #7/Designer Digitals; brads: Anne Langpap Spring/Autumn Leaves; arrow photo turn: Kim Christensen RAD Refresh/Scrapbook Bytes; fonts: CAC Pinnafore and Thiamine fonts.
JOURNALING: within 15 minutes of the idea being proposed,these 4 had a lemonade stand up and running. Being entrepreneurs, they added freeze pops and rice krispy treats to the menu as the afternoon progressed. Aug 2006.
HOW-TO:
Crop background photo to 7.5 x 12" and apply art filters (here I used Colored Pencil and then Diffused Glow). Fill 12x12 canvas with patterned paper. Drag background photo onto canvas. Use rectangle marqee to select an area just inside of the photo. Reorder layers so that patterned paper lies over photo. Press DEL to erase area inside marquee. Apply drop shadow to paper.
Mount focal photo on blue patterned paper. Add thick white stroke (Edit/Stroke). Mount all of this on dark blue mat. Mount smaller photo on dark blue mat, also. Add drop shadow to photos and mats.
Add sun embellishment and type title in two fonts. Rotate subtitle 90 degrees counter-clockwise. Add dark blue stroke to "cold." Use Magic Wand to select inside of letters in "cold." Add a layer. Using grunge brush, paint white speckles on this new layer over top of the title.Add drop shadow and bevelling to all title pieces.
Add stitching, photo turn, brads and journaling.
More resources:
Keywords: Adobe Photoshop, Advanced, Artistic Photo, Beginner, Blend Modes, Featured Reader, Photo Editing, Paint Shop Pro PSP, CS2, Digital Image Pro DIP, Photoshop Elements PSE, PS7, Printing, Resources


1 comment:
If you are looking for something easy to use and simple for editing your images then use the Reaconverter online application
Post a Comment