Give a Creative Gift: Custom T-Shirt Instructions

How To Use Digital Brushes to Create
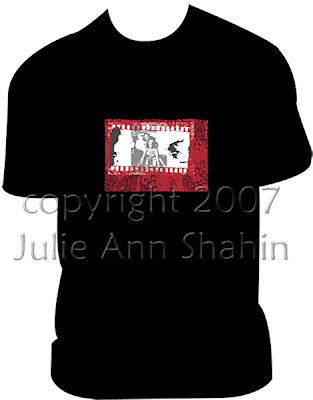
A Custom T-Shirt Gift

By Julie Ann Shahin, Founder
A Custom T-Shirt Gift
By Julie Ann Shahin, Founder
Put your creative skills to good use by designing a unique, one-of-a-kind t-shirt for a loved one this holiday season. Then upload your design to be screen-printed or digitally printed professionally at Uperprints.com
Let me show you the quick and easy steps!
If you want to create your design on a t-shirt graphic for realism, you can download a FREE T-SHIRT GRAPHIC by going to this link at Photoshop Roadmap. You need to click on one more link there "Go to Skull T-Shirt Design". There you will find the free graphic to download as well as another T-shirt Tutorial.
- Open the graphic in Photoshop Elements.
 Go to Image -->Resize--> Change width to 30 inches while keeping proportions constant. I chose 30 inches because that is the size of the t-shirt I will be printing on.


- Next, create a new document that will be the size of your design.
- In this example, my design will be 10" x 8". Go to File --> New --> Blank Document, then enter the inches.
- I will have the background as transparent.

- I want a border to act as my guidelines so I click ctrl-a which "selects all",
- then I go to Edit-->Stroke (Outline) Selection --> Chose the color and the stroke width 10 px, Location Inside. Click ok.
- We want to copy this onto the t-shirt so click ctrl-a again to select all, then go to Edit-->Copy Merged.

- Go to the T-shirt Design.
- Click ctrl-v to paste,
- then move the border into position by selecting the move tool,
- and using the arrows on your keyboard to move it into place.
- This will be your design guidelines.

- Now we are ready to upload the brushes we want to use.
- Select the brush tool. Use the drop down box, and click on the arrow on the right.
- Click on Load Brushes, then chose a brush from your files.


- I am using Katie Pertiet's Stamped Block Frames from Designer Digitals.
- On a New Layer, I position it within my guidelines.
- At any time you do not want to see your guidelines, you can hide them by clicking on the eye icon.

- My next step is to add a dingbat font (Oldtime Dings Set number unknown).
- I then decide I want the area within the frame to be white so I draw a rectangle with the marquee tool.
- Then go to Edit --> Fill Selection. I fill it with white. Click OK.

- I also add some splotches with another dingbat font called Loosydings Expert.

- Here you can see the order of my layers.

- Now I want to move my design to a new document to print.
- In a new document that is 10"x 8", I have a transparent background.
- On my t-shirt document, I hide the t-shirt by clicking on the eye icon.
- I select one of the layers above the t-shirt graphic. Then I go to Layer -->Merge Visible.

- I drag the design onto the new 10" x 8" document.
- Now I am ready to print if I am using inkjet iron-on transfers. Or you can upload the design to a professional site as I mentioned above such as http://www.uberprints.com/


Enjoy your new digital knowledge! If you liked this tutorial, be sure to sign up for our newsletter!

Mention this ad and get free May Arts Ribbon with your first order at The Shaker Box!


2 comments:
What a great tutorial. The link to the t-shirt didn't provide an actual download link though. I will still try this out. Thanks for thinking out of the box!
Thanks to you Julie for sharing your idea in using digital brushes to create a custom t-shirt design. Now I know how people put the desired design on the tees. I am sure now that I could do this at home if only I have the resources.
Post a Comment