Introducing Miss October, Connie Bensen - Guest Creative Team Member
Timeless Treasures - Hybrid Shadowbox Project

By Miss October, Connie Bensen
Featuring ACDSee Photo Editor

By Miss October, Connie Bensen
Featuring ACDSee Photo Editor
This project showcases the vintage watch (circa 1860) that is worn in the lower photo by my great grandmother.
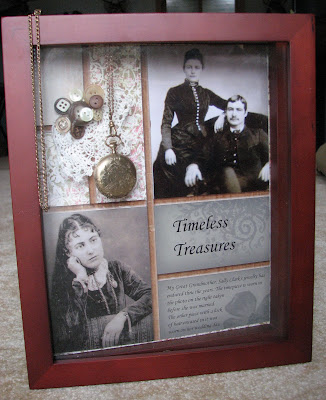
The materials used in this project are: ACDSee Photo Manager & Photo Editor; scrapbooking papers: Beloved from Aged Florals Collection by Nancie Rowe-Janitz, Everyday “Growing Up” by Jen Wilson; digital items: brushes from Found collection by Nancie Rowe-Janitz; shadowbox frame by Rachel Knight; heritage photos, buttons, doily, vintage watch & a shadow box.
When I saw the soft floral paper by Nancie Rowe-Janitz, I knew that it was perfect for these photos. I tend to start by finding papers that go with a photo(s). I chose to use digital scrapbooking techniques for the photos & brush aspects because of the flexibility. Then I added paper scrapping techniques to add texture & 3 dimensional effects to highlight the vintage watch.
Instructions:
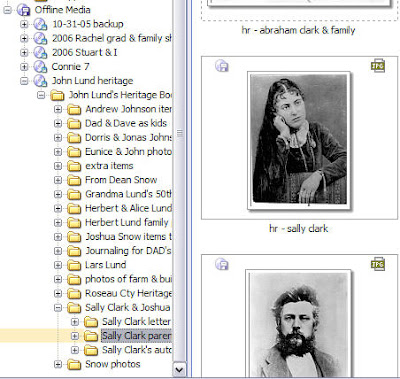
I started by opening ACDSee Photo Manager & finding the photos I wanted. They are located on an offline disc but I can see thumbnails. ACDSee told me the name of the disc that I needed to put in my computer.
Click on image to enlarge
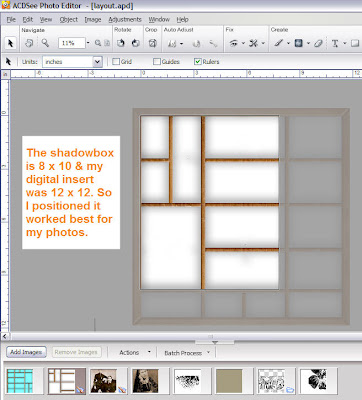
I opened ACDSee Photo Editor & created a workspace that’s 8 x 10 (the size of the shadowbox). Using ACDSee Photo Manager I found the shadowbox frame & put that into the image basket. Clicking & dragging it into the workspace showed that it was 12 x 12, so I positioned it so that I could use my chosen photos.
Click on image to enlarge
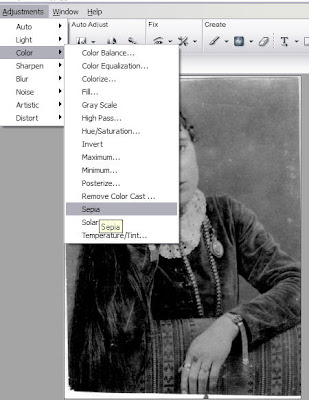
One o f my photos was black & white, so I opened it in ACDSee Photo Editor by double clicking on it from the image tray. Using Adjustments | Color | Sepia it was converted to sepia tones that match the wedding photo.
Click on image to enlarge

Mention this ad and get free May Arts Ribbon with your first order at The Shaker Box!
Click and drag a photo & place into the workspace. Because I needed to cover 2 spaces, I carefully resized the wedding photo & positioned it in a layer on top.
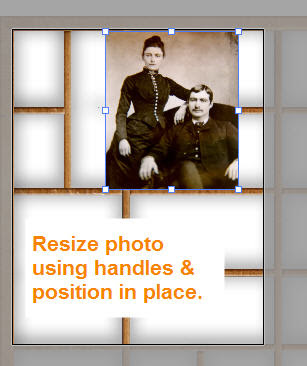
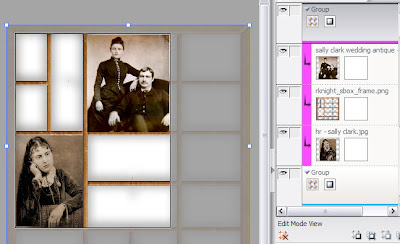
Then I click & drag the second photo & resize it. Layers are very easy to understand in ACDSee Photo Editor. You can see them on the right in the object panel. By clicking on a layer, you can drag it up or down depending on what you need. Once I had the photos settled I didn’t want them to move, so I grouped them by selecting all three layers in the object panel (hold the shift key as I selected them & then right click & choose group)
Click on image to enlarge
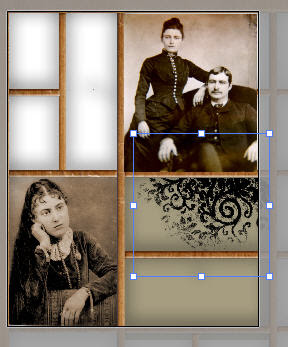
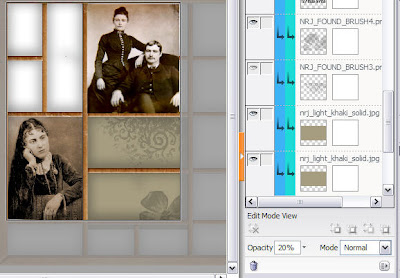
I love Nanci Rowe-Janitz’s brushes & have bought many! I use the png files that are included. I place it & resize it. Then I adjust the opacity to the desired effect. In this case I’m using 20% of the original for a faint background effect. These two images show a brush placed at 100% & then the two at 20%. See the difference? (And I used the png files which is what is what people organize in ACDSee Photo Manager too).
Click on image to enlarge
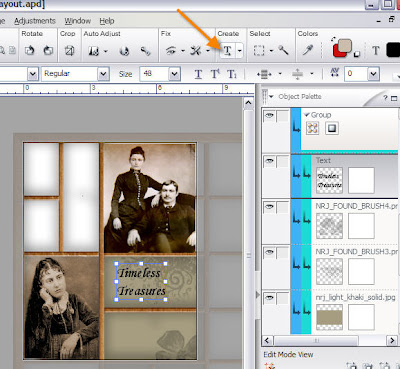
My next step is to add text. Click on the Text tool & click where you want it located. Type in your text. I also added journaling in the lower box. ACDSee makes text easy. I don’t show it here, but text on a curve is one of my favorite features in ACDSee Photo Editor and is very easy to do.
Click on image to enlarge
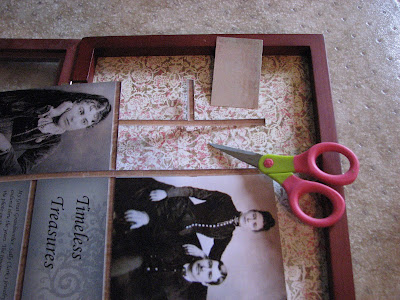
All of this could have been done with digital scrapbooking, but I knew that I wanted to add the watch. And I have many paper scrapping supplies! The next step is to cut out the 3 blocks in the shadowbox that haven’t been filled yet. I covered the inside back of the shadowbox with the floral paper & cut a small rectangle of the solid paper.
Then I went thru my button collection. This is a wonderful tactile experience in itself! I chose buttons that echoed the photos. And I decided I wanted to add a crocheted doily for a vintage effect. (I cut the doily! I used to do fine crocheting like that, so I did feel guilty but the whole thing was too bulky).
Then it’s a matter of fastening the doily & buttons in place. You can use double stick tape, a glue gun, etc. I hung my great grandmother’s watch so that it will be displayed inside, but the rest of the chain is on the outside & the hinged door of the shadowbox not quite closed.
 Note: If you found interest in any of our recent tutorials, please take a moment to be kind and leave a comment. It really makes our day! Thanks!!!


3 comments:
What a fabulous project. You made it looks so easy, yet it looks completely professional!
You have just provided me with some inspiraton
Great job!
Post a Comment