How to Make Your Own Flower Accent for Digital and Hybrid Scrapbooking

Creating a Realistic Crochet Flower
Digital Scrapbooking Tutorial

by Sarah B. Meyer, Creative Team Member
My girls both have a special sweater with cute little crocheted flowers on the front. I thought these flowers would make a fun layout embellishment! Here's the sweater:
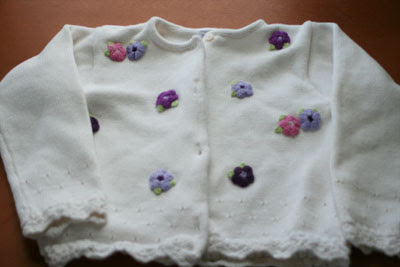 {Note from the Editor: If you knit and crochet, and have made your own crochet flowers - you are free to create and sell them once you make them into digital files. However, if it is a store bought item that is new, you can only use the flower for personal use - not to be sold. The exception is vintage items that are older than 25 years old.}
1. With my camera set to the Macro/closeup setting I took a picture of a single flower, making sure to take the picture from directly above the flower and and the same level.
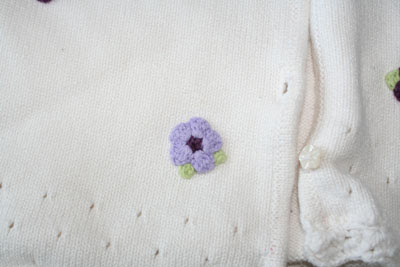
2. I cropped the image closely in Photoshop and duplicated the layer so I have an unaltered copy of the image handy. I added an extra layer in between the two flower copies and filled it will black (D and Alt+Delete). Add a layer mask to the upper flower layer (button at the bottom of the layer palette with a circle in a rectangle). Click on the layer mask and use a large round brush to roughly mask any area of the photo you don't wish to keep.
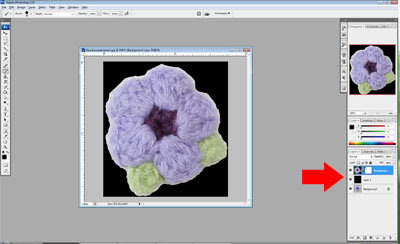
3. Using a smaller brush (I used hard round 5px or smaller for really tight corners) carefully continue to mask the extra portions of the photo. Take care to fill in only short segments at a time so if you make a big mistake you won't lose a lot of work by undoing (Ctrl+Alt+Z). For small mistakes, just unmask by switching to white. Continue until only the flower remains.
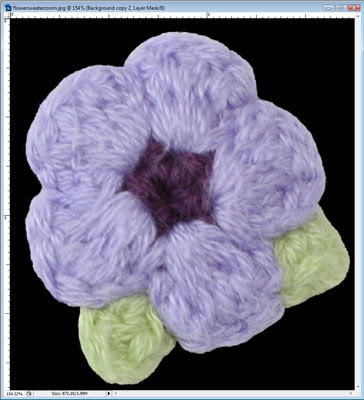

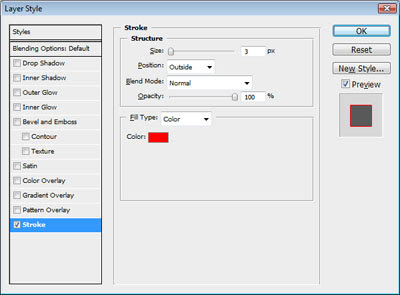
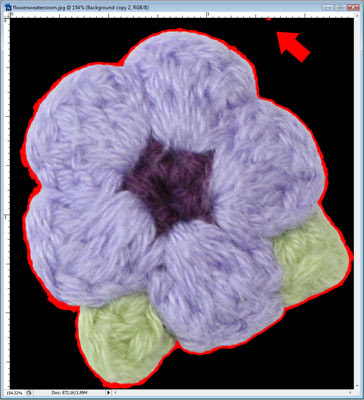
4. To ensure that I haven't left behind any stray pixels, I apply a bright red outer stroke to the masked layer--this will highlight any areas I missed. As you can see from the second screenshot below, I missed a small area at the top of the image. Using the brush tool again, mask this spot. Once you are satisfied, clear the effect by right clicking on the layer and selecting "clear layer style."
5. Hide the original flower image and the solid background layer. This will leave a transparent background. From the Image menu, select Trim (Based on Transparent Pixels, Trim Away Top, Left, Bottom and Right).
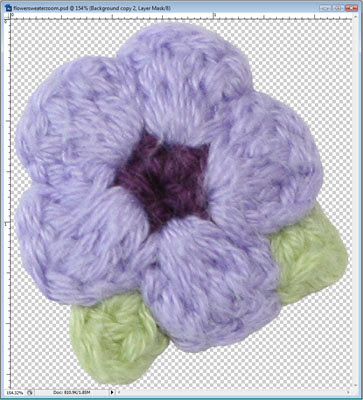
6. Save your new embellishment as a png file to preserve the transparency.

Mention this ad and get free May Arts Ribbon with your first order at The Shaker Box!
Did you learn anything today from Sarah's tutorial? I sure did! Please leave our Creative Team a note if you appreciate their hard work and dedication.
Thanks~!
JA


2 comments:
#4 was a great idea! Thanks Sarah.
Wow, that's a great tutorial! I was thinking bout it today :) Thanks alot!
Post a Comment