More Ideas for Creating A Digital Kit from Scratch with freebie!
Creating a Digital Scrapbooking Kit with CS2
by Sue Kristoff, Creative Team Member
by Sue Kristoff, Creative Team Member
Creating a digital kit is a fun way to personalize your layouts. I've made a few digital elements, but I've never make a full kit before. So, I'm documenting my process to share with the readers of the EDS blog. For software, I use Adobe Photoshop CS2, thought the general concepts can be applied using any software package.

Step 1: Choose an Inspiration or Theme
I was inspired by a shorts/t-shirt set that belongs to my younger son. It contains a bright blue and bright orange color combination, which is very vibrant and striking. I decided to create my kit around those colors.
Step 2: Choose a Color Palette
Because my inspiration was based on a color scheme, choosing my color palette was easy. Blue and orange are complimentary colors on the color wheel, so they create a natural color combination.
Step 3: Sketch Ideas for Paper and Embellishments
I wanted to have a playful and kid-like kit, to match my two young boys. I decided to go with a hand-drawn star motif as my major design element. I digitally drew stars until I created one I liked, that wasn't too perfect, but not too messy either. I saved the basic star as a brush, so I could use it in creating additional elements.
Step 4: Creating and Saving Papers
All of my papers and elements were created at 300dpi.
I started my kit by creating the papers, since they would form the base of my layouts. I picked a vibrant blue for the base, then gave it a texture using the "Blending Options" for that layer. I then used my star brush to "stamp" stars onto my paper using a slightly lighter blue. I scattered the stars around the paper until it was uniformly filled. I then "distressed" the edges of the background layer so that the edges of the paper were slightly lighter. I did this by adding an "Inner Glow" under the "Blending Options" for that layer, then playing with the variables until I was happy with the look. I saved my paper as a .jpg, then I altered the colors to create a darker blue paper. I saved that paper also as a .jpg, and did this two more times to create two orange papers.
Step 5: Creating and Saving Embellishments
I used my star brush that I created in Step 3 to create a star element, that I saved as a .png file. Saving elements as .png files allows you to preserve the transparency of the element. I used the color picker to match the color of my stars to the papers I had created, so I had an assortment of stars in coordinating colors. I took one of the blue stars, filled it with a contrasting orange, then applied a chipboard action by Atomic Cupcake to the star so it would look like a distressed chipboard accent. Finally, I created a frame and a border using the star brush. I saved all of these elements as .png files.
Step 6: Packaging Your Kit
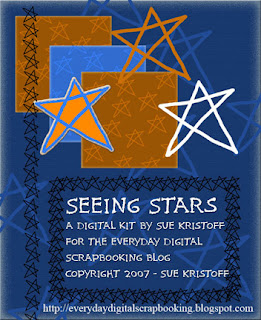
Once you have created a complete kit, you may want to package it to share with others! Create a terms of use file, and a preview image, then zip all the items together into one zip file. You can then upload the zip file to a free file sharing site, and share your kit with your friends! When I created my terms of use file, I looked at TOUs from other digital kits I had, then modified one to fit my own needs.
Now that you've seen how I made my kit, go out and try one of your own! If you would like to download my kit, please click this link: http://www.fileden.com/files/2007/4/23/1010244/stars_sbk_kit.zip Please leave a comment here if you download my kit!
Stay tuned later in June for a mini-album created using this kit!
Please leave feedback for Sue!


17 comments:
Great tutorial. When you save a preview, do you just save it like you would a layout to upload to a gallery? Thanks
My first time here! Thank you for sharing the kit and the tutorial. I will try the tutorial sometime soon. Cool blog!
yes, the preview I created was a .jpg file that incorporated several elements plus the title and description text. I saved that file at 72 dpi so that it was a smaller file, and better viewed on your monitor.
Great tutorial and love the kit!! Thanks so much!!
Thank you so much.
Thanks so much for the freebie. I've never designed a kit but I'll try.
Thank you so much for the free kit and for sharing how to make my own! I may now have the courage to tackle such a project.
Thanks for the freebie kit .... I used it on this
http://twopeasinabucket.kaboose.com/pg.asp?gallery=1&cmd=display&layout_id=1175144
Hopefully I'll be able to design a kit some day.
Thank you!!
{{{hugs}}}
Thanks so much for the tutorial and the freebie! They're both great!
I was just directed here by another blog, and this tutorial is wonderful! Thank you for sharing your steps with us, this is really great. :-)
Thank you for this great tutorial. Seems easy enough ;) (Just kidding)Would really like to give it a go. Love this!
Thank you for the great tutorial and kit ;)
Stars are one of my favorites and blue - who could go wrong - thank you!
Thank you, great tutorial! love the kit. I will try the tutorial
great for my grandson
Thanks for the tutorial and the fun kit.
Post a Comment