How to Scan Polaroids, Historical Photos and More
Scanning Photos for Digital Scrapbooking
By Sue Kristoff, Creative Team Member
By Sue Kristoff, Creative Team Member
Part 2 of 2
Introduction to Part 2
Yesterday we covered the basics of scanning. Although we may generate many of our images digitally (via a digital camera), you may want to use actual photographs in your digital scrapbooking. Photos can be converted to a digital format using a scanner. This article will provide:
- information for converting non-standard prints to digital files
- including polaroids
- prints with texture or gloss
- historical photographs
- and resources to educate you further.
Non-Standard Print Types
Not all of our photographs are the standard clear prints from the photo lab. Other photo
formats can be more difficult to scan due to their thickness, surface texture or format.
The following sections will provide some tips for some non-standard print types.
Polaroids
Polaroid Instant cameras were very popular in the late 1970’s through the 1980’s. These
photos are more suceptable to damage and darkening over time, so scanning them can
help preserve them for a longer period of time. Polaroid images can be mostly improved
via software processing, but here is one important tip for scanning: When scanning the
Polaroid photo, run a preview using your scanning software, and select only the photo
area, and not the white border. If you include the white border in your scanning area, the
contrast between the border and the darker background may skew the colors of your scan.
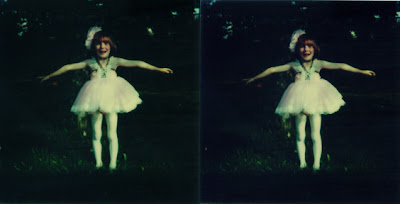
Figure 1 compares two scans of the same photo under identical circumstances. The scan
on the left did not include the white border. The scan on the right did include the border.
It’s only a slight difference, but the scan on the right has more of a bluish tinge, despite
the green background. Also, some lighter “ghosty” areas are evident, such as on the left
side of the right scan.

Prints with Texture or Gloss
Many photographs that you purchase from a professional photographer have a gloss or
texture to them that can make scanning challenging. Also, older color prints may have a
texture as well.
David Dorn of Practical PC on the Web provides an excellent summary of tips for
dealing with scanning difficult print surfaces. These tips can be found here:
http://www.practicalpc.co.uk/computing/how/scan2.htm
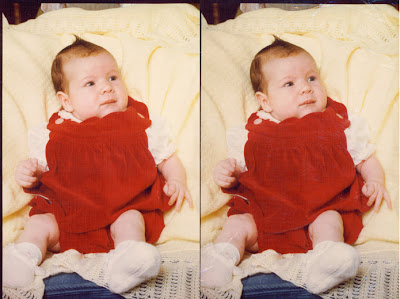
Figure 2 shows an example of the “plastic wrap” tip for textured photos provided on the
Practical PC tutorial. The photo that was used was circa 1974, and had a canvas texture
to it. The scan on the left used the photo as is. The scan on the right used the same photo
wrapped in Glad Cling Wrap. The plastic wrap did cut down on the reflections a bit,
resulting in a slightly less washed out image. However, I found that my Cling Wrap did
not shrink when I used the hair dryer on it. I did pull the wrap as tight as I could to avoid
wrinkles. Perhaps another brand of wrap would work better.

Historical Photos
If you’re a genealogist, like me, you may have some very old photos of your ancestors
kicking around. These are the photos in your collection that require the most care in
preservation. Scanning them allows you to preserve them, scrap with them, and later
print copies if family members would like them.
The primary concern is protecting the quality of your photo print. Be sure that the
scanner bed glass and the inside surface of the lid are clean and free of all particles. A
lint-free cloth and a can of compressed air are useful for this. When handling old photos,
it is best to wear clean cotton gloves, but you can get by with washing your hands before
handling.
Older photos generally have a smooth and fairly matte surface, so the actual scanning
operation is not difficult. The light of the scanner will not damage the photograph, but do
not leave the photograph in the scanner for long because the exposure to heat over time
from the lamp being on could damage it.
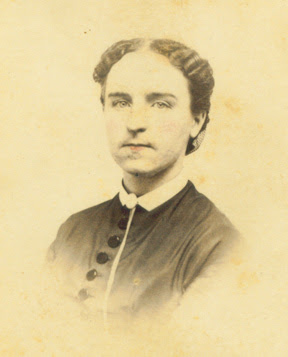
Figure 3 is a color scan of a photograph in my collection circa 1869. It will require some
post-processing, but that is another article.

Resources to check out:
1. This site provides an in-depth description of issues pertaining to preserving historical
photos and documents.
2. Tips from Microsoft on preserving family history.
If you enjoyed this two-part article by Sue Kristoff, please reward her by leaving a comment. You will also enjoy our weekly newsletter!

Visit Our Sponsor: Suzz' Stuf4U

Visit Our Sponsor: Angela Sharrow


No comments:
Post a Comment