Saturday, July 07, 2007

7-7-7 Happy Day!


Photo by Annette Lein, Democrat & Chronicle Staff Photographer

My local paper did a story about hybrid scrapbooking: Scrapbooking with a Techno Twist

Friday, July 06, 2007

Advanced Blog Header Tips


Discover More Ways to Customize Your Blog

Tips by Julie Ann Shahin, Founder


If you have your blog header in place and you still want to jazz it up a bit more, I've found a few more tips for you.

Blogspot Hack: Put Random Quotes in Your Header

Random Blog Header Images: Rotates Images Every Time Refresh is Hit (Wordpress)

Another Tutorial for Random Blog Header Images

Random Images in Blog Header for Blogger

Blog Header Generator


Templates For Sale
Blog Header Templates at Digichick

Blogwear at The Shabby Shoppe

Blogwear at Pocket Pearls


Special Announcement: Julie Ann is gearing up for CHA in Chicago as well as a new publication to be unveiled July 16th at Scrapbook Dimensions. The EDS Blog will be on hiatus until July 30th after the newsletter is sent out on July 8th! Come back July 30th for tutorials on Making Invitations!

Thursday, July 05, 2007

How to Install Your Custom Blogger Header

Visit Scrapbook Dimensions Magazine
Adding a Header in the New Blogger Templates

Tutorial by Susan Rodriguez, Creative Team Member


I use blogger and I have to say I love it. {Visit Susan's blog here} Not only is it free (now you really can’t beat free) but they have made it so easy to customize. In this tutorial I will show you what your graphic settings should be and how to add it to your blogger.


Create a new file in Photoshop. 9 x 3 at a resolution of 72.


Visit our sponsor: click on image


Below is one that I created at those dimensions.


Now lets add the blog header to the your blogspot.com blog. Seriously this is going to be so easy! I promise.

I would suggest using the template minima (see below). This one will be easy to customize.


Once you are in your blog click on template and click on the edit button on the blog header.


The configure header will pop up. You can either upload the image from your computer or from your picture hosting site.


Click on save changes.


Now preview your blog. Do you like what you see?


I like it, but I don’t like the overlaying text on the blog header graphic. To remove the text go back and click on edit on the header blog.
Visit Our Sponsor: Click on image


Click on instead of title and description and save changes. Go back and preview your blog now. Like what you see?


Continue playing around with the other page elements and continue customizing your blog. This new blogger really is much nicer and so much more user friendly. Please let me know if this was helpful.

Please leave feedback for Susan as we work hard to bring you free tutorials every workday!

Shutterfly.com

Wednesday, July 04, 2007

10 Favorite Blog Headers

Let's look at some cool blog headers! (Click on the image to enlarge)


Sara's Blog (Hot Off the Press Manuf)


Please visit our sponsors!


Tuesday, July 03, 2007

Blog Header Design 101

Tips for Designing a Blog Header

by Sue Kristoff, Creative Team Member


Do you have a blog? A lot of people have them now for various reasons: for businesses, for hobbies, for sharing family information. If you are looking to get people to return to your blog again and again, one of the easiest things you can do is to create a distinctive and memorable blog header.

At its basic, a blog header is a block at the top of the page that contains the title of your blog, maybe your name, and some graphics. It's generally the first thing that people see when they visit your blog. Does it stand out? Is it recognizable? In this article, I'll highlight the traits of a very familiar blog header, then share some online design resources so that you can create a stunning blog header of your own.

Let's look at the blog header for this blog, the Everyday Digital Scrapbooking blog! I know I'd recognize it in an instant, even if there was no text on the image. There are several elements that make it memorable.

  • First, the colors are very bright. The yellow, blue and fuchia jump right out at me. These colors are only found in the header, and not in the blog text, so it's not overwhelming. While this sort of color scheme works well for a creative-themed blog, it would not work as well for a more technical blog.
  • Second, the title is a distinctive. The title uses an unusual font, and I've unconsciously associated that font with this blog. Take a look at household products and foods around your house. I bet you'd recognize a lot of them based on their title font. This is a basic branding technique that many marketing firms use.
  • Finally, the header uses several elements that are relevant to the subject of the blog: Digital Scrapbooking, including swirls, fonts and other digital elements. This ties the title of the blog to the subject of the blog, so a digi scrapper will know immediately that this blog is related to digital scrapbooking.


Here are some links to give you ideas on creating your own personal logos and branding:

Photoshopsupport.com
TutorialBlog.org - Logo and Branding
Allgraphicdesign.com - Logo and Branding Tips
Webreference.com
Allgraphicdesign.com

Was this tutorial helpful or useful to you? Please leave feedback for Sue. We work hard to bring you free tutorials! Thanks!


Shutterfly.com

Monday, July 02, 2007

How to Create Blog Headers


Tutorial by Maggie Lamarre, Creative Team Member

Creating a blog header requires only 3 items you need to know.
  • The first item is to figure out what size you want to make the header.
  • Second item you need to decide is where to store the image in a photo storage site such as photobucket or flickr.
  • Last thing to know is where to insert the url.

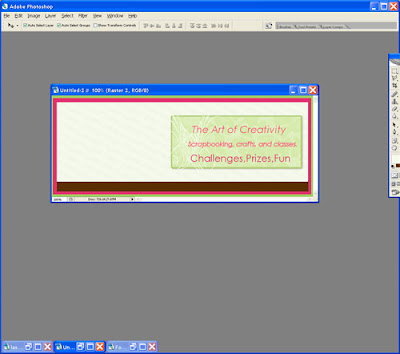
I am using blogger and I have created my header to be 768x300. Here is what is looks like currently.


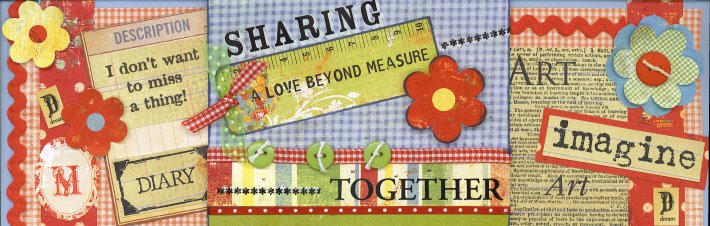
I am going to be changing the header to reflect the same header as the store where I sell my designs.

Let’s begin

1. Open your graphic software to the size you need and create a layer and flood fill with the chosen colour.

I am going to be adding patterns to the layer to give it depth and dimension.

Support This Site

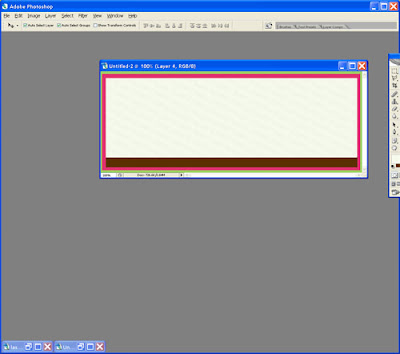
2. In psp select the layer and duplicate, then select effect, texture effect, sculpture, I select a pattern I had created, then my size is very big I want large effects of 300, Angle 310, Intensity 40 and leave everything else as default, hit ok.

3. On the layer palette change the opacity to soft light

4. Next step: I created a square and flood fill with a different colour and added another pattern the same way as the step above. I added the text, then a brush at the corner.


Next I added the logo of the store on a different layer, then added more text and embellishments each on it’s own layer.

Then I saved as psd and open in Photoshop to use the layer styles. You can achieve a similar shadow by adding each shadow on it’s own layer as well.
Once done merge all layers and save as jpg.

Next step is to upload the header onto a storage site either flickr or photobucket and capture the link of the url, we are going to need it.

In Blogger I select the template settings once I signed in.

Shutterfly.com


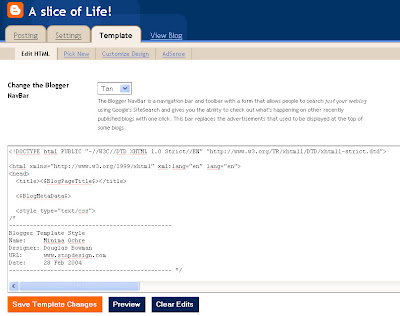
What you are looking for in blogger is the code below to insert the url as below.
/head

body

br br br
img src="http://i108.photobucket.com/albums/n31/mphoinix/blogheader.jpg"
!-- Begin #content --
div id="content"


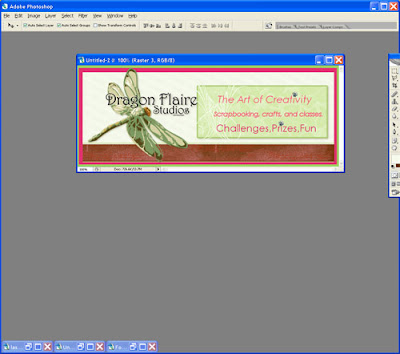
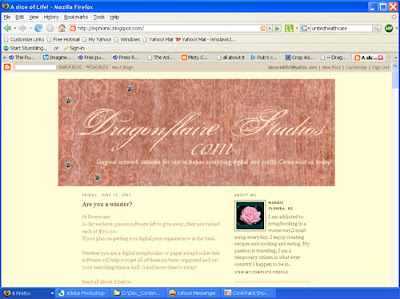
Here’s what the blog looks like with the new header


I went a step further and changed the background of the blog here’s the code below to look for.

body {
background:#fffed7;
margin:0;
padding:40px 20px;

you can see the blog result at mphoinix.blogspot.com

Have fun, create your ART
Maggie


Please leave Maggie feedback as we work hard to bring you free tutorials every weekday!

Sunday, July 01, 2007