Two Tutorials for Beginners: Your First Layout and How to Use Actions
Tutorial by Julie Kelley, Creative Team Member
Creating your First Layout (This tutorial is written using PhotoShop Elements 4, but can easly be translated for any program that uses layers).For my example, I downloaded the free "Vintage FLorals" digital kit available at www.shabbyprincess.com. This is a wonderfully versatile kit that can be used for many different kinds of layouts. I'm going to mention it now, instead of throughout the tutorial, but you should save your creation as you go... every couple of steps... You wouldn't want to lose the creation you are working so hard to create!
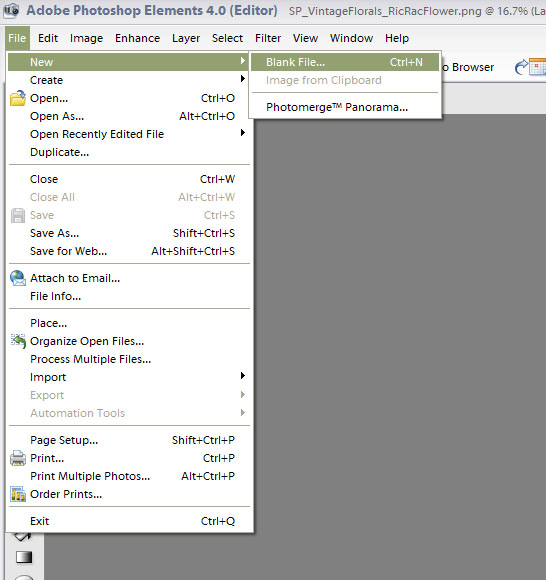
To get started on your layout you first need to open a new document, go to FILE>NEW>BLANK FILE
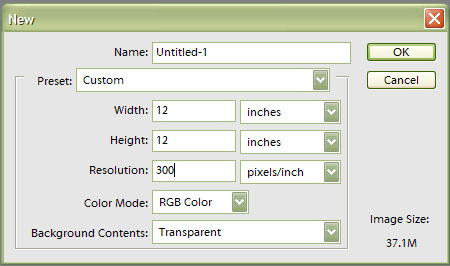
A dialog box will pop up, plug in the size you want (I usually work 12x12) and the resolution (300 pixels/inch will guarantee the best printing resolution). I also like to work on a transparent background. Click OK. Many digital scrappers work in 8x8 because they can print at home easily, it is just a personal preference.
Once you have your blank file ready, open a paper that you would like to use for your background. CTRL>A to select the whole page, then click on your new file, and CTRL>V to paste it onto your background.
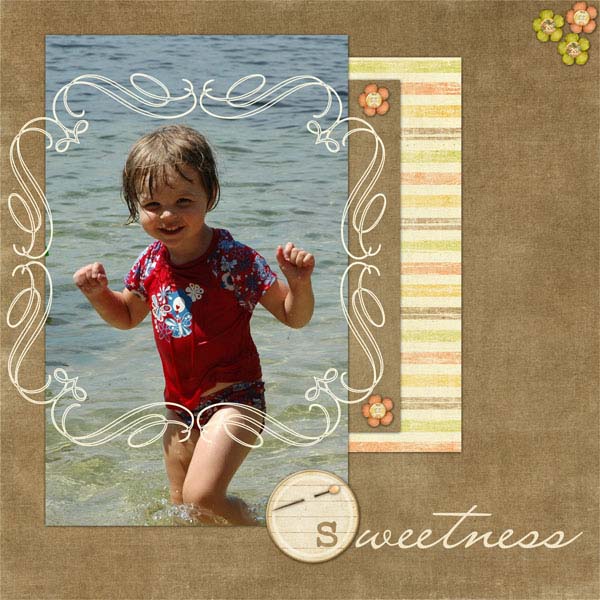
Open a photo that you'd like to use. I chose a photo of my daughter at the beach. select all and copy/past as above to put this on your background.

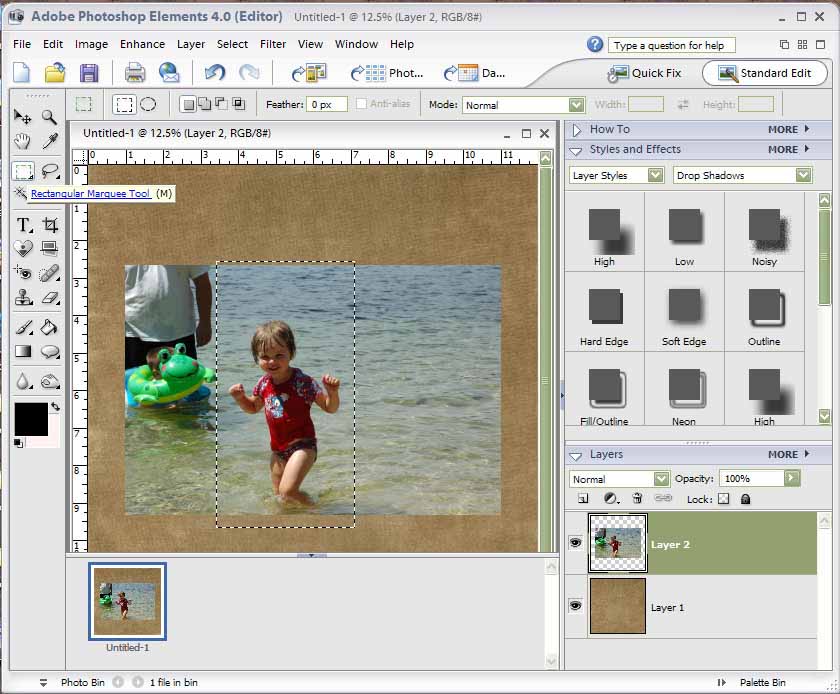
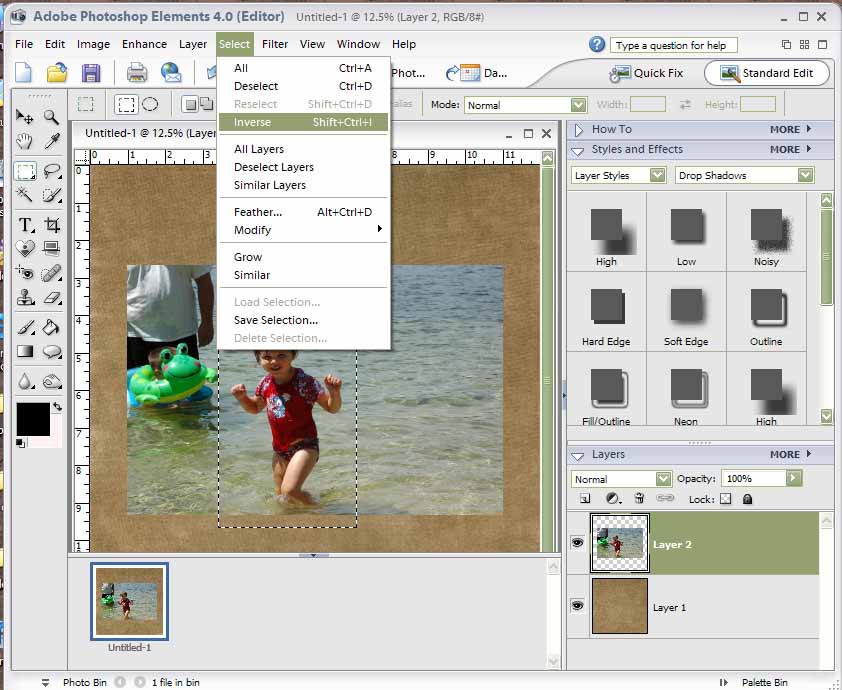
I wanted to crop the distracting elements out of the photo, so first make sure that the photo layer is selected (it will be highlighted in your layer palette) then use the "rectangular marquee" tool to select the area that you would like to use for the photo.
Because you want to erase the outside of the photo, in the SELECT menu, choose INVERSE and then hit the backspace.
To make the picture a little bit bigger, use the MOVE tool, and while pressing SHIFT and Clicking at the same time, drag one of the corners out until the photo is the size that you like.

It may look pixel-y until you click the check-mark (upper right). Holding the SHIFT key while dragging will keep the proportions of the photo correct.

Continue adding elements from the kit, use the move tool to change the size of anything you need to resize. I decided to use the first letter of the word from the alphabe that was included with the kit (I made it a little bit bigger). To add the rest of the word, click on the HORIZONTAL TYPE TOOL
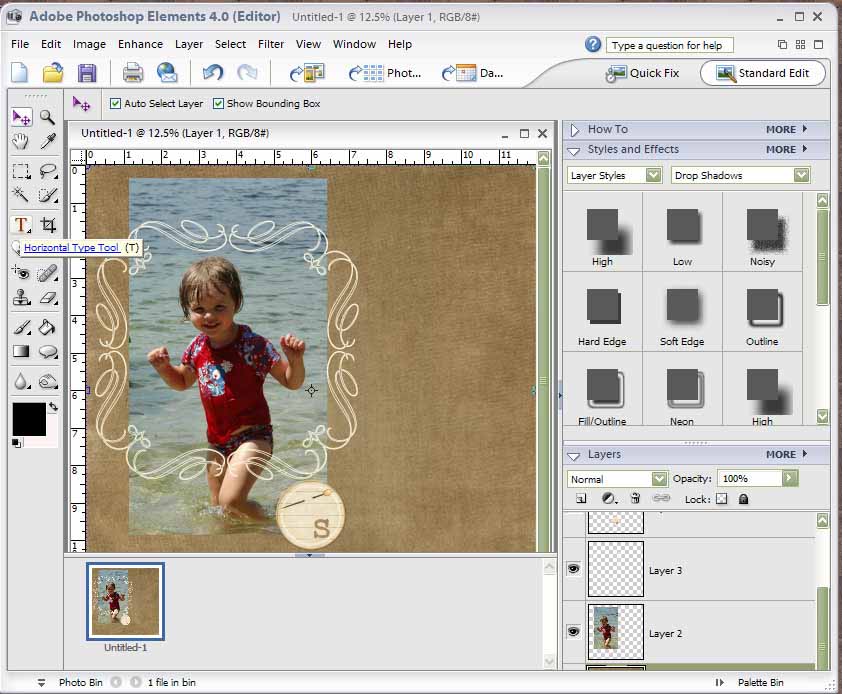
The tool bar will appear at the top, choose your font, size and color, then click close to where you want the text to be. The text will creat it's own separate layer, so you can move it around later.

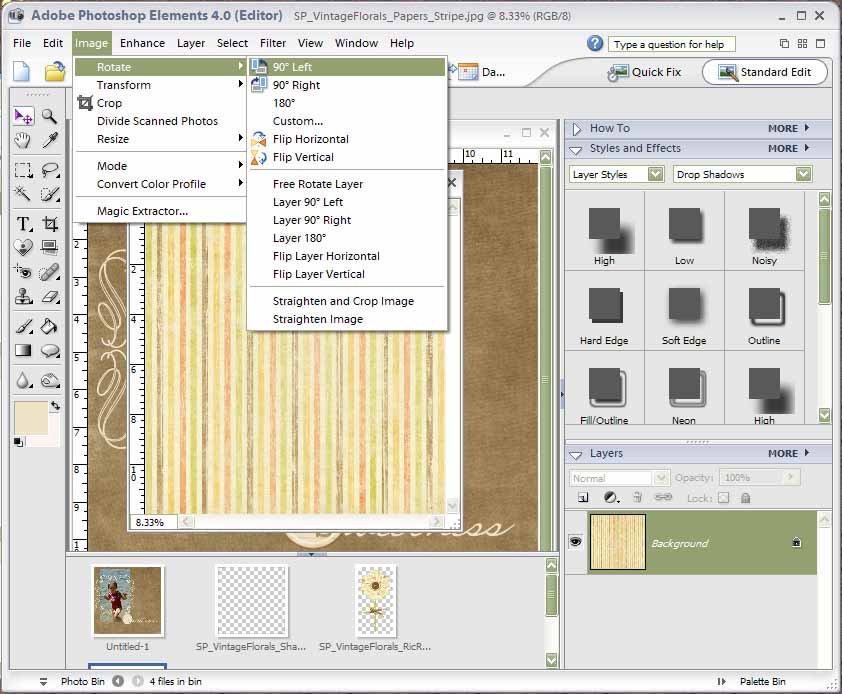
For the next layer, I wanted to use a stripe paper, but the stripes were going up and down, and I wanted them to be horizontal. To rotate the whole image, open the file that you want to rotate, then IMAGE>ROTATE>(then choose from the menu how you want it rotated). DOn't forget to either "save as" and change the name of the rotated canvas, or when you close it chose to "not save changes" or it will change the original.
Keep adding elements until you have the layout basically complete.
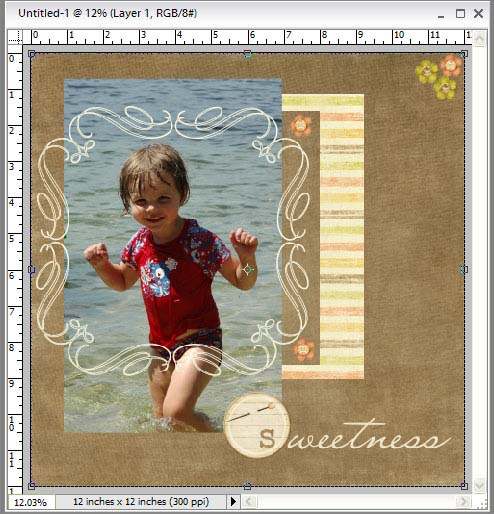
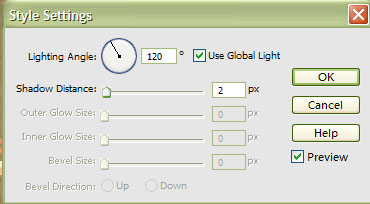
The last thing that you want to add, inorder to get some depth and realism are drop-shadows. Unfortunatley, the default size for shadows in PSE is 21, that makes a VERY dramatic shadow, I always change the shadow depth to 1-10 pixels depending on what the element is. For paper, I usually use about a 2, for larger elements that would sit a bit higher off the paper(like flowers, or chipboard etc), I tend to use between 5-7. To add a shadow, click on the layer that you want to add shadow to, and click on the "LOW" shadow in the layers styles palette.

To change the size of the shadow, first look in the layer palette (on the right side of the screen) and double click on the circled f in the layer (see above image). A dialog box will pop up and you can change the direction of the light, and the size of the shadow.

Make sure to save your creation!!
Installing, Creating and Using Actions in Adobe Photoshop CS2
Tutorial by Sue Kristoff, Creative Team Member
We’ve all used a graphics program to edit photos or work with digital elements. However, have you found yourself doing some processes over and over? Do you love the look of some elements but think they would be time consuming to reproduce? Actions may be the answer to these questions. An action is essentially a macro command within Photoshop that executes a set of operations automatically. Photoshop contains some default actions, but there are also lots of different actions available to download, and it is also very easy to create your own actions. We’ll take you step-by-step through the basics of actions, and get you using them like a pro.
What is an Action?
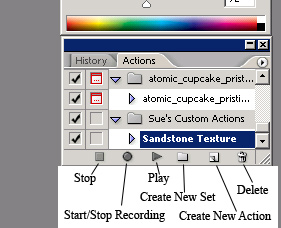
An action is a command in Photoshop that executes a specific set of instructions automatically. This set of instructions can do almost anything that can be done with Photoshop. If you do a Google search for Photoshop actions, the primary results are for actions dedicated to photo enhancing. However, the scrapbook world is not limited to photo actions. Many actions exist to change the appearance of text (we featured an action from Atomic Cupcake on XX/XX/06 to give your text the look of distressed chipboard), or to create textured elements. Figure 1 shows the locations of the buttons on the Action Palette
There are two ways to add actions to Photoshop. The first method is to download and install them. The second method is to create them yourself within Photoshop.
Downloading and Installing Actions
When you find an action that you would like, download the file to your location of choice. Actions have a file extension of “.atn”. I created a separate directory specifically for actions. This directory does not have to be in your Photoshop file path. Open Photoshop and make sure the Actions palette is visible (Window>Actions). In the top right corner of the Actions palette is a button with an arrow on it. Click the arrow and choose “Load Actions”. Find the directory where you placed your action file, then select the file and click “Load”. Your action is now available in the Actions palette.
Creating Actions
We’re going to create a very simple action to show you the creation process. This action will give your paper a texture. You can use this action to create custom textured cardstock, similar to what you may use for paper-based scrapbooking.
1. Create a new document. For this example, I am creating a 12”x12” canvas at 300 dpi. The size of the document does not matter at this point.
2. Select a color. Use the paint bucket tool to fill the canvas with your color of choice. For my example, I used the Eyedropper tool to select a color from another digital element so that the “cardstock” would coordinate.
3. Now we start creating the action. On the action palette, there is a button on the bottom with a circle on it. This is the “Record” button. Creating an action is just like operating a VCR. Once you click the “Record” button, all of the commands that you enter are recorded, until you press the “Stop” button, the one with the square on it. To get started, press the “Record” button.
4. Open the texturizer by Filter>Texture>Texturizer. (Figure 2)
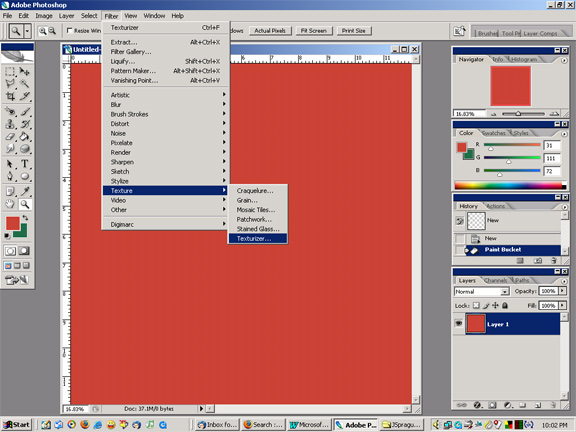
There are several different options in the drop-down menu. For this example, I used “Sandstone”, but you could use any of the other options. Play around with the Scale and Depth options to get the look you want.

When you are happy with the result, click “OK”. The texturizer will apply the filter, and return you to your canvas.
5. Stop the action by clicking on the “Stop” button on the action palette. In the action palette, your new action will be listed as “New Action”. Double click on it to change the name. I have also created a directory within the actions to hold my custom made actions.
Even though this action only has one actual operation, it does retain the filter settings (in this case, scale and depth), so every time you apply the action, you will get the same effect, without having to play around with the settings.
Using Actions
Using actions is as easy as playing a video in the VCR.
1. Repeat steps 1 and 2 from the Creating Actions instruction above.
2. Select the action by clicking on your action’s name in the Actions palette.
3. Click the “Play” button, the button with the triangle on it.
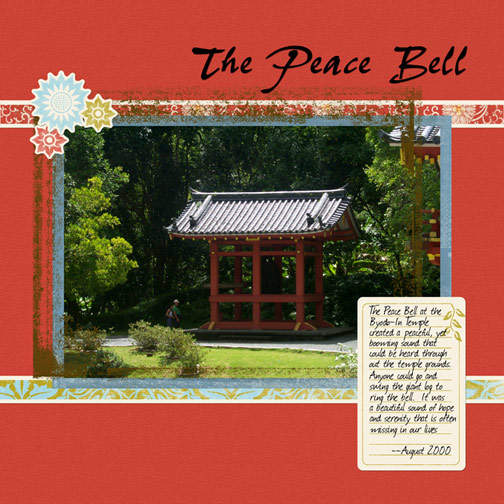
That’s it! Photoshop will apply the action, leaving you with a beautiful texturized base to create your page with. The only thing to be aware of, is that you need to have the necessary elements on your page for the specific action to work. In this case, all you need is a filled layer. In the case where you are modifying text (like the chipboard action mentioned previously), you need to have a layer with text active. The action will not work if it doesn’t have the necessary ingredients already on the page. Here is a page I created with my textured “cardstock”
Credits:
All digital elements from Echoes of Asia Kit by Jessica Sprague for Creating Keepsakes http://www.creatingkeepsakes.com/digi
Fonts: Ms Neely (title), Journal (journaling block)
Related Categories:
Beginner
Photoshop Elements PSE
CS2


3 comments:
wow... thank you SO VERY MUCH for showing me how to adjust the drop shadows like that... I had no idea. That's so very exciting!
ditto here...also knew nothing about adjusting shadows!!TFS!!
Can Gimp be used instead of photoshop?
Post a Comment