Friday, November 03, 2006

Bonus Gift Project Tutorial
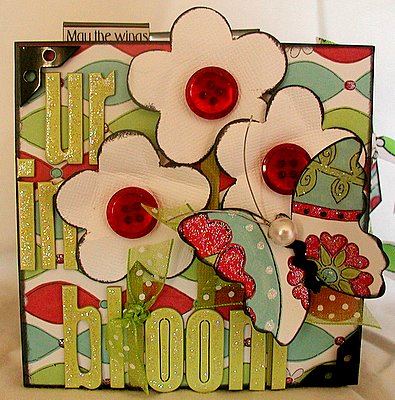
Featured Reader: Lisa PaceU R in Bloom
Mini Album by Lisa M. Pace
Posted with Designer's Permission

Supply List:
Accordion Mini Album: Junkitz
Cardstock: Die Cuts With A View
Pattern Paper: Junkitz
Ribbon: Junkitz; Offray
Buttons: Junkitz
Chipboard Letters: Heidi Swapp
Photo Corners: (black) Unknown
Ink: Staz On (Jet Black); ClearSnap (Charcoal)
Tabs: Office Supply
Punch: Whale of a Punch
Paint: (Black) Making Memories
Stickles: (Star Dust) Ranger
Black Thread
Sanding Block
Mini Envelope

Instructions:

1. Paint mini album black
2. Cut 10 pieces of pattern paper 3 5/8 x 3 ¾ squares (well we will say squares even though they are not truly square)
3. Using black thread stitch around each square and cover outer edges with Black Fluid Chalk Ink.
4. Adhere tabs to top of album pages and insert journaling or quote.
5. Adhere photo corners to each square.
6. Adhere pages to album.
7. Create a matchbook 2 ½ inches wide x 3 ½ inches long
8. Stitch around edges and then cover outer edges with Black Fluid Chalk Ink.
9. Punch out; flower cover edges with Black Fluid Chalk Ink attach button, stem and ribbon
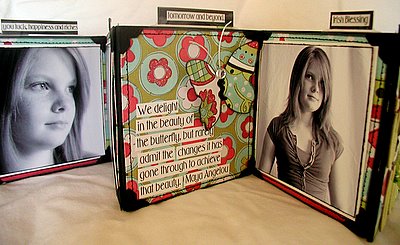

10. Create pocket measuring 3 3/4 x 3 ½ inches and adhere in between pages. Insert two tags measuring 4 ¼ x 2 1/8 inches each.
11. Cut out three butterflies and decorate with ribbon, and embellishments of your choice. Add quote or journaling.
12. Attach one to the page after the pocket you created.
13. Cover a mini envelope with cardstock, pattern paper and embellish.
14. On back of album place another butterfly and either put a quote or journal
15. Cut out 2 4 x 4 pieces of pattern paper. These will be for your front and back cover. Attach to the mini album, using your sanding block smooth edges of front and back cover in order to make your pattern paper flush with the album.
16. Using the punch create three flowers and adhere to front cover.
17. Place Chipboard letters to front cover and cover with stickles.
18. Adhere butterfly and buttons.
19. Adhere your photos and enjoy your finished mini album.

Reader Questions:

  • Recently I had a reader ask if I could link to the designer's projects in online galleries so they could leave praise. That is a great question. I would ask you all to leave praise right here on the blog so that we can track which of our tutorials are most helpful and what people are looking forward to learning more about. Thank you very much.
  • Feel free to ask questions any time. Please allow me some time to find the answers of our various designers and I will post the answers as soon as I have them! Thank you!


Share your thoughts on all the tutorials this week! Please leave us a comment.

Subscribe To Our Newsletter
Subscribe for Daily Updates Delivered to Your Inbox (or enter your email into the sidebar box to the right)

Keywords: Hybrid, Digital, Gift, Christmas, Holiday, Photoshop, CS2, Adobe Photoshop, Advanced, Digital Image Pro DIP, Featured Reader, Paintshop Pro, Photoshop Elements PSE, PS7, Resources, Gift Ideas, beginner, hybrid, Paint Shop Pro, PS7

See how easily you can make these fantastic gifts and cards

Featured Reader: Lauren Teather
Project posted with designer's permission
Click on image to enlarge


List of Supplies:
Ceramic floor tiles - Mine are 8"x8" and I got them at Home Depot for about $0.63
Modge Podge
a sponge paint brush
Your layout - Mine was 7.55"x 7.55" to show a small border of the tile around the edge of the layout.


How to:
1. Design your layout - I designed my layouts in Photoshop Elements using a digital kit from Rhonna Farrer and some elements from Heather Ann Melzer.
2. Print your layout off - I printed mine on Epson Heavyweight Matte Photo Paper and then trimmed it.
3. Pour some Modge Podge on top of the tile, about the diameter of a golf ball or so. Use the sponge brush and spread it around, all the way out to the edges, covering the whole tile.
4. Center your layout on top of the tile, and lay it down right on top of the modge podge adhesive. Smooth it out from the center, making sure that you don't get any modge podge on top of the print out (it just leaves a shiny streak). Smooth down the edges and corners and make sure there aren't any bubbles.
5. Spray the whole thing with a clear top coat, spray sealer and let that dry.
6. Voila!


Friend Card Digital/Hybrid Tutorial by Betsy Veldman, Creative Team MemberFriend Card Tutorial

Create a new document in Photoshop. Click the shape tool and create a square of the desired size, filling it with black.

Open the digital image you wish to use for the card.
Go to Enhance>Hue/Saturation and drag the lightness slider all the way to the right to turn your image white. Place it in the center of your black square, moving it to the front if need be by clicking layers>arrange>bring to front.

Print onto cardstock.

Finish card by layering with patterned paper and cardstock. I stitched around the circle with variegated thread and also applied some rick-rack.

Credits:
Digital Image: Sandy Kreiger “Talking in Circles” brushes (Downloaded from Two Peas in a Bucket)
Cardstock: Die Cuts With a View
Patterned Paper: KI Memories

Keywords: Hybrid, Brushes, Card, Gift, Photoshop, Photoshop Elements


Featured Reader: Janet LawrenceProject posted with designer's permission
Click on image to enlarge

Supply List:
Background Paper - Shabby Princess, Flea Market Chic
Frame - Katie Pertiet
It's Your Day - Nancie Rowe Janitz, Schmootzy Alpha 2
Make A Wish, Flower and Little Girl - Paper Relics, Hope Wallace


Keywords: Card, Card Gift, Vintage, Vintage Card, Birthday Card, Hybrid, Digital, Photo Gift

Subscribe To Our Newsletter
Subscribe for Daily Updates Delivered to Your Inbox (or enter your email into the sidebar box to the right)


Keywords: Card, Card Gift, Vintage, Vintage Card, Birthday Card, Hybrid, Digital
Gift, Gift tags, Christmas, Holiday, Photoshop, CS2, Adobe Photoshop, Advanced, Digital Image Pro DIP, Featured Reader, Paintshop Pro, Photoshop Elements PSE, PS7, Resources, Gift Ideas, beginner, hybrid, Paint Shop Pro, PS7

Thursday, November 02, 2006

Friday Newsletter

Don't miss out on our newsletter! Sign up at the bottom of today's post to receive new project ideas that will only be in tomorrow's newsletter.

Very cute and very easy Birthday Card

Featured Reader: Janet Lawrence
Supply List:
Background Paper - Shabby Princess, Flea Market Chic
Frame - Katie Pertiet
It's Your Day - Nancie Rowe Janitz, Schmootzy Alpha 2
Make A Wish, Flower and Little Girl - Paper Relics, Hope Wallace

Keywords: Card, Card Gift, Vintage, Vintage Card, Birthday Card, Hybrid, Digital
Gift, Gift tags, Christmas, Holiday, Photoshop, CS2, Adobe Photoshop, Advanced, Digital Image Pro DIP, Featured Reader, Paintshop Pro, Photoshop Elements PSE, PS7, Resources, Gift Ideas, beginner, hybrid, Paint Shop Pro, PS7
Subscribe To Our Newsletter
Subscribe for Daily Updates Delivered to Your Inbox (or enter your email into the sidebar box to the right)

Wednesday, November 01, 2006

How to Create a Simple Gift that is Sure to Impress: Digital Tutorial

Featured Reader: Shanah Gordon
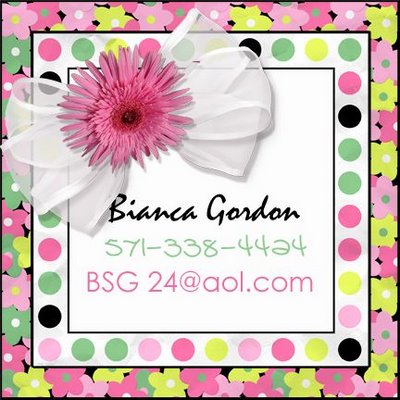
Tutorial: Personalized Calling Card Gifts
Project posted with permission from designer

Shanah's inspiration in her own words: I had gotten this idea to make calling cards from the Neiman Marcus catalog where they sell these beautiful and VERY pricey calling cards and matching leather holders. I whipped my own version up in a jiffy and have given them as gifts with a holder I purchased at Lillian Vernon or at Neiman Marcus.....or even I've given them as token gifts just on their own.If I give them without a holder I stack them up, put them in a bit of cellophane and I tie them with a coordinating organza or grograin ribbon. Ok, ok...so I use four or five ribbons....I'm like that!!!!!

I think they are great everyone because nowadays we all have so many numbers and places to be reached at. A land phone, a cell phone,an e-mail address, our home address...and the list goes on. I made this version for my daugther (no, it's not her real information!) using a fun and youthful approach.

How to: I sized these 2.5 by 2.5 but you can size them to fit whatever holder you may buy or you can just size them to suit your personal taste. I was able to fit three across and four down on an 8.5 x 11 sheet of photo paper so I got 12 cards for about a dollar (I printed on my home printer).After selecting the papers I felt best suited my daughter, I added a bow and a "real" digital flower, a nice heavy black border and I was done. What fun! They are great stocking stuffers and teacher's gifts when you just need a little something extra that shows some thought and creativity.

Credits:
Papers by Kellie Mize- Party Girl (designerdigitals.com)
Bow by Ronna Penner
Flower by silly bird nut (sbbytes.com)


Additional Inspiration for Calling Cards:

Keywords: Card, Cards, Gift, Gifts, Christmas, Holiday, Gift tags, Christmas, Holiday, Photoshop, PS CS2, CS2, Adobe Photoshop, Advanced, Digital Image Pro DIP, Featured Reader, Paintshop Pro, Photoshop Elements PSE, PS7, Resources, Gift Ideas, beginner, hybrid, Paint Shop Pro, Photoshop, Photoshop Elements, PS7, CS2, Homemade Christmas


Subscribe To Our Newsletter
Subscribe for Daily Updates Delivered to Your Inbox (or enter your email into the sidebar box to the right)

Cool Magnet Gifts Plus Create Chic Diva Card Sets This Holiday Season

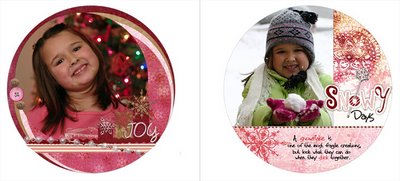
...You can use these {magnet} templates to make custom labels for tins, coasters, mini-albums, door-hangers, cardsand more...
What's the second most important part of the gift besides what it is? That you made it yourself! Inspirational scrapbook celebrity Stacy Julian says, " Homemade doesn’t mean that you make it from scratch. Homemade just means that you make time to build memories at home."


All week we continue to bring you ideas for gifts, gifts that you can make by yourself or with family members helping out!

Here are two more ways you can wow family and friends with your artistic creations!


Digital Card Gift Tutorial by Cammy Plummer,
Creative Team Member


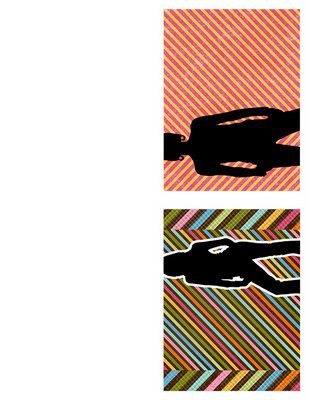
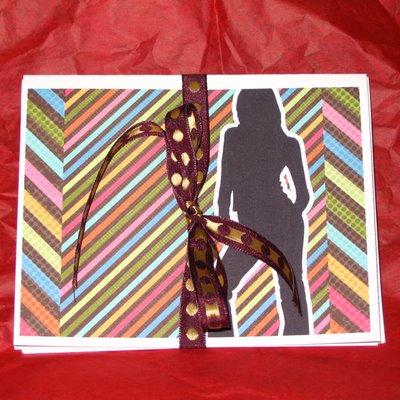
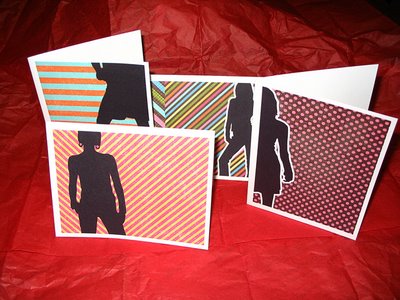
Title: Diva Cards

Instructions for Photoshop Elements
  1. Create a new document at 4.25 x 5.5 inches.
  2. Add background elements.
  3. Use subeve font to add groovin' girls. Point size should be 300 or larger to extend over the edges.
  4. Simply the font layer and go to Edit > Stroke (Outline) Selection. Suggested settings: Width - 20 px; Color - select a contrasting color; Location - Outside.
  5. Merge layers.
  6. Create a new document at letter size.
  7. Arrange cards as illustrated so they can be cut in half and then folded.
Suggested sayings for the inside message:

  • Good times are even better when they're shared.
  • When it comes to "bonding", females do it better.
  • Friends are like wine, they get better with age.
  • Gems may be precious, but friends are priceless.
Credits:
Patterned paper: Michelle Underwood, Tropical Funk, Scrapbook-Bytes
Font: Subeve, downloaded at http://www.dafont.com/

Keywords: Gift, Gifts, Card, Cards, Cardset, Gift Cards, Gift for Friend


Featured Reader: Maureen Spell

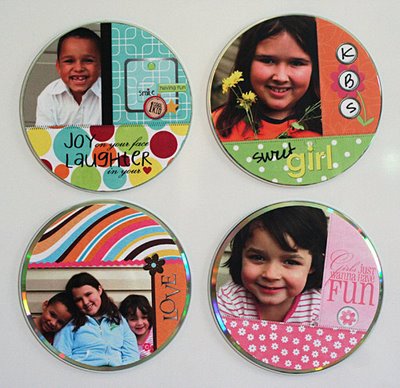
CD Magnets

How to :

For a really quick project use the magnet templates by Kari Schoonover/Pattie Knox available at http://www.designerdigitals.com/. I used the template as a guideline, changing a few things to fit my layouts. Once complete, print out on photo paper and cut out the circle. If you want to have part of the metal show from the cd, cut inside the circle. Run the circle layout through a Xyron and adhere to a cd. Place magnet strips on the back and showcase your art on your fridge.


CD ornaments:

How to:

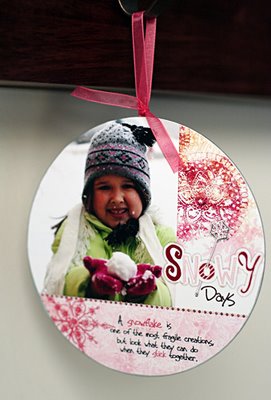
Follow the directions above and make two circle layouts. Cut a piece of ribbon for a hanger. Loop it over the cd and adhere it to the cd on both sides. It is best to use E-6000 glue or Super Tape to securely hold down the ribbon. Once the ribbon is in place and the glue is dry, place the layouts over the ribbon on both sides of the cd.

Other uses:

You can use these same templates to make custom labels for cd tins, coasters, mini-albums, door-hangers, cards and more.


Credits:
Templates: Simply DIP CD Magnet Templates by Kari Schoonover http://www.designerdigitals.com/
Kari Kopy CD Magnet Templates by Pattie Knox http://www.designerdigitals.com/
Christmas ornaments: All http://www.jenwilsondesigns/ products
Everyday magnets: All http://www.heatheranndesigns/ products


Share your thoughts on all the tutorials this week! Please leave us a comment.

Subscribe To Our Newsletter
Subscribe for Daily Updates Delivered to Your Inbox (or enter your email into the sidebar box to the right)

Keywords: Gift, Gift tags, Christmas, Holiday, Photoshop, PS CS2, CS2, Adobe Photoshop, Advanced, Digital Image Pro DIP, Featured Reader, Paintshop Pro, Photoshop Elements PSE, PS7, Resources, Gift Ideas, beginner, hybrid, Paint Shop Pro, Photoshop, Photoshop Elements, PS7, CS2, Homemade Christmas Ornaments

Tuesday, October 31, 2006

Outshine the Gift with these Simple Gift Tags: Digital Tutorial

Featured Reader: Shanah Gordon
Tutorial: Gift Tag

What's a great way to impress friends and family even before they open your present this holiday season?

Digital diva Shanah Gordon admits that her gifts tags "are sure to make the present shine....and sometimes even "outshine" the gift....they are that cute!"


You can make your tags to co-ordinate with your favorite wrapping papers or your actual gift that is inside the package. Here's Shanah's simple instructions that are sure to save you time:


In Shanah's words: This was a fun tag to create.....I made it in a large lo size (12x12 so I could keep a copy for myself) and then I shrunk it when I was done into a 4x4 size which was suitable for using as a gift tag.

I cut this shape out using my custom shape tool.

Then I made a circular crop for the picture center of the tag. I added a larger circular cropped piece of vellum under the picture just to add a bit more dimension.

I used my text on a path tool to create text in a circular formation around the border of the tag. I added a digital button and bow....and voila....the digital portion was complete!

I then printed the tag and cut out along the edges of the flower. You can just cut a square and leave white space in the back if you have a bunch of these to do. Either looks nice but I personally opted for the cut out version.

Then you can either put the tag on with some double sided tape or you can punch a hole in the top and add a lovely organza ribbon on to tie it to the package.

I've even printed these gift tags on self adhesive paper at times....that way you can just peel off the back and you have a sticky tag ready to go. Whatever way you try this...just free yourself up and have fun. They are sure to make the present shine....and sometimes even "outshine" the gift....they are that cute!

Credits:
Papers by Katie Pertiet of designerdigitals - Pink Hydrangea. Button and \n Bow by Ronna penner.Created in Adobe \nPSCS2.
\n\n",0] ); D(["ce"]); //-->
Papers by Katie Pertiet of designerdigitals - Pink Hydrangea. Button and Bow by Ronna penner.Created in Adobe PSCS2.


Resources:

Sticker paper for inkjet printers


Keywords: Gift, Gift tags, Christmas, Holiday, Photoshop, PS CS2, CS2, Adobe Photoshop, Advanced, Digital Image Pro DIP, Featured Reader, Paintshop Pro, Photoshop Elements PSE, PS7, Resources, Gift Ideas, beginner, hybrid, Paint Shop Pro, Photoshop, Photoshop Elements, PS7, CS2

Subscribe To Our Newsletter
Subscribe for Daily Updates Delivered to Your Inbox (or enter your email into the sidebar box to the right)

Please share your thoughts!

Monday, October 30, 2006

Quick and Easy Gifts for Any Occasion using Digital Products


...Even though
Christy's idea is for Halloween, you could easily adapt
this tutorial for any holiday...

Have you ever wondered how you could use your digital scrapbooking products for something other than digital scrapboking? Digital scrapbooking products are not just for layouts. I thought we could all benefit from some gift ideas as November creeps in upon us. This week my team and friends
of the EDS blog all share their creative
ideas for making homemade gift items.

Featured Reader: Christy Lyle
Adorable Altered Bottle Gifts
Project posted with designer's permission

I know I don't have to convince you that homemade gifts are more touching than store-bought ones. The best thing is that using your computer speeds up the process and makes handmade gifts fast and easy! Even though Christy's idea is for Halloween, you could easily adapt this tutorial for any holiday or gift-giving occasion. Ideas for filling the bottles include: seashells, buttons, bath salts, cookie mix, candy, toys such as ball and jacks, popcorn kernels, etc.

Christy's description of her project:
Here are some little Halloween goodies I made for DD's friends. I used Starbucks Frap bottles and just wrapped a 3" x 8.5 strip of paper around them and tacked them with glue - added a little ribbon and they were done! TFL! CREDITS: Robin Carlton's Monster Mash Kit at Sweet Shoppe Designs.


Keywords: Adobe Photoshop, Advanced, CS2, Digital Image Pro DIP, Featured Reader, Paintshop Pro, Photoshop Elements PSE, PS7, Resources, Gift Ideas, Altered Bottles, frappucino bottles, beginner, hybrid, Paint Shop Pro, Photoshop, Photoshop Elements, PS7, CS2
Be sure to follow the blog all week for more gift and card ideas. Next week: Home Decor Ideas.

Subscribe To Our Newsletter
Subscribe for Daily Updates Delivered to Your Inbox (or enter your email into the sidebar box to the right)