Add Fancy Flourishes to Your Photos with this Simple Tutorial
Brush Tutorial for Photoshop/Elements by
Julie Ann Shahin, Founder I would have to say that the reason I got into digital scrapbooking this spring is because I saw the fun things Keisha aka klcards was doing with her photos on her blog, that I just had to try adding brushwork to my own photos once I had Photoshop Elements.
Here I show you the steps that I go through when adding brushwork. In this tutorial I will use brushes that I downloaded for free from Cottage Arts. See Flourish Brush Freebie.
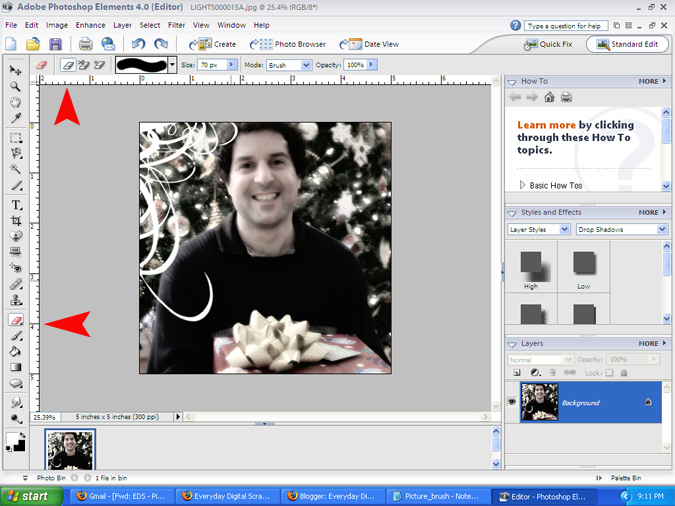
First, I open my photo which has been cropped to 5" x 5". This tutorial assumes you have installed the brushes at instructed by Cottage Arts.
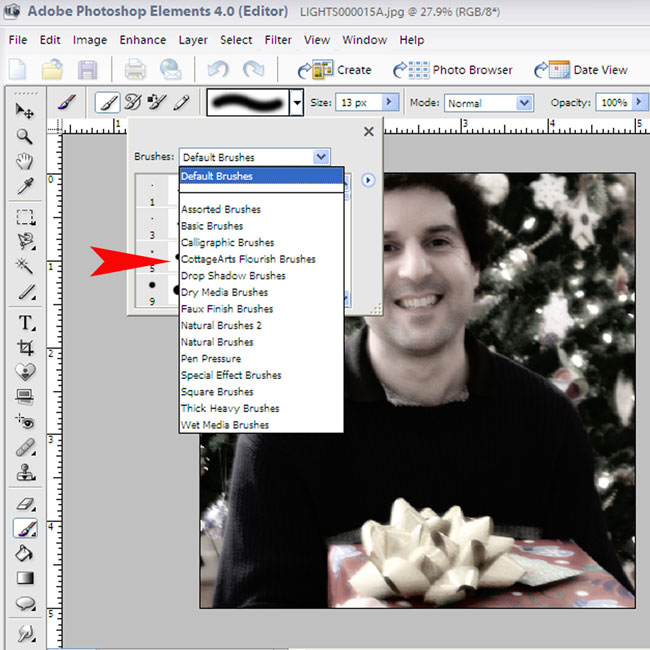
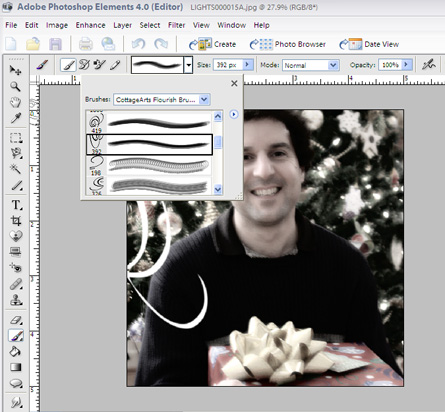
Select your brush tool, then go to the drop-down menu to select "Cottage Arts Flourish Brushes."
Julie Ann Shahin, Founder
 I would have to say that the reason I got into digital scrapbooking this spring is because I saw the fun things Keisha aka klcards was doing with her photos on her blog, that I just had to try adding brushwork to my own photos once I had Photoshop Elements.
Here I show you the steps that I go through when adding brushwork. In this tutorial I will use brushes that I downloaded for free from Cottage Arts. See Flourish Brush Freebie.
First, I open my photo which has been cropped to 5" x 5". This tutorial assumes you have installed the brushes at instructed by Cottage Arts.
Select your brush tool, then go to the drop-down menu to select "Cottage Arts Flourish Brushes."
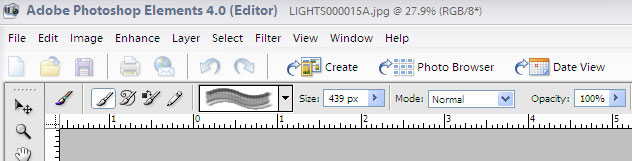
The first brush I decide to use is #439. Be sure to have white selected as your foreground color.
Normally I apply my brushes in a new layer however I neglected to do that for this tutorial.
The reason you want your brushes applied to separate layers is that if you change your mind, you can easily change that layer instead of having to "undo" or you can save the image and still make changes later. Ideally you want to make a new layer with each new brush you use.
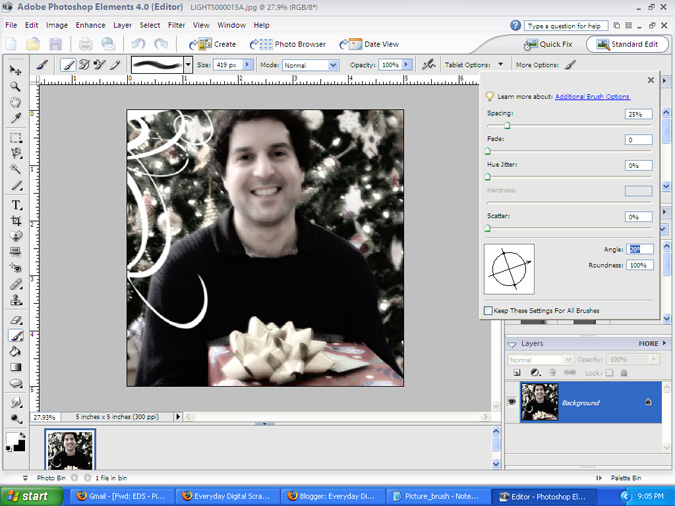
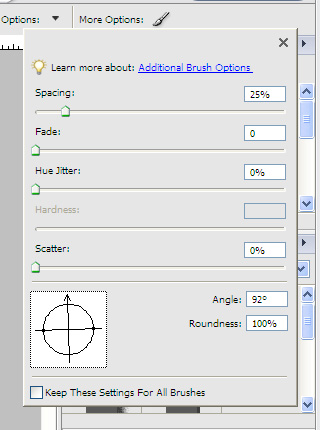
Next I want to rotate the brush, so I go to "More Options" on the right and click on the brush icon to get the pop-up dialogue box. I rotate the angle to 180 degrees.
(Click on image below to enlarge.)

Next I adjust the size of the brush. Apply the brush to the upper left corner of the photo as shown.
(Click on image to enlarge.)

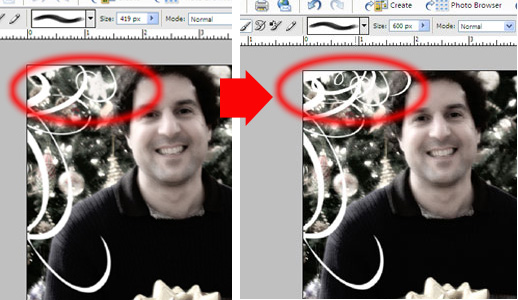
I am going to use brush #419 next.
Use the "More Options" dialogue box to adjust the angle of the brush 20 degrees.
Click on image below to enlarge.
With the brush size at 600 px, apply to the upper right corner of the photograph.

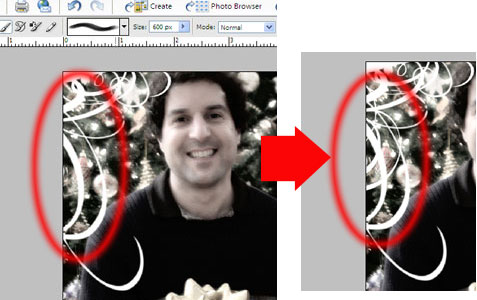
My next step is to choose another brush style. This time I use brush #392.
I adjust the angle to 92 degrees.
Apply the brush along the left edge of the photograph.
Next, I decide I am not happy with the one swoosh that hooks over my husband's arm and I decide to erase it. Click on the eraser tool. You have the choice to use the regular eraser, the background eraser tool or the magic eraser tool. I am using the regular eraser.
Zoom in when erasing to make sure you are being accurate and erase the swoosh.

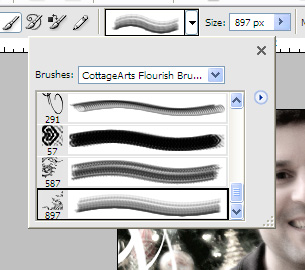
I decide to add one more flourish that is a little different from the others: #897 in the Cottage Arts Flourishes. Apply to the lower right corner of the photo.
You can save your photo now before going on to the next step. Be sure to save it as a different name than your original photo.
You can save your photo now before going on to the next step. Be sure to save it as a different name than your original photo.
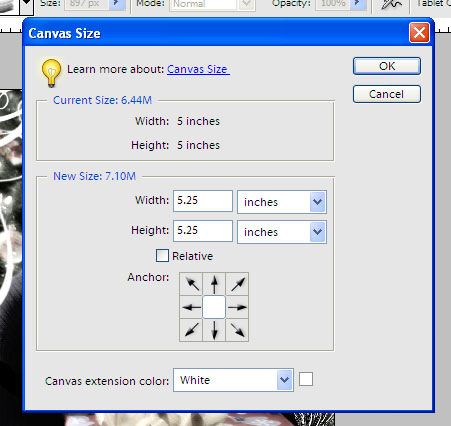
Next I am going to add a white border all around my photo as I assume I am going to put the photo on patterned paper or colored cardstock. I just like to have white all around the photo.
I will re-size the canvas by going to Image --> Resize --> Canvas Size
I will re-size the canvas by going to Image --> Resize --> Canvas Size

My photo was cropped to 5"x5" inches to begin with and I want to add a white border. If you have layers, flatten the image by going to Layers --> Flatten Image.
Here I change the canvas size to 5.25" x 5.25" to give me at .25" border all the way around. Choose the canvas extension color as white. Click "OK"
Here I change the canvas size to 5.25" x 5.25" to give me at .25" border all the way around. Choose the canvas extension color as white. Click "OK"
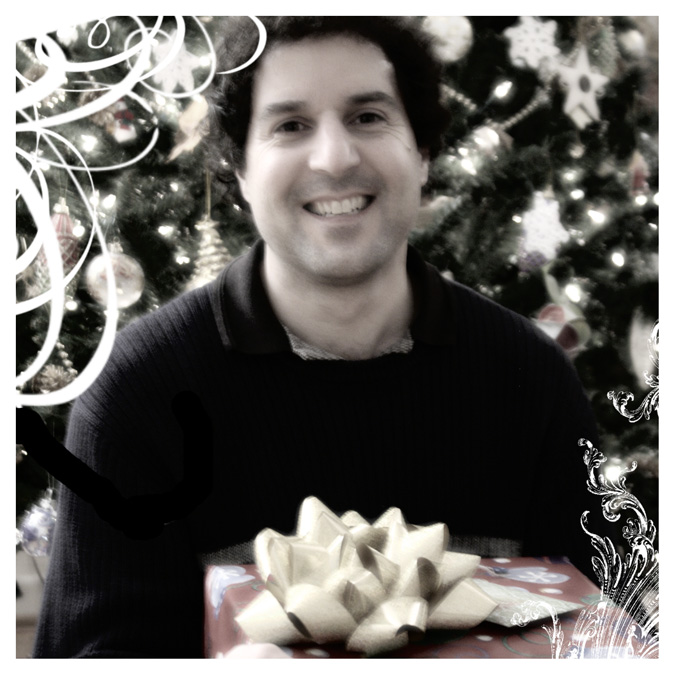
Here is the embellished photo, the final product. You may frame it or use it on your scrapbook layouts. If you are a traditional scrapper, print it and then add to your paper layout.
Additional Resources:
Loading and Using Brushes by Traci Turchin (2peas)
Turn a doodle into a brush by Traci Turchin (2peas)
Creating Easy Patterns with Brushes by Erica Hernandez (2peas)
Photoshop Tutorial for Saving and Organizing Brushes by Rhonna Farrer (2peas)
Categories:
Beginner
Brush - Brushes
Creative Team Member
Photoshop Elements PSE
If you like this tutorial please leave our designer a message! Thank you.


4 comments:
I do not have time to try this out yet, but from what I am reading it is just what I was looking for.
It feels like a christmas gift from you! Thank you very much for boiling it down and making it so simple to understand!
Thank you for this tutorial. I just recently discovered how to use brushes and I'm having a lot of fun with them. I use them in cardmaking a lot. Hope to see many more "brush" tutorials.
Marg
This looks really doable for a beginner - thanks for the step-by-step Julie Ann.
Who knows where to download XRumer 5.0 Palladium?
Help, please. All recommend this program to effectively advertise on the Internet, this is the best program!
Post a Comment