Friday, August 03, 2007

More Templates & Ready-to-Print for Invitations!


Use these templates to create your own unique vertical greeting card and matching envelope. Add your choice of digital papers, embellishments, type and more. The especially crafty will enjoy adding real glitter, inked edges and rubber stamping as well as real embellishments and ribbons. Make every event and holiday special with the gift of a handmade card.

Included is the Outside Card Template. Inside Card Template and Envelope Template. PLUS, How-to Instructions with step by step screen shots, Illustrated Crafting Tips and Techniques.

Created by Valerie Randall, a professional craft designer, these templates are designed to make crafting simple, easy and fun!


Use these brushes for your next party invitation. Simply stamp them on your digital card and fill in your personal information. Nine (9) word art brushes are included. These brushes coordinate with the entire line of dinny's Party On Products, but will also enhance any digital creation.

This Brush Set Biggie comes with 9 brushes. Brushes come with an .abr brush file for photoshop but also as .png's in case they are incompatible with your graphics program. Instructions, with screen shots, on how to download, install, use, and create your own brushes from the .png files are included.


Save the Date! Deliver this unique card set and reserve the date for weddings, showers, anniversaries, even graduations, recitals or a surprise birthday. Designed to be color neutral in a elegant array of tan, beige, gold, taupe and ivory, this card set has many uses. Easy to make, insert a photo inside and place in the Petal fold envelope for an elegant presentation. Use the envelope for gift certificates and place cards, too! You could even add this to a digital scrapbooking page. Includes easy to follow instructions. Personalize, print and trim! More info.


Desire Card Set - Party Invitation
Planning a summertime bash? Start with this bright invitation. Personalize the card with your software (like Adobe Photoshop, Photoshop Elements and Paint Shop Pro). Then print, trim, fold and your ready to pop in mail. Also included is the cheery flower to embellish your invites. Set includes front and back of card along with matching envelope. More Info.


Baby Bottles Card Set

Perfect for announcements, birthdays, invitations and congratulations, this card set comes with a ready-to-print card, 2 ready-to-alter cards, matching envelope and complete instructions. Very easy to make. Coordinates with Valerie's Spring Fling Collection, too!


ScrapSimple Craft Templates: Horizontal Card and EnvelopeUse these templates to create your own unique horizontal greeting card and matching envelope. Add your choice of digital papers, embellishments, type and more. The especially crafty will enjoy adding real glitter, inked edges and rubber stamping as well as real embellishments and ribbons. Make every event and holiday special with the gift of a handmade card.

Included is the Outside Card Template. Inside Card Template and Envelope Template. PLUS, How-to Instructions with step by step screen shots, Illustrated Crafting Tips and Techniques.

Created by Valerie Randall, a professional craft designer, these templates are designed to make crafting simple, easy and fun!


Card making becomes simpler with these 6 ScrapSimple Basic Card Templates. No more tricky measuring or racking your brain for the perfect design. Experiment with different colors and background papers until you come up with a combination that pleases your tastes. Be creative by mixing and matching different card templates, adding embellishments, shadows, stamping, font work, etc. Layer the pieces according to the card sample and print, or print the individual pieces out and layer the card traditionally.

Includes 6 card templates and one envelope template in .png formats. Instructions, with screen shots and card samples. More info.


Thursday, August 02, 2007

Mastering the Art of Hybrid Invitations


Girls' Night Out Invitations

by Julie Ann Shahin, Founder


Instructions:
1. Open your word processing program. Change the page setup for approx. 4" x 9" which is the size of a business envelope. Measure your envelope and that determines your page size.

2. Choose a font that you prefer.

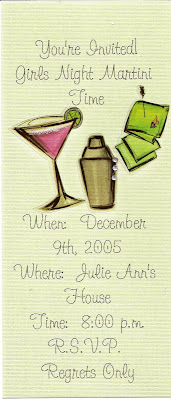
3. Type in the title of the invitation. In this example the title is "You're Invited! Girls Night Martini Time"

4. Leave space for themed stickers. Measure the size of your stickers. Make sure your rulers are turned on in your word processing program.

5. Type the rest of the information about the event below where the stickers will be placed. Print onto cardstock trimmed to your required page size.
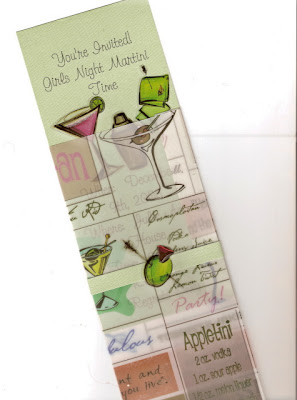
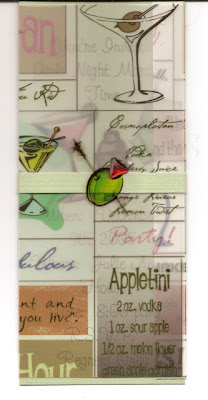
6. Take a piece of 12x12 printed vellum. Trim it to 12" x 9". Wrap the vellum around the printed invite, and score the edges or smooth with a bone folder.


7. Take a scrap of cardstock and wrap that around the cardstock and vellum wrapper. Secure with a sticker as shown above.

8. You are now ready to mail your invites! Have fun!!!

Shutterfly.com


Support This Site

Wednesday, August 01, 2007

Tuesday, July 31, 2007

Discover Templates for Hybrid/Digital Invitations!


Barbeque Invitation

In PhotoShop Elements 5

by Beth Price, Creative Team Member


1. Choosing the layer photos
I started this invitation with a template from scrapgirls.com called ScrapSimple Card Templates: Remember Postcard.
  • This is a neat template because you can format your invitation to be a postcard.
  • It comes with the address template for the back of your card.
  • I’ll print this postcard on glossy card stock because if I use regular photo paper the back will have manufacturer information, and I want to print out the postcard address template.

Since I’m working on the computer, I decided to make my whole invitation digital. This will help my postcard look, since the card won’t be in an envelope when I mail them. I could print the components out individually and assemble them if I want a hand-made look, either way will work.

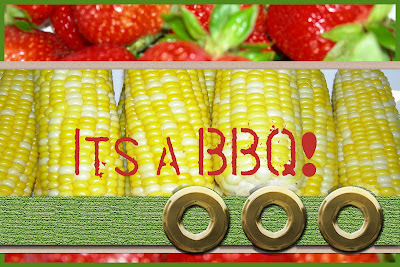
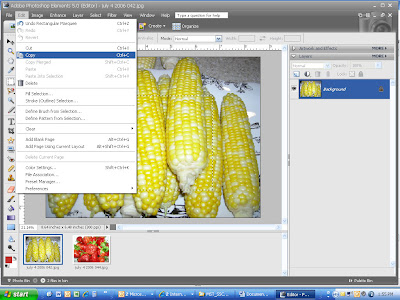
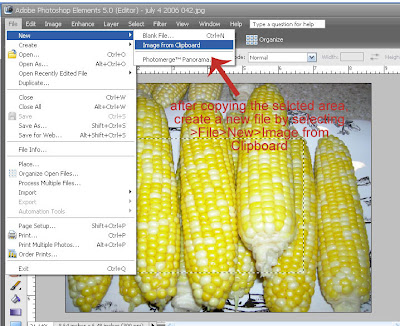
For my barbeque invitation, I had some fun photos of food from our last 4th of July celebration and thought I’d use those instead of digital paper. So I opened the photos and selected a small section of the photo that will enlarge well, without any open spaces along the border.


2. Using the Post Card Template
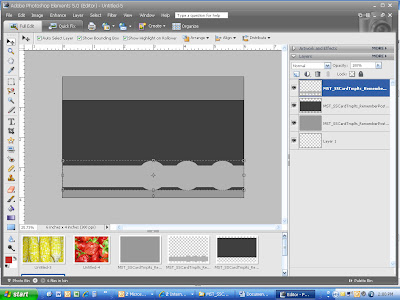
  • I create a new blank file, size 4x6, transparent background.
  • Next I opened the card template, including all the layers and then drag them in order onto the new file.
  • Follow the instructions that come with the templates if you need further direction.


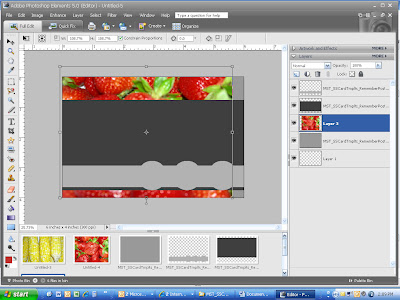
  • I dragged the corn and berry photos over the top of the layers I wanted to use and expanded the photos until the photo completely filled the template.
  • Then on each photo, making sure the photo is selected in the photo palette, I hit CTRL G to merge with the previous layer, which causes the photo to conform to the template layer.
  • I can still move the photo around and play with the placement after it’s been merged.

Shutterfly.com


  • I decide I will fill and texturize the bar across the card.
  • I select a green based on the color of the strawberry leaves. To do this, I click on the foreground color box, then use the eye dropper to choose a green in the strawberry picture.
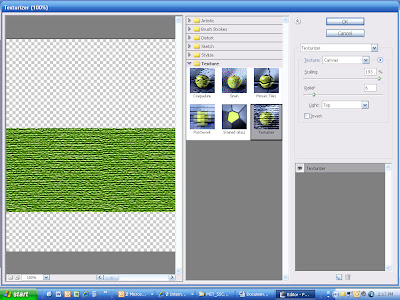
  • Then use the fill bucket to color in the bar. Next I select FILTER>TEXTURE>TEXTURIZER


  • I play with the options, decide on canvas and play with the sliding scales until I find the amount of texture I like.
  • I can add a drop shadow right now too.


3. Details and Finishing

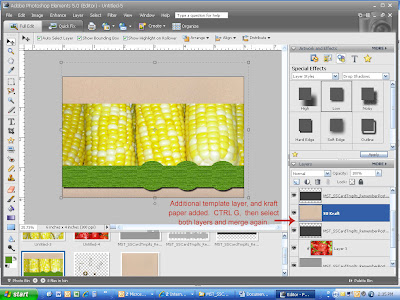
  • At this point, I see I need more separation between the corn and berry photos. So I decide to add a mat layer under the corn.
  • I drag the second template layer onto my card again, then place a kraft paper over that template and CTRL G to merge them.
  • I’ll need to decrease the size of the corn layer, I do this by dragging the top and bottom sides in a bit.

  • For the mat layer, I used a kraft paper I had in my digital stash.
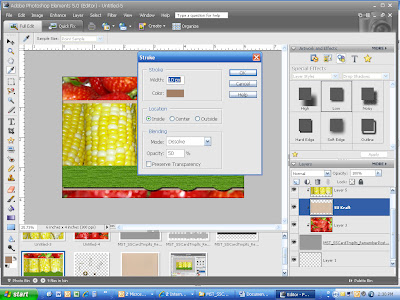
  • After I add it I merge the layers so that I could play with the edges. CTRL click on the template and paper layers, and then right click to merge layers.


  • Now the layers are glued together, and I can go to EDIT>STROKE(outline) and add a darker brown edge, dissolved, at 50% opacity.


All that’s left is to add text (font is ColdCoffee) and the grommets.
I print 4x6 images, flip the paper and print the postcard template on the back. I cut them out, add a stamp, and I’m ready to invite lots of people to our summer cookout!

If you enjoy our tutorials, please leave a comment! We work hard to bring you free tutorials! Thanks.


Monday, July 30, 2007

Tutorials Return to Show You How to Combine Digital Design with Visa Print

Hybrid Papercraft Tutorial

by Julie Kelley, Creative Team Member


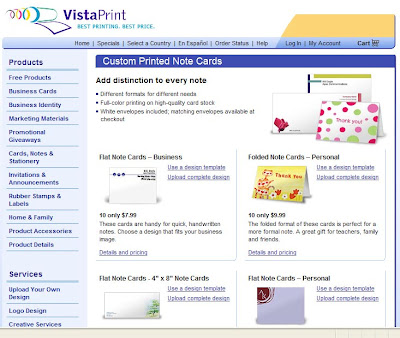
Having invitations and matching thank-you notes printed with your favorite digital designs is easy!! You can print them yourself at home, or have them printed professionally. There are many companies will print them for you at a reasonable cost. www.vistaprint.com is the example I will use, you can choose from pre-designed cards or create and upload your own design... and they have downloadable templates so that you will have no doubt that your design will print correctly.

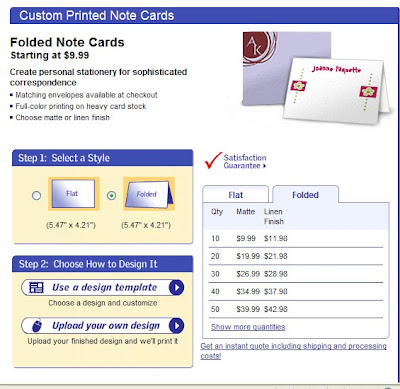
First go to the website (I used www.vistaprint.com), check out their options and choose your size and style, then download the provided template for your chosen design.

THey have many different options, I wanted a horizontal folded notecard using my own design


click on the design that you like, and it will being you to the page where you can see what your options are


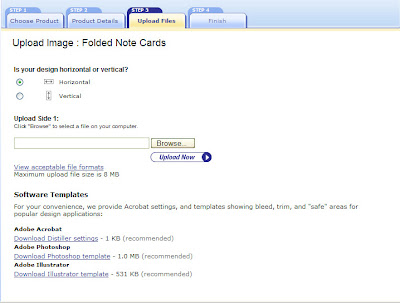
If you want to use your own design, download the correct template for the program you are using


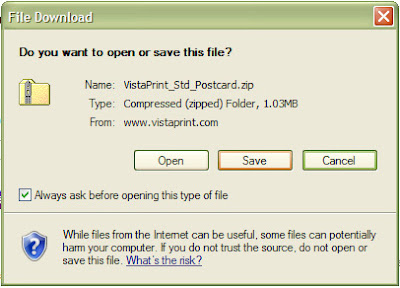
Save that template to your computer


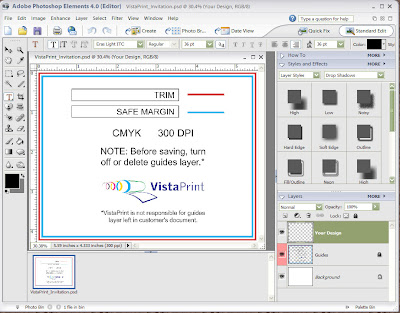
open the template and the template instructions, be sure to pay attention to the trim and margin lines. When you are designing, make sure that there isn't anything outside the lines that you wouldn't want to have cut off. I kept the template lines hidden, and after adding elements, I would unhide them to check and make sure that everything would fit.

Here's the blank template


Here's what it looked like while I was designing it

Here's what it looks like with the template layer showing... This way I know that there aren't any words or important elements that could possibly get cut off. You can toggle the template layer on and off using the layers pallette


Design your invitation pages and save them in the prefered format. VistaPrint will take most formats with an 8M filesize limit. Flattening and saving as a jpg will usually keep your file small enough to upload.

Front:


Inside:


For my invitations and matching thank you notes, I wanted a folded notecard, and also chose to use a coordinating panel for the inside of the card. There are so many styles and price ranges to choose from... single pages that are front and back, folded notecards (like this example), you can also choose from matte, glossy or for an extra fee, a linen texture.

Follow the simple prompts on the webpage to upload your design, and wait for them to arrive at your door!

Here is an example of the completed coordinating thank you cards. I kept the design the same, but left space on the inside for a hand-written message. The folded notecards come pre-scored, so folding them is a piece of cake!


credits:
digital papers and elements by Sarah Meyer SarahB Designs "Gummy Grins: Girly" kit
Fonts: Scriptina and Eras Light
Program: Adobe Photoshop Elements 4