Digital Scrapbooking Tutorial for Alphabets
by Susan Rodriguez, Creative Team Member
Instructions:
Create an image 8 x 4 resolution 300.
Create an image 8 x 4 resolution 300.
Type in your text and rasterize the layer. Right click on the layer palette and click on Rasterize Layer
You will need to select the text only, while holding down the CTRL button click on the layers thumbnail.
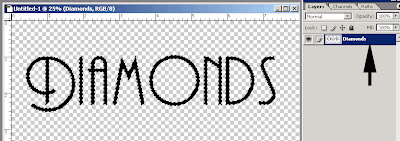
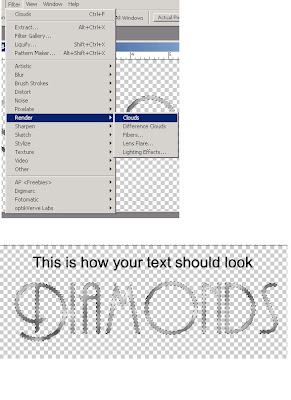
Once the text is selected, click on Filter - Render- Clouds.


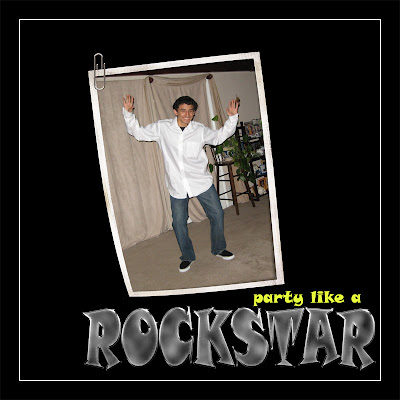
Credits: frame is from Sponsor Jen Wilson Designs.
You will need to select the text only, while holding down the CTRL button click on the layers thumbnail.

Once the text is selected, click on Filter - Render- Clouds.

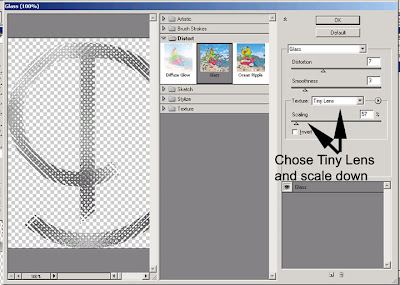
Next click on Filter - Distort - Glass. Chose the TIny Lens texture and scale down on the scaling. See image below.

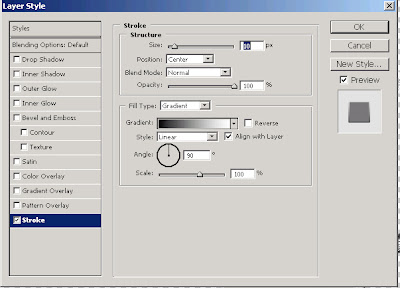
Click on the layer thumbnail and click on blending options. In the blending options click on Stroke.
Position = Center
Fill Type - Click on Gradient
Size 10 px
See below for example.
Position = Center
Fill Type - Click on Gradient
Size 10 px
See below for example.

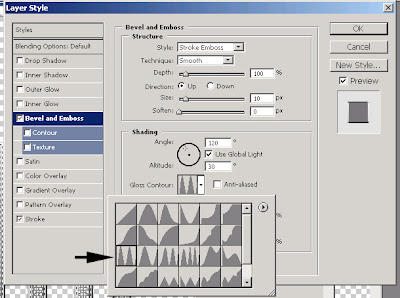
Click on the Bevel and Emboss option.
Style = Stroke Emboss
Size - 10 px
Gloss Contour = Peaks Or anyone that will give you a metalic sort of look.
Style = Stroke Emboss
Size - 10 px
Gloss Contour = Peaks Or anyone that will give you a metalic sort of look.

Click Ctrl_D to deselect your text.
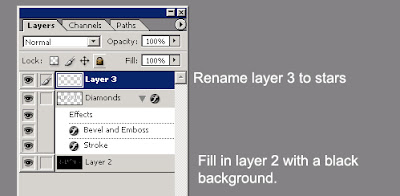
Create 2 new layers, one will go above your text and one will go below your text.
Create 2 new layers, one will go above your text and one will go below your text.

Once complete click on your text layer again. Go to Image - Adjustment - Hue/Saturation.
Play around with your settings until you get a really cool metalic sort of look. These are my settings.
Hue = +50
Saturation = +100
Lightness = -32
For the bottom layer fill it in with black, this will enable you to see your bling stars a bit more.
Click on the top most layer and lets start playing with those stars.
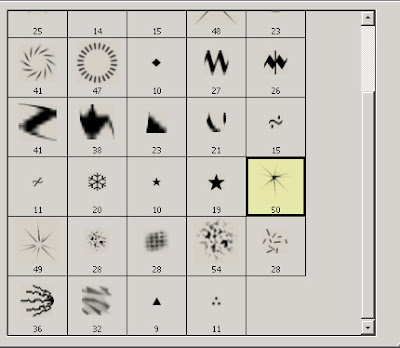
Click on your brush tool and select your assorted brushes. Select Starburst - Small brush. See example below.

Make sure your forground color is select to white and start playing around.

Credits: frame is from Sponsor Jen Wilson Designs.

Did you learn something today from us? Please let us know and leave a comment! thanks!!!
I can't wait to try this. Thanks.
ReplyDeleteD
Very cool Bucket! From your non-digi friend who appreciates your braininess.
ReplyDeleteAnyway to do this with PSE 4? I played around with it for a long time trying to find similar things under different headings to no avail. Achieved interesting effects but not the one here LOL. Would love to be able to do this though.
ReplyDelete