Flower gift box tutorial by Di Hickman
I love giving little gifts and using printable templates make it so easy! This flower box template has a finished size approximately 3” wide, 3” high by 2” deep, plus the flower element on top. You can download my template from the Prima Hybrid store.
Materials needed
I love giving little gifts and using printable templates make it so easy! This flower box template has a finished size approximately 3” wide, 3” high by 2” deep, plus the flower element on top. You can download my template from the Prima Hybrid store.
Materials needed
- Gift box Template
- Digital papers
- Scissors
- Embossing tool (or other scoring tool)
- Hole punch
- Ribbon
- Flowers
- adhesives
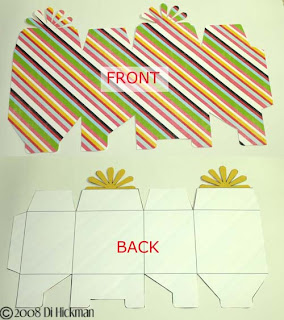
1. Open the digital paper you wish to use for the front of the box, and print onto cardstock (or photo paper, your choice).
If you wish the topside flower to be a different color other than white then follow steps 2 & 3, otherwise simple open the template and print running the paper through your printer again, printing on the reverse side.
2. Open the Hybrid Helper template in your graphics program, open the paper you wish to use for the flower and drag onto the template. Ensuring that the paper is directly above the base layer template, apply a clipping mask (ctrl, G) for the paper to take the shape of the template.
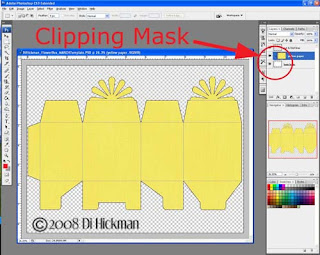
3. With the patterned paper selected, using the Marquee tool click and drag a rectangle the width and height of the template EXCLUDING the flower, and press delete. This should leave just the flower as a colored element. Print onto the reverse side of the paper printed earlier.

4. Cut along the black lines being careful around the flower as the design is intricate. Smaller detail scissors help on this part.
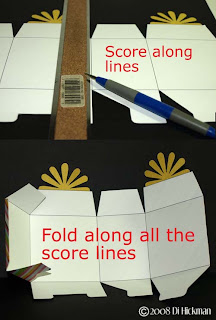
5. Using a ruler and embossing tool, score along all the grey lines. Then fold all the score lines.
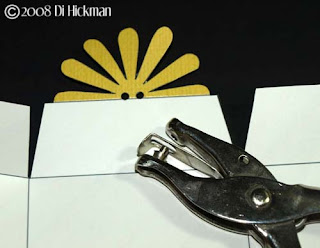
6. Decide at this step how you’ll be closing the box. You could simply staple the box shut, just use adhesive, or as I did use a ribbon tie. Using a small hole punch, punch two holes in each flower center. (When the box is assembled you’ll simply fold the flower halves together and thread ribbon through like you would a button. Tie loosely into a bow.)
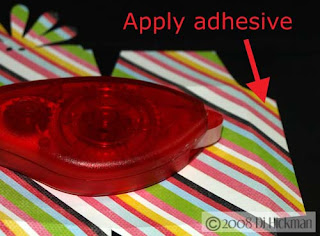
7. Let’s assemble the box. Apply strong adhesive to the side flap, adhere flap to the INSIDE of the box.
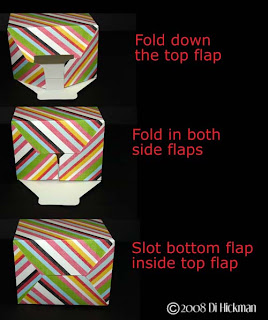
8. Assemble the bottom of the box as shown in the image below. The bottom closes like a take-out box
9. Using ribbon, thread through holes and tie in bow (as described in step 6). Fold down flower, adding more flowers for depth. Finish with some bling!
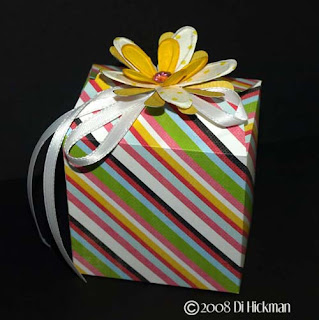 Supplies: Gina Miller “the sweet life” patterned papers @ Prima Hybrid; Prima Flowers (Sprites2); Bling: Prima Center Kisses; Ribbon: Offray;
Remember you don't have to use digital papers, you can use these printables with traditional scrapbook papers, just run the paper through your printer, printing the template pattern on the reverse side.
Tutorial & Project by Di Hickman
Mention this ad and get free May Arts Ribbon with your first order at The Shaker Box!