How to Use Shapes and the Stamp Tool
to Create Floral Paper
Digital Scrapbooking Tutorial

by Sarah B. Meyer, Creative Team Member
to Create Floral Paper
Digital Scrapbooking Tutorial
by Sarah B. Meyer, Creative Team Member
I use Photoshop CS3, but this same technique can be used in any program. If your software doesn't offer all the brush variations, try using the brush as a stamp and repeating the image randomly over your paper, using several different sizes.
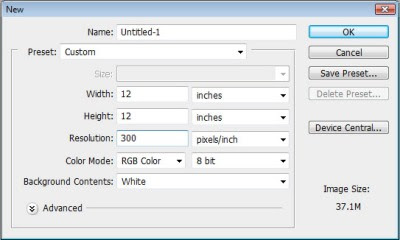
1. Open a new document, 12x12 inches and 300dpi.
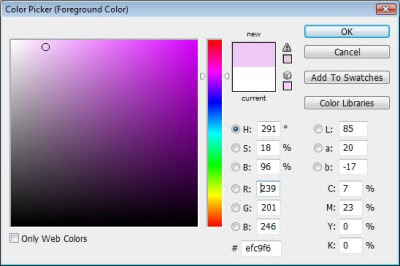
2. Choose a background color with the Color Picker (click on the foreground color in the palette). Use the paint bucket tool (shortcut G) to flood fill the background with your new color.
3. Add a new blank layer to the top of your document (Ctrl + Shift + N).
4. Switch to the Brush tool (B) and choose a brush that looks like a flower. For this example I chose one from the Special Effects Group. Now open the Brush Window (F5).
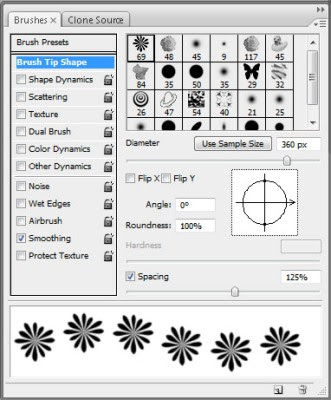
5. By changing the brush presets you can get a completely original paper! To start, UNcheck all the options so we can have a fresh start. (It's ok to leave Smoothing checked.) On the main screen of the Brush Preset Window, change the Diameter to 360 px and the spacing to 125%.
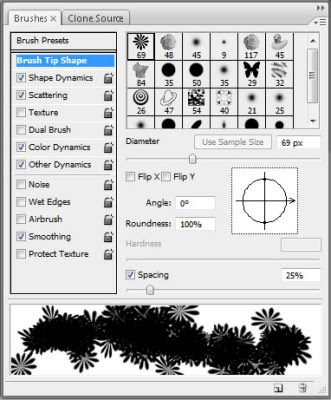
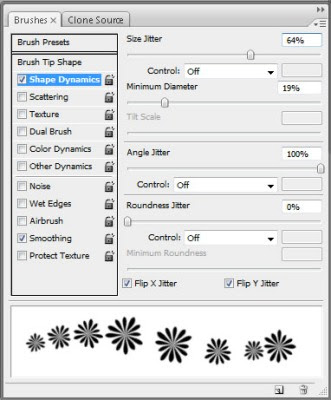
6. Now, let's play with the Shape Dynamics. Check the box and you should be taken to a different screen in the Brush Window. I set the Size Jitter to 64%, the Minimum Diameter to 19%, the Angle Jitter to 100% and the Roundness Jitter to 0%. All Controls are set to Off and I've checked Flip X Jitter and Flip Y Jitter.
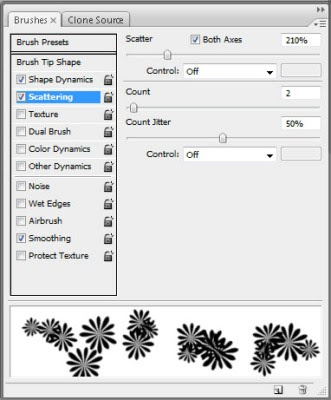
7. Click the Scattering box and you'll see more brush options. I set the Scatter to 210% with the check box for Both Axes selected. I set the count to 2 and the Count Jitter to 50%. Both Controls are set to Off.
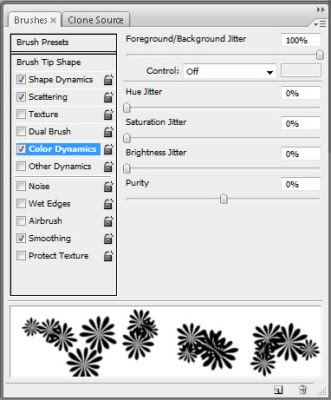
8. For some extra interest, let's set the Color Dynamics. I set the Foreground/Background Jitter to 100%, the Control Off, and the Hue, Saturation, Brightness and Purity to 0%.
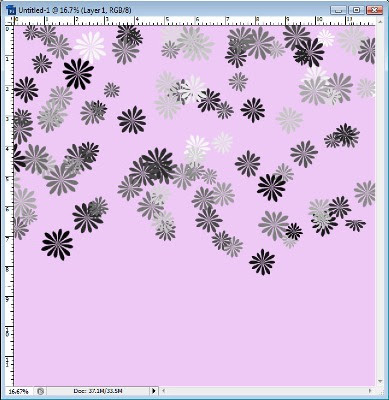
9. Reset your color palette to Black and White by pressing D. With your blank layer selected, just begin dragging your brush across the paper---don't worry about straight lines, just get a pattern that is pleasing to you.
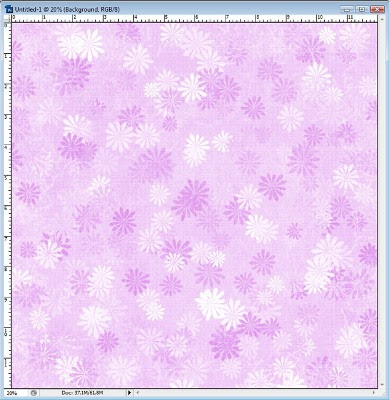
10. Once you have filled your paper with flowers, change the blending option in the layer palette. I chose Overlay, but you may like another option better. Add another layer with a little grungy/wear brushing and/or an overall texture if desired, and you've created your own custom paper!
thank you for this great tutorial. I am sure I will be using this technique often!
ReplyDeleteThanx for the tut! it helped me starting to create my own digi papers!
ReplyDeleteThanks sooo much for this fantastic tutorial. It has really helped me!
ReplyDeletePattyAnne
Great tutorial. Thanks for writing it. =)
ReplyDeleteExcellent tutorial. I am recently taking an Adobe Photoshop class for the purpose of creating digital scrapbooks. Your tutorials allow me to use the tool, I've learned, and apply them to scrapbooking. Thanks so much. :)
ReplyDelete