Barbeque Invitation
In PhotoShop Elements 5
by Beth Price, Creative Team Member

In PhotoShop Elements 5
by Beth Price, Creative Team Member
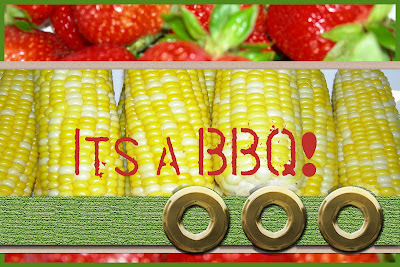
1. Choosing the layer photos
I started this invitation with a template from scrapgirls.com called ScrapSimple Card Templates: Remember Postcard.
- This is a neat template because you can format your invitation to be a postcard.
- It comes with the address template for the back of your card.
- I’ll print this postcard on glossy card stock because if I use regular photo paper the back will have manufacturer information, and I want to print out the postcard address template.
Since I’m working on the computer, I decided to make my whole invitation digital. This will help my postcard look, since the card won’t be in an envelope when I mail them. I could print the components out individually and assemble them if I want a hand-made look, either way will work.
For my barbeque invitation, I had some fun photos of food from our last 4th of July celebration and thought I’d use those instead of digital paper. So I opened the photos and selected a small section of the photo that will enlarge well, without any open spaces along the border.
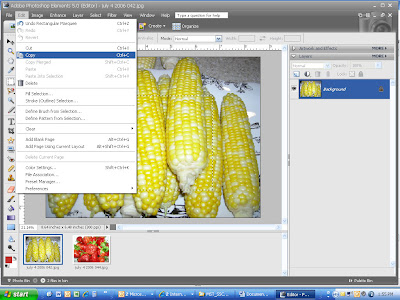
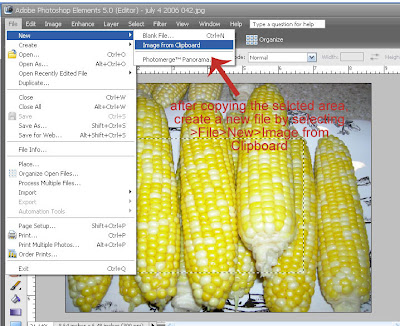
2. Using the Post Card Template
- I create a new blank file, size 4x6, transparent background.
- Next I opened the card template, including all the layers and then drag them in order onto the new file.
- Follow the instructions that come with the templates if you need further direction.
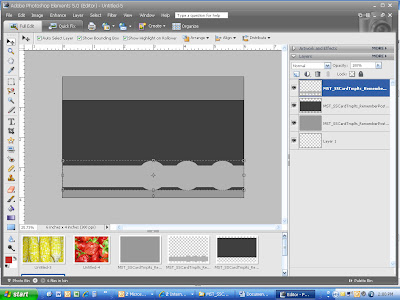
- I dragged the corn and berry photos over the top of the layers I wanted to use and expanded the photos until the photo completely filled the template.
- Then on each photo, making sure the photo is selected in the photo palette, I hit CTRL G to merge with the previous layer, which causes the photo to conform to the template layer.
- I can still move the photo around and play with the placement after it’s been merged.
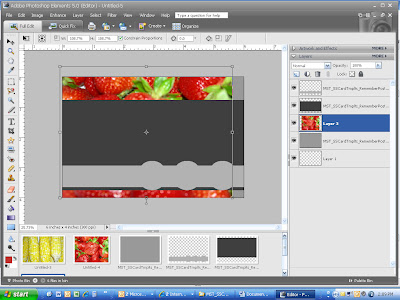
- I decide I will fill and texturize the bar across the card.
- I select a green based on the color of the strawberry leaves. To do this, I click on the foreground color box, then use the eye dropper to choose a green in the strawberry picture.
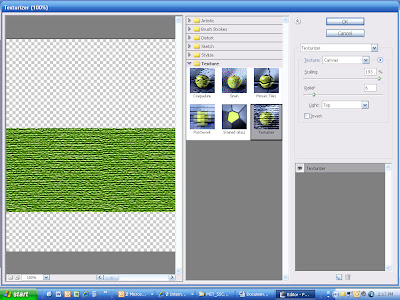
- Then use the fill bucket to color in the bar. Next I select FILTER>TEXTURE>TEXTURIZER

- I play with the options, decide on canvas and play with the sliding scales until I find the amount of texture I like.
- I can add a drop shadow right now too.
3. Details and Finishing
- At this point, I see I need more separation between the corn and berry photos. So I decide to add a mat layer under the corn.
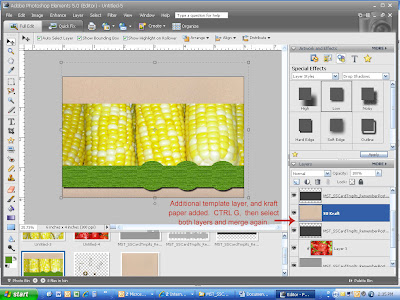
- I drag the second template layer onto my card again, then place a kraft paper over that template and CTRL G to merge them.
- I’ll need to decrease the size of the corn layer, I do this by dragging the top and bottom sides in a bit.
- For the mat layer, I used a kraft paper I had in my digital stash.
- After I add it I merge the layers so that I could play with the edges. CTRL click on the template and paper layers, and then right click to merge layers.
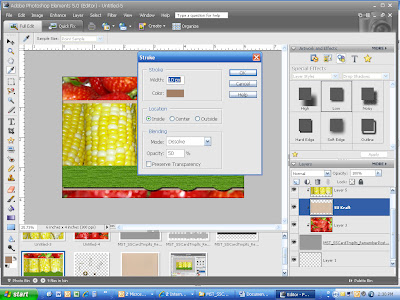
- Now the layers are glued together, and I can go to EDIT>STROKE(outline) and add a darker brown edge, dissolved, at 50% opacity.
All that’s left is to add text (font is ColdCoffee) and the grommets.
I print 4x6 images, flip the paper and print the postcard template on the back. I cut them out, add a stamp, and I’m ready to invite lots of people to our summer cookout!
If you enjoy our tutorials, please leave a comment! We work hard to bring you free tutorials! Thanks.
No comments:
Post a Comment